
About Seqrite mSuite
Seqrite mSuite is the security solution to manage and monitor all the Android and iOS devices of an organization.
Seqrite with the help of mSuite solution provides:
- Management of devices and users.
- Ensures compliance with policies.
- Excellent administration with mSuite portal management.
- Device monitoring with configurations.
- Reports for infection status, network data usage, and app non-compliance.
- Remote device control to troubleshoot any issue.
Supported Devices and Platforms
mSuite Clientand Launcher: Compatible with Android OS version 5.1and later version, iOS 10 and later
Browser Requirements: Administrator Web panel, Google Chrome (latest versions), Firefox (latest versions), EDGE (latest versions).
Note: Some devices may not fun with Seqrite mSuite due to device, manufacturer specific application or security feat.
Before Device Enrollment
Before you enroll the devices, ensure the following points.
- Check availability of Internet connection.
- Add user to mSuite portal.
- Add device to mSuite portal.
- Download mSuite client on device.
Enrolling Android Device Using Email/SMS
The device enrollment process gets easier with some prior preparations, such as adding user and device to the mSuite portal and downloading mSuite client on user’s device.
The user with the Admin privilege can add the users and devices to the Seqrite mSuite portal.
Admin Action
TO add a new user and device to the mSuite portal, follow these steps.
- Log on to the mSuite portal and click Manage > Users > Add.
- Enter the First Name, Last Name, Email, Phone No., Mobile No, and select a Department. The Admin can also upload a photo of the device user.
- Click Save. The user is added successfully.
You can add the device in either ways:
- Click the Enrolled Device tab and then click Enroll new device. Add the device name, enter phone number, select Send Enrollment Request check box and click Create.
Device is added to the mSuite portal.
OR
- In mSuite portal, click Manage > Devices > Add. Enter Device Name, assign ownership to the newly added user. For this example, select Enrollment via Email/SMS. Select the Group and click Save.

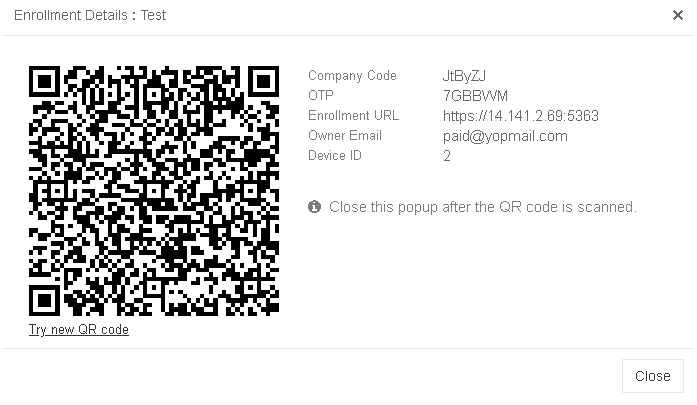
The enrollment details are displayed on the portal and the details are sent to the device user via Email and SMS.
- The device User receives SMS and email with the Enrollment information along with QR Code, OTP, and company code.
Enrollment through SMS is applicable to the users based in India.
SMS and Email Sample

Device User Action
- The device user must open the enrollment link in the mobile browser. The system checks the operating system if Android or iOS. Tap Yes continue.
- Tap Download to install the mSuite client on the device from: https://www.seqrite.com/app-store
- mSuite requests permissions to manage calls and SMS. Tap Allow and grant permissions to access all the features.
- Read terms and conditions and tap I Agree.
-
In all the further screens, tap Allow and grant permissions to access contacts, calendar, photos, media, files, record audio-video, device location, and take pictures.

- On the Device Administrator screen, tap Activate.
- Tap and enable the Allow modify system settings option if it is not enabled. Tap back.
- Tap and enable the Display over other apps permission. Tap back.
- Tap and enable the Can Modify System Settings permission. Tap back.
- Tap on Seqrite mSuite in App with usage access. Tap and enable Permit Usage Access permission. Tap back.
- Tap on Allow to let mSuite App always run in Background permission.
- Tap and enable the Do Not Distrub access permission for Seqrite mSuite. Tap back. Once all these permissions are granted, Enrollment Details screen appears.
- In Enrollment Details screen, enter the Company Code and OTP received in the SMS or email.
- If you have QR Code in enrollment email, then tap the Scan QR Code arrow.
-
Open the email received from mSuite Admin, which has the QR Code in it. Bring the device camera in front of the computer and scan the QR code.

The enrollment process will initiate and the device gets enrolled successfully.
Other Device Enrollment Methods
The device can also be enrolled with the following options:
- Enrollment via ADO Enablement (Android Device Ownership)
- Enrollment via QR Code
Enrollment Using ADO (Android Device Ownership) Enablement
When you do the enrollment with ADO Enablement, you provide Seqrite mSuite client the device ownership. This ownership gives complete control of your device.
This enrollment is supported on the devices with OS Android 7 and later versions.
To start with the enrollment, ensure that the device is factory reset state.
Enrollment using ADO enablement completes in the following steps.
Admin Action
- The Admin must log on to Seqrite mSuite portal.
- In the mSuite portal, click Manage > Devices > click Edit icon of the device which is to be enrolled.
-
On Device Details page, in select an Action field, select Enrollment with ADO Enablement and click Submit.

The ADO Enablement QR Code and Device Enrollment QR Code is displayed on the mSuite portal.
After sending the enrollment request, the user will receive an email with two QR codes.
The first QR Code will help to ADO enable (provision) the mobile device, and the user can use the second QR Code to enroll the device.
User action
- Use new device or factory reset your device.
If the device is in use, the user must first Factory Reset the device to enroll via ADO enrollment.
- Factory reset: To factory reset your device, tap Settings > System > Factory Reset. Please note that the terminology in your device may differ.
Provisioning
If using the new device, you can directly provision (provide device ownership to Seqrite mSuite) your device using QR Code.
-
After factory reset or in the new device, on the Welcome screen, tap 6 times on Welcome.

-
Connect to the Internet and download QR code reader. In QR Code setup screen, tap Next.

- Select Internet connection option.
-
Accept the Google terms and conditions and let the QR reader installation begin.

-
Open the email received from the Admin. Bring your device in front of the computer and scan the first QR Code (ADO Enablement QR Code.)

- In the next screen, tap OK and then tap Next. The ADO enablement process using QR code is completed.
- Enroll the device by scanning the second QR Code (Device Enrollment QR Code).
- On the device, in the apps list, tap Seqrite mSuite icon to open the app.
- The Enrollment Details screen is displayed. Tap the arrow to open the camera on the device.
- Bring the device in front of the computer and scan the Device Enrollment QR Code received in an email.
- The Device Administrator screen is displayed. Tap Activate.
Device is successfully enrolled. Virus database is updated.
Android Device Enrollment via QR Code
This method can be used when the device is with the Admin.
Admin Action
- Log on to the Seqrite mSuite portal.
- In the mSuite portal, click Manage > Devices > click Edit icon of the device which is to be enrolled.
-
On the Device Details page, in Select an Action field, select Enrollment via QR Code and click Submit.
QR code details are displayed on the mSuite portal.
After sending the enrollment request, user will receive an email with QR Code and enrollment details.
User Action
- On the device, the Enrollment Details screen is displayed. Tap the arrow and open the camera.
-
Bring the device in front of the computer screen to scan the QR code.
- After the QR code is detected, activate the Device Administrator by tapping Activate.
Device is successfully enrolled.
iOS Device Enrollment Using Email/SMS
In iOS devices, the Supervised mode gives enhanced control of the devices to the Admin.
With Supervised iOS device, the mSuite Admin gets complete control over the devices. The iOS device enrollment process gets easier by adding user and device to the mSuite portal and downloading mSuite client on user’s device.
Admin Action
To add a new user and device to the mSuite portal, follow these steps.
- Log on to the mSuite portal and click Manage > Users > Add.
- Enter the First Name, Last Name, Email, Phone No., Mobile No, and select a Department. The Admin can also upload a photo of the device user.
- Click Save. The user is added successfully.
You can add device in either ways:
- Click Enrolled Device tab and then click Enroll new device. Add the device name, enter phone number, select Send Enrollment Request check box and click Create. Device is added to the mSuite portal.
OR
- In mSuite portal, click Manage > Devices > Add. Enter Device Name, assign ownership to the newly added user. For this example, select Enrollment via Email/SMS. Select the Group and click Save.
The enrollment details are displayed on the portal and the details are sent to the device user via Email and SMS.
- The device user receives SMS and email with the enrollment information along with QR Code, OTP, and company code.
Enrollment via SMS is applicable only to the users settled in India.
Device User Actions for Enrollment
- The device user must open the Seqrite App store link from email/SMS in the mobile browser, redirected to mSuite app store link.
- Click on Download, a prompt to Install mSuite app, mSuite will get installed on the device.
- When the app is launched, a prompt “Untrusted Enterprise Application” appear, tap on cancel button.
- User needs to go to Setting > General > Profile & Device Management > Open “Quick Heal Tech…” App distribution.
- Tap on Trust “Quick Heal Technologies Private Limited”, and tap the Trust button on Popup window
- Go and launch Seqrite mSuite App, the user will be asked for permissions. The user must grant the permissions.
- Tap Enroll Device, In the enrolment details screen, enter the Company Code/OTP, OR Scan the QR code received in Email.
- Post QR code scan, a popup of Configuration Profile appears, tap on Allow button.
- A pop-up window “Profile Downloaded” shows that Seqrite profile downloaded successfully.
- To start with Profile installation, user needs to go to Setting > General > Profile & Device Management, open “Seqrite mSuite Enrollment Profile” and Tap on Install button and follow the given instruction to install the profile.
- To trust the Profile’s source, tap Trust, the mSuite Profile gets verified and device gets enrolled with mSuite.
- Steps to Download and Install the mSuite from Seqrite App Store.

Tap on the link.

Tap Download.

Tap Install.

Authorize the device.

Tap Cancel.

Go to Profiles & Device Management

Approve Quick Heal.

Allow access rights.

Tap Trust.

Tap Enroll Device.

Type the Company Code, OTP, and Mobile Nmuber and tap Enroll.

Tap Allow.

Tap Close.

Verify.

Tap Trust.

Tap Done.

Tap Done.

Tap Done.
- Steps to Enrol mSuite App with Seqrite Console and installing the profile.
Now, the mSuite Administrator can remotely manage the iPhone.
Informative Resources
- Seqrite mSuite Administrator’s Guide
- Seqrite mSuite FAQs
- Seqrite Support