Whitelisting rules for alerts
Alerts are generated based on default rules specified in the Seqrite XDR engine and displayed on the dashboard. You may come across some alerts that are triggered by valid activity in your network. A whitelisted rule allows you to specify a combination of parameters to whitelist the generated alerts. Any alert that matches the whitelisted rule becomes visible under the “Whitelisted alerts view” tab. You can add the corresponding alert conditions to the Whitelist rules so that future alerts and same old alerts based on the file execution or activity under that rule are no longer displayed on the Regular Alerts dashboard view. These alerts are then listed under the Whitelisted Alerts.
Adding an alert rule to Whitelisted rules
-
- On the dashboard, in the right panel, click the alert for which you want to Whitelist the corresponding rule.
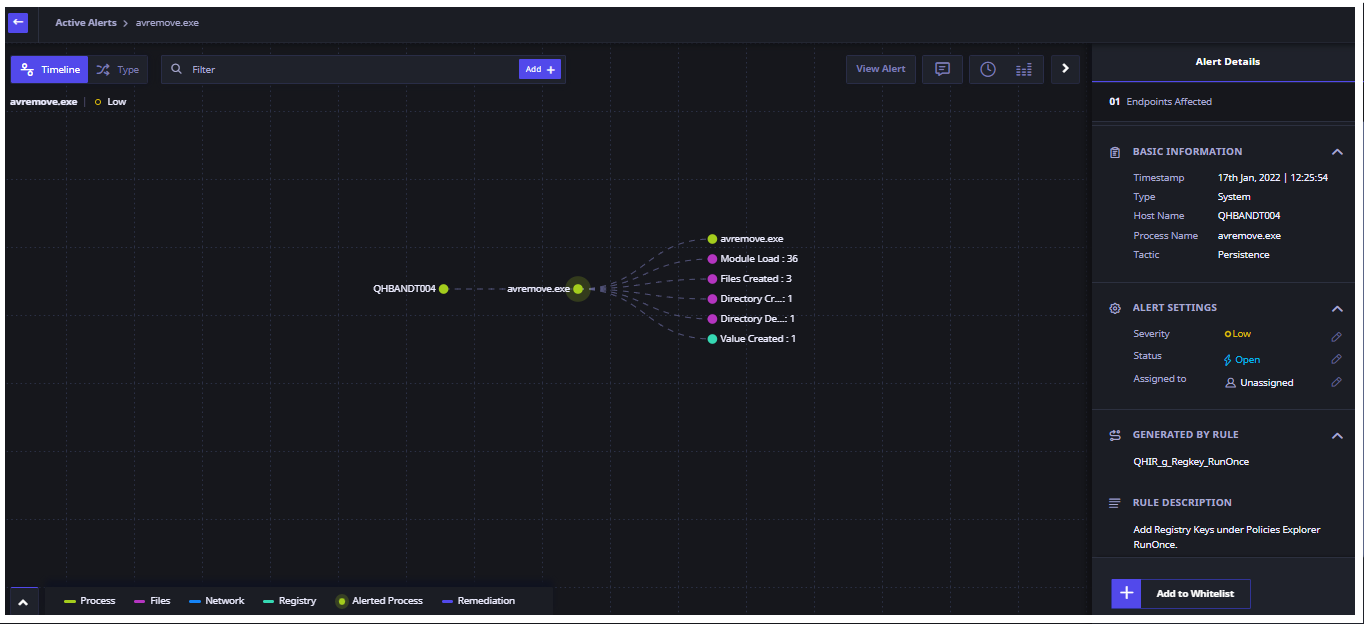
- The Alert Analysis view opens. The right pane displays the details for the selected process or any other processes.

- Click Add to Whitelist.
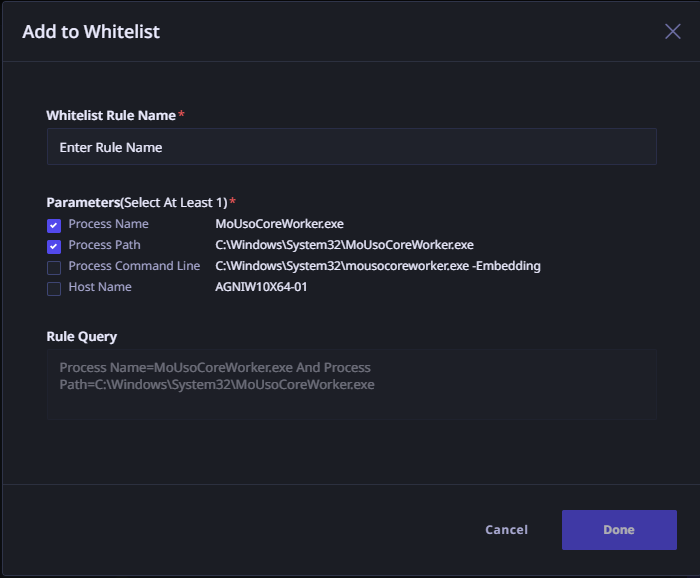
- In the Add to Whitelist dialog, enter a name for the Whitelisted rule.

- Select the parameters as required from the displayed parameters. The parameters will appear depending upon the process.
- The Rule Query preview pane shows the corresponding rule query that would be Whitelisted.
- Click Done to save the rule to the Whitelisted Rules.
You can view the rule under Whitelist Rules tab on the Rules page. Alerts generated for this rule would be available under the Whitelisted Alerts only. You can sort the Whitelisted Rules by Timestamp.

You can delete the Whitelist Rule with the help of the Delete icon.
Note: ☛
Automatic alert correlation to the incident is not applicable for White-listed Alerts.

