
This section includes platform qualification, installer prerequisites, pre‑checks, installation steps, and troubleshooting instructions.
Supported Operating Systems
Seqrite Endpoint Protection supports the following platforms:
- Windows 11 Enterprise
- Windows Server 2019
- Windows Server 2022
Note
Support for Windows 11 Pro and Windows Server 2025 may be included in a future release.
2. Installer OS Qualification Logic
The Seqrite installer validates the target operating system before installation. Supported versions include:
- Windows 11 Enterprise / Pro and above
- Windows Server 2019 and above
If the system does not meet the minimum OS requirement, the installer must prevent installation and display a clear message.
3. Installer Framework and Technology Requirements
The Seqrite EPP installer is implemented using Java and install4j.
The installer package must include the following third‑party components and internal dependencies:
- Java 21
- MongoDB 8.0.12
- NATS Server 2.11.8
- WildFly 36
- Client packages
- Stand‑alone tools
- Bundled utilities required for service startup and configuration
All components must be version‑locked and validated for compatibility.
4. Pre‑Installation Checks
Before installation starts, the installer must perform the following mandatory pre‑checks:
4.1 Hardware Checks
· Disk Space:
Minimum 50 GB free disk space
(This includes space for antivirus definitions; final requirement may change based on performance testing.)
· RAM:
Minimum 4 GB Free space.
(Based on Microsoft recommendations for Windows 11; subject to change based on performance testing.)
· CPU:
Minimum 4 cores
4.2 System Feature Checks
- AXV (virtualization) check: Enabled
- Locale: Must be en (English)
- OS version:
Minimum version = Windows 11 / Windows Server 2019
If any check fails, the installer must block installation and provide remediation instructions.
If a screen with message ‘Missing System Requirements- Windows defender is currently active and may interfere with the installation process.’ popups while installing EPP, then use the below command on powershell to uninstall the Windows-Defender
Uninstall-WindowsFeature Windows-Defender
5. Installation Procedure
5.1 Launch the Setup Wizard
- Right-click the installer and select Run as administrator.
- The Welcome to Seqrite Endpoint Protection Wizard screen appears.
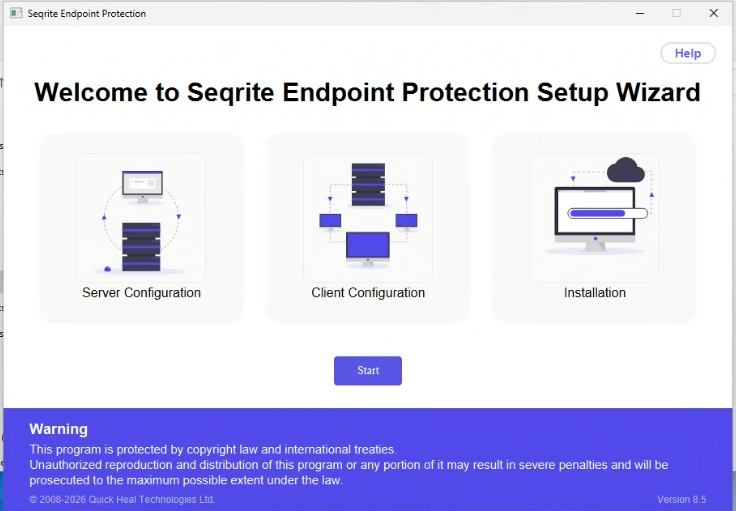
- Click the Start button
- The Seqrite Endpoint Protection Software License Agreement screen appears.
- Read the Software License Agreement and Privacy Policy.
- Click the Yes I agree button.
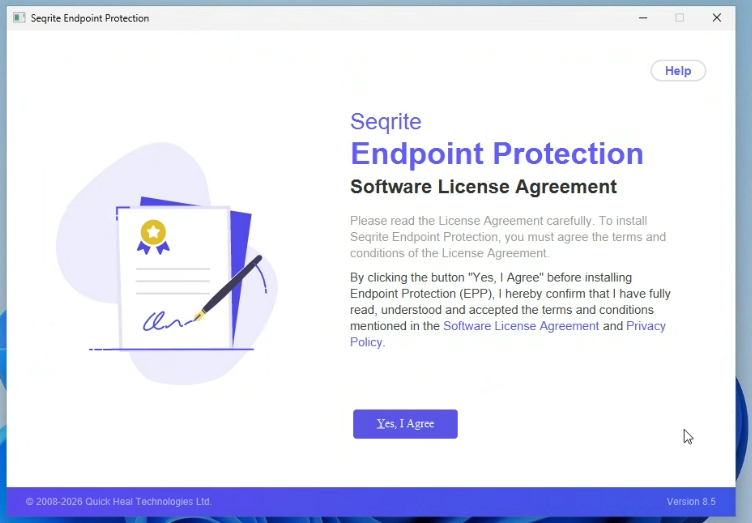
- Clicking ‘Yes, I Agree’ button opens the Installation folder screen.
- The default installation path is C:\Program Files, however, you can choose a different path by clicking the Browse button and then provide the desired path.
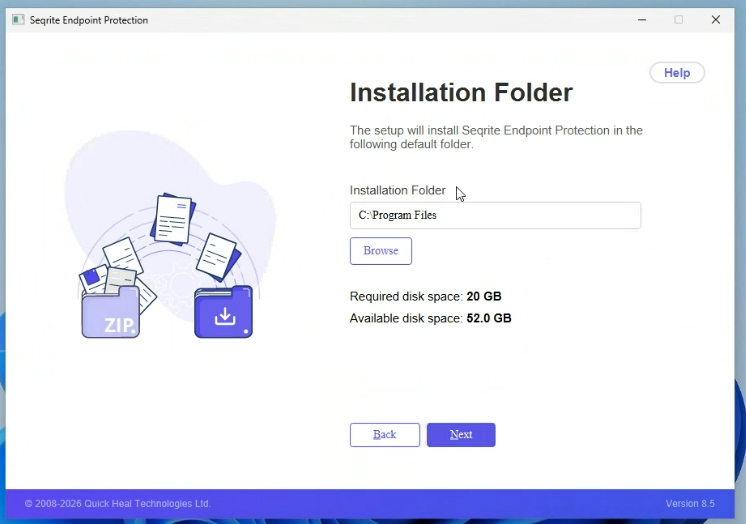
- click Next
- This opens the Server Configuration screen
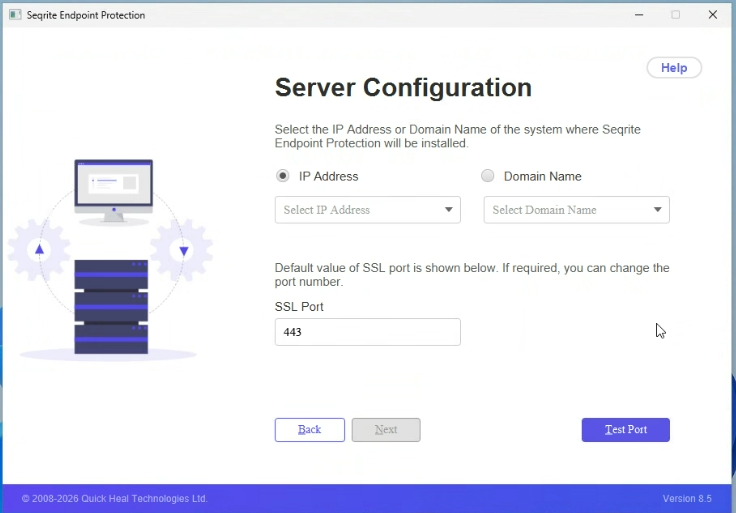
- Choose how the server should be identified:
- IP Address, or
- Domain Name
- If using IP address, select the appropriate value from the list.
- Confirm the SSL Port (default: 443).
- Select Test Port to validate connectivity.
- After validation succeeds, select Next

-
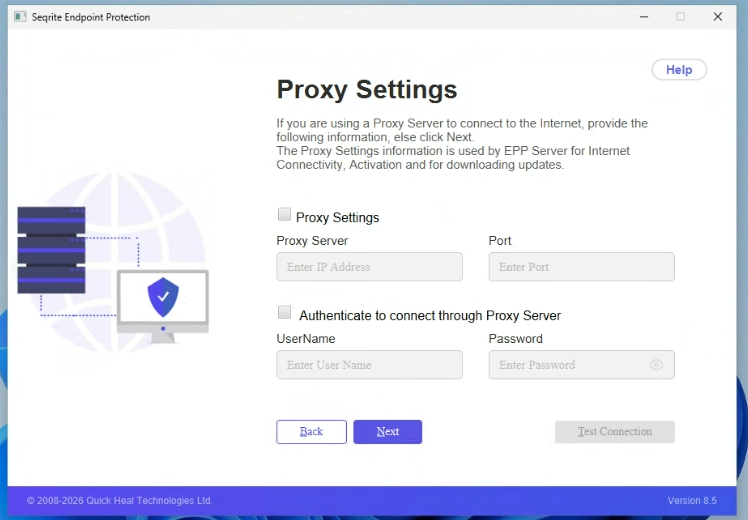
Clicking Next will open the Proxy Settings screen.
-
If your organization uses a proxy, select Proxy Settings.
-
Enter:
- Proxy server IP or hostname
- Port
-
If required, enable authentication and enter credentials.
-
Select Test Connection.
-
Select Next.
This completes your installation process.
6 . Post‑Installation Verification
After installation completes:
6.1 Verify Core Services
- Ensure Seqrite services are running.
- Verify Windows services required for updates (BITS, Windows Update) are active.
6.2 Validate Console Accessibility
- Access the console via your configured IP/FQDN and SSL port.
- Confirm dashboard loads successfully.
6.3 Test Endpoint Enrollment
-
Deploy a test client package.
-
Verify:
- Policy retrieval
- Event reporting
- Malware definition updates
Note:
– After server reinstallation, clients require three heartbeat intervals to stabilize.
– Policies must be re‑applied to ensure proper synchronization for all existing and newly connecting clients.
7. Troubleshooting
- Ensure installer is run with administrator privileges.
- Confirm the OS meets minimum qualification criteria.
- Verify disk, RAM, and CPU meet pre‑check requirements.
- Check network connectivity to the selected IP/FQDN.
- Ensure SSL port (default 443) is not blocked by a firewall.
- Re‑validate port using the Test Port button.
- If proxy is used, verify credentials and bypass SSL inspection if necessary.
- Confirm AXV/virtualization is enabled in BIOS/UEFI.
- Verify system locale = English.
- Check the Event Viewer for installer or service errors.
- Review installation logs in
%temp%/Seqrite/Logs. - Remove conflicting third‑party antivirus products.
- Ensure correct versions of MongoDB, Java 21, WildFly, and NATS are bundled.
- Confirm no group policies restrict installation paths or services.