
Microsoft 365 Connector and Response Connector Configuration Requirements and Setup
By following these steps, you can successfully configure the Microsoft 365 Message Downloader Connector, Microsoft 365 Response Connector, and Microsoft 365 PS Response Connector to manage and forward messages within your organization.
Microsoft 365 Message Downloader Connector Configuration
Prerequisites
- Sign in to the Microsoft Entra Admin Center:
- Navigate to Identity > Applications > App registrations and select New registration.
- App Registration:
- Enter a display name for your application.
- Select the supported account types as Accounts in this organizational directory only (
only – Single tenant). - Leave Redirect URI (optional) blank.
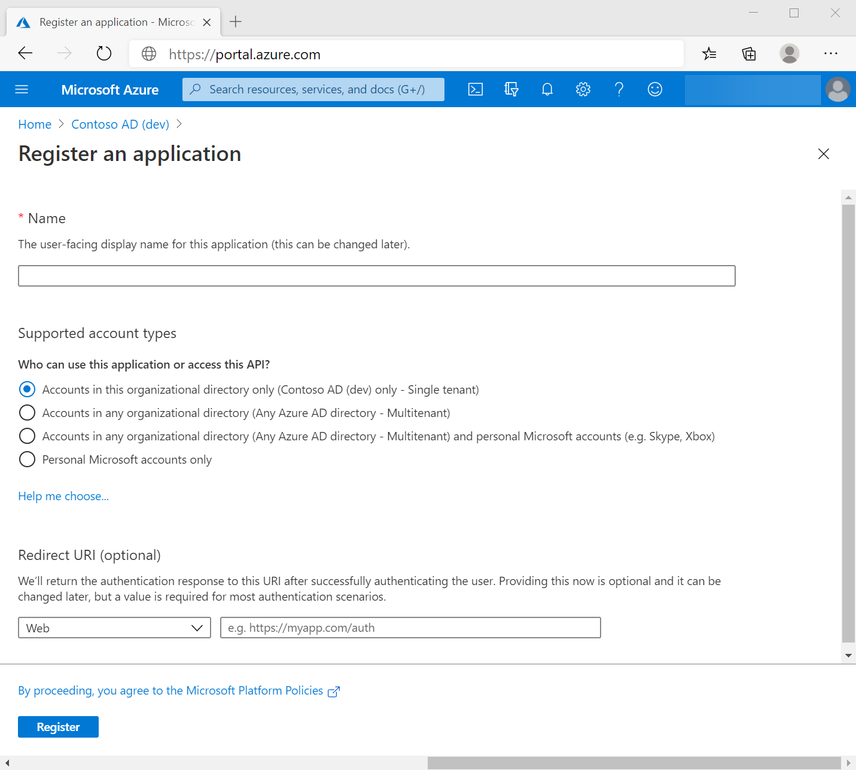
- Select Register to complete the initial app registration.
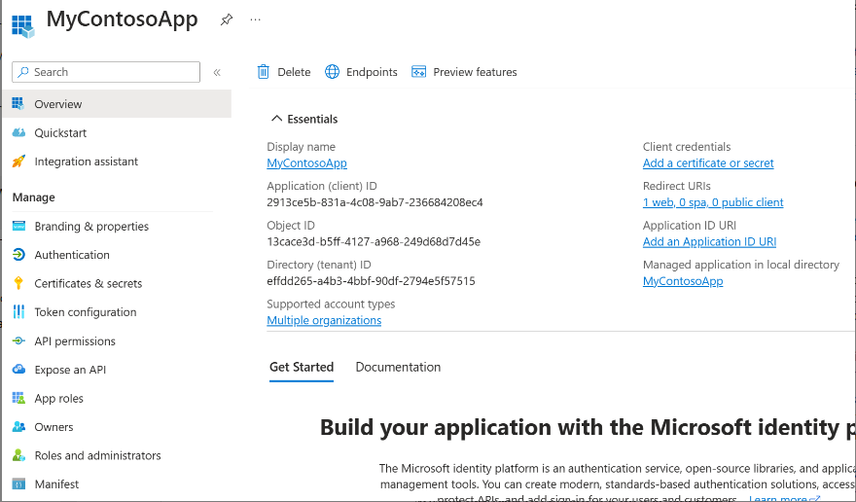
- Overview Pane:
- Note the Application (client) ID (also called the client ID).
- Add Client Secret:
- Go to Certificates & secrets > Client secrets > New client secret.
- Add a description and select an expiration for the secret.
- Select Add and record the secret’s value. This secret will not be displayed again.
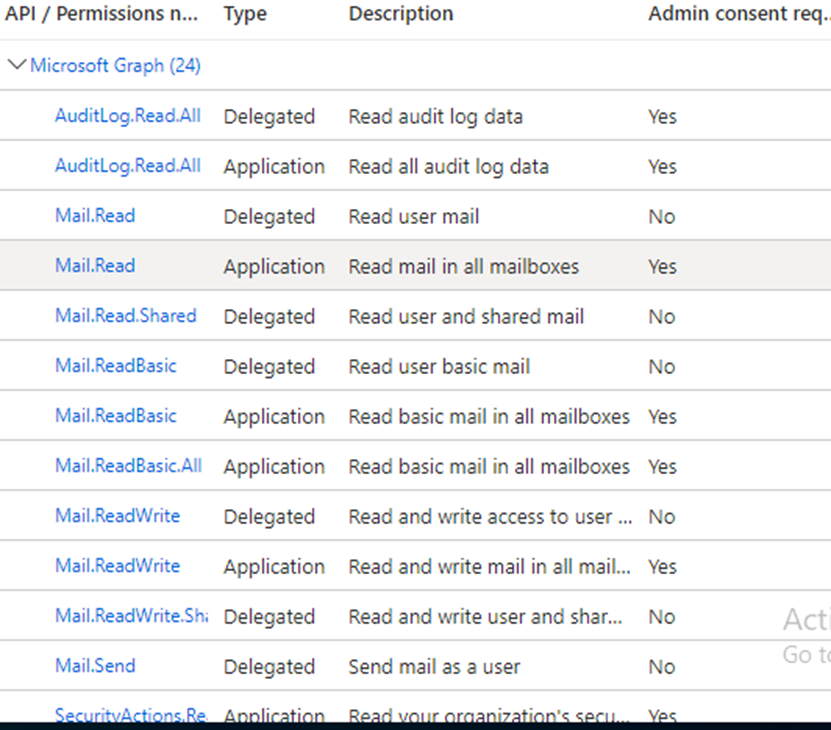
API Permissions:
- Go to API permissions > Add a permission > Microsoft APIs > Microsoft Graph > Delegated permissions
- Search and select the following permissions for User and Mail:
- User:
User.Read,User.Read.All,User.ReadWrite.All - Mail:
Mail.Read,Mail.Read.Shared,Mail.ReadBasic,Mail.ReadBasic.All,Mail.ReadWrite
- User:
- Search and select the following permissions for User and Mail:
- Repeat the process for Application permissions with the same set of permissions.
- Ensure Admin Consent Required is set to Yes. If not, click Grant Admin Consent.


Microsoft 365 Message Downloader Connector Configuration in XDR
- Navigate to the Connector page in the XDR portal and select Ingestion.
- Select Microsoft 365 Message Downloader and click Configure.
- Enter Configuration Details:
- Client Domain (e.g.,
domain.com) - Client ID
- Client Secret
- Client Email ID (The designated email example: abuse@quickheal.com)
- Client Domain (e.g.,
- Select Validate and Save.
Microsoft 365 Response Connector Configuration in XDR
- Navigate to the Connector page in the XDR portal and select Response.
- Select Microsoft 365 Response Connector and click Configure.
- Enter Configuration Details:
- Client Domain (e.g.,
domain.com) - Client ID
- Client Secret
- Client Email Id (The designated Email Ex. Abuse@quickheal.com)
- Client Domain (e.g.,
- Select Validate and Save.