Your organization may store the customer data in many application databases across your IT infrastructure. Data sources are the databases that store end-user data of the PII and PD types. After a Data Subject Request is raised, Seqrite Data Privacy allows an administrator to scan the data source instances for critical personal information so that it can be deleted as per the request from the end-user customers. Database can be of several types. In Seqrite Data Privacy, several types of data connectors are available to make a connection to these data sources or databases. After a data source is connected with a connector, the administrator can scan these database instances for PD and PII information.
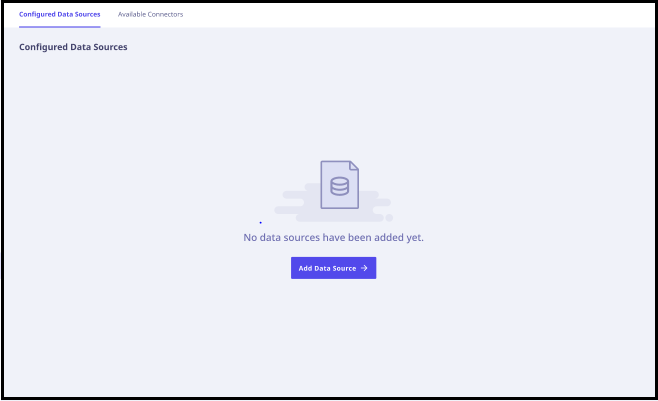
When you click Connectors in left navigation pane, Configured Data Sources tab is displayed by default. If there are no existing data sources, the page will look as follows.
When there are data sources already connected, the page will look as follows.
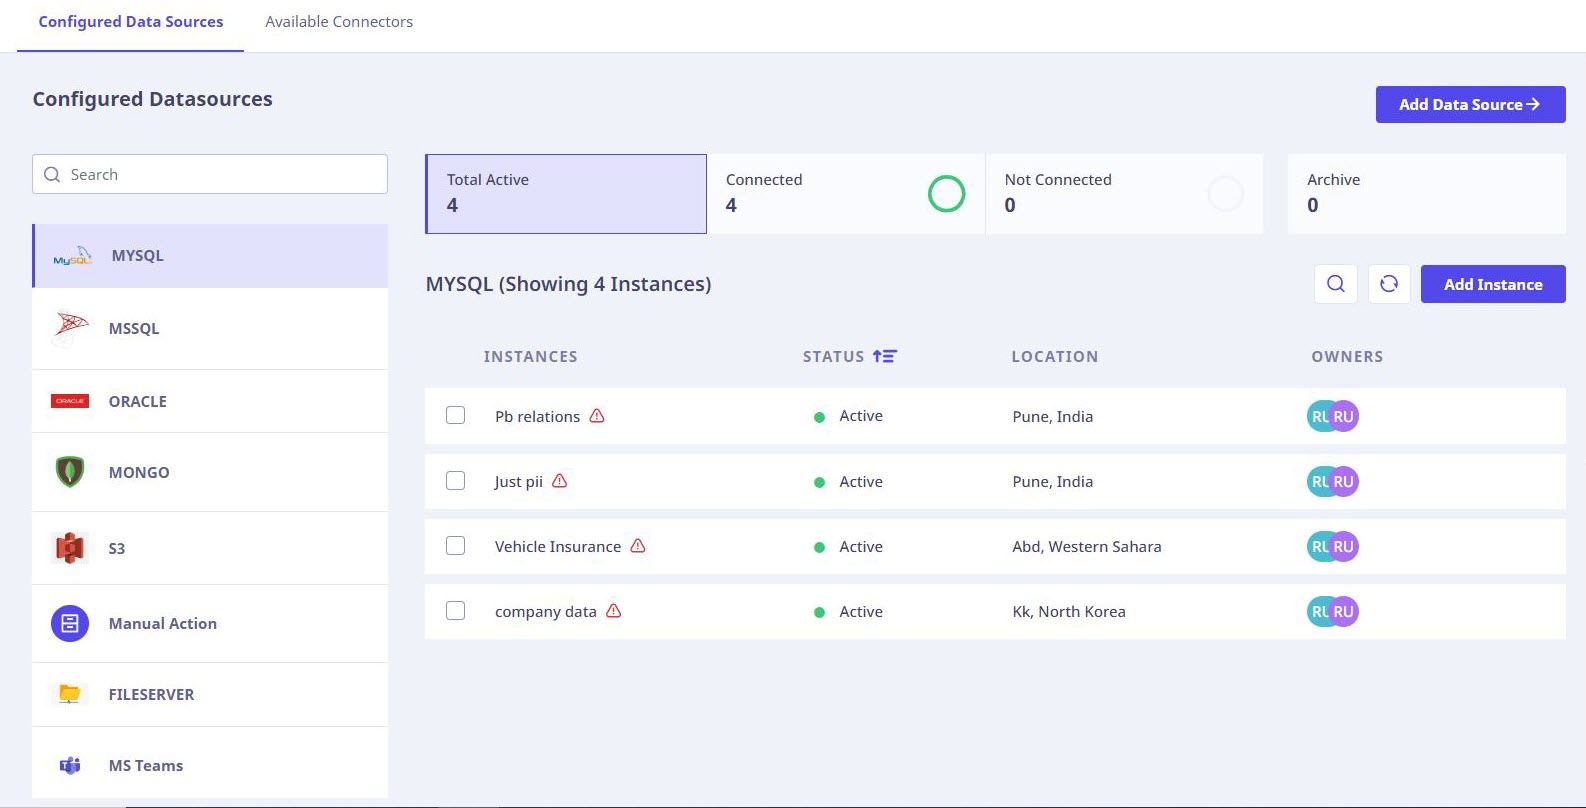
You can use the search box to search for data sources.
The following information related to the instances is also displayed:
- Total number of Active Data Sources.
- Count of Connected Data Sources.
- Count of Data Sources not connected.
- Count of archived instances.
A list of connectors is displayed in the left pane.
Following connectors are supported in Seqrite Data Privacy.
- MongoDB, MYSQL, Amazon S3, MSSQL, ORACLE, One Drive, Manual Action, MS Teams, Salesforce, File server (SMB), Microsoft Outlook, Vision Helpdesk, Gmail, Google Drive, SAP S4 HANA, Dropbox.
Note:
For MongoDB SSL and Non-SSL connections can be established with respective SSL certificates.
When you click a connector, all the instances for the selected connector type are displayed in a tabular format with the following details.
| Column name | Description |
|---|---|
| Instances | Shows the name of the instance. |
| Last Scan Status | Shows the status of last scan. |
| Location | Shows the physical location of the data instance. |
| Owners | Shows the business owner and technology owner of the instance. |
To view details for an individual instance, click the instance. The detailed information for that instance is displayed in the right pane as follows.
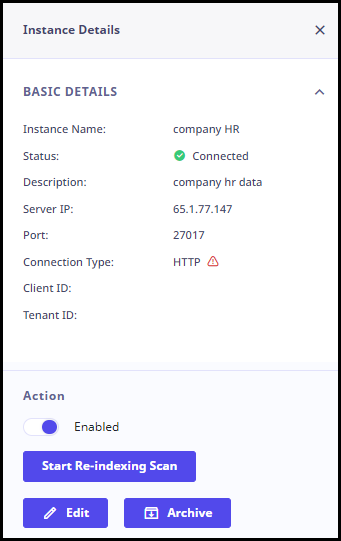
- Basic Details: Instance Name, Status, Description, Server IP, Port, Connection Type, Client ID, Tenant ID, Client Secret, File/ Folder, Location, Password, Access Key, Secret Key, Country, City, Timezone, SID, Username, Password, Technology owner, Business Owner.
- Database Details: Database name.
- Scan Status: Last scan status, Last Deep Scan, Last Re-Indexing.
- Region Details: Region.
- Datasource Availability: Availability for scan, Scheduling of Time and Days. Also, scan schedule and deep scan schedule is mentioned.
- Scan Frequency: Frequency of the scan schedule.
- Action: From this section, you can start re-indexing scans, edit, and disconnect the instance.
Additional actions available
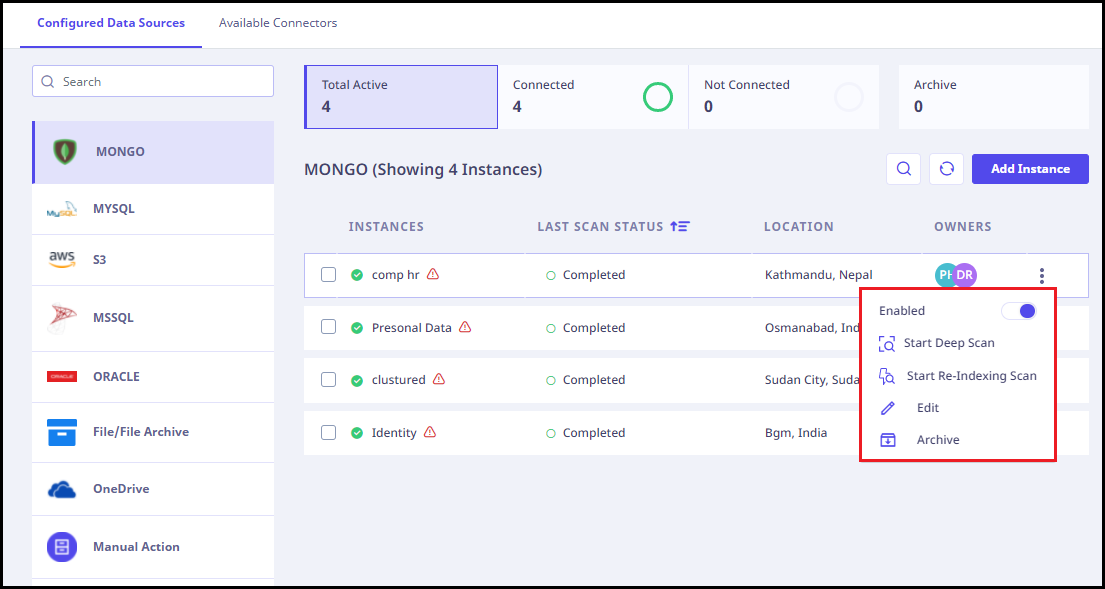
A three-dot menu (highlighted in red box) is highlighted when you select an instance using which you can perform the following actions.
- Enabled / Disabled: You can toggle between these two options using this button.
- Start Deep Scan: To start a Deep Scan.
- Start Re-Indexing Scan: To perform a Re-indexing scan.
- Edit: To edit the details of the instance.
- Archive: To archive the instance.
Following options are available next to the Add Instance button.
- Search: Use the designated search box to enter a search query.
- Refresh: Click the Refresh icon to refresh the displayed data.
Bulk Actions
You can perform the following actions when you select multiple instances.
- Archive: To archive the instance.
Tip: You can also view the respective owners of a data source by hovering over the owner names.
Adding a new instance
To add a new instance, follow these steps.
- Log on to the Seqrite Data Privacy portal. Navigate to Data Sources page.
- Click Add Instance. The Add Instance dialog is displayed.
-
Enter the following details.
- Instance Details:
On the Instance details page, enter the following information.
Following information fields are common for all data sources such as Name, Description, Country, City, Time zone, Data source/ technology owner, and Business owner.
The following fields are different depending upon the selected data source connector.Data source connectors Fields on ‘Instance Details’ page MongoDB Mongo type: Standalone: Server IP, Port,Mongo type: Cluster: Connection URL,Connection type, Root/ CA certificate, Client Certificate, Client Key, TLS Protocol, Username, Password. MySQL Server IP, Port, Connection Type, Root/ CA certificate, Client certificate, Client Key, TLS protocol, Username, Password. Amazon S3 Connection type, Access Key, Secret key, Region. MSSQL Server IP, Port, Connection Type, Root/ CA certificate, TLS protocol, Username, Password. Oracle Server IP, Port, Connection Type, SID, Username, Password. Manual action Storage location, Technology owner, Business owner. File Server (SMB) Connection URL, Username, Password. Note: For the File Server connector, the only protocol supported at the moment is SMB.
The following are the allowed SMB Connection URL Patterns:
With “smb” Protocol and Root Folder>
URL Format: smb://<IP_Address>/<Shared_Folder>/
Example: smb://xx.xxx.xxx.xx/share/
Description: This format represents an SMB connection using the “smb” protocol to access a shared folder hosted at the specified IP address with a defined root folder.With “smb” Protocol and Without Root Folder:
URL Format: smb://<IP_Address>/
Example: smb://xx.xxx.xxx.xx/
Description: This format denotes an SMB connection utilizing the “smb” protocol to connect directly to the root directory of the server located at the given IP address.Without Protocol and Without Root Folder:
URL Format: <IP_Address>
Example: xx.xxx.xxx.xx
Description: This format indicates an SMB connection without specifying the protocol and directly targeting the root directory of the server identified by the provided IP address.MS teams Connection type, Client ID, Tenant ID, Client secret, Country, City, Time Zone. OneDrive Connection type, Client ID, Tenant ID, Client secret. Salesforce Client ID, Client secret, Version, Username, Password. Vision Helpdesk Domain, Username, Password Microsoft Outlook Connection type, Client ID, Tenant ID, Client secret. Gmail Google requires users to create an application entity to obtain the necessary credentials (client ID, client secret, etc.). Once created, users receive a JSON configuration file containing these parameters. This JSON file serves as the authentication mechanism for establishing connections with Gmail’s API. Users can then upload this JSON file to enable Gmail’s and Google Drive’s connection API to establish a connection securely. Google Drive SAP S4 HANA Server IP, Port, Username, and Password. Dropbox Application Key, Application Secret Key, and Code from Dropbox After entering these details, test the connection to the data source by clicking the Test Connection button.
If the connection is successful, the gray dot in front of the data source name turns green and the text ‘connected’ appears next to the data source name.
- Review Tables: Select the appropriate database from the drop-down menu.
- Data Source Availability: Availability, Available time. The frequency of the scan is displayed according to your selection.
Tip:
On the Datasource Availability page, you can add multiple time slots under Available Time by clicking on the ‘Add’ sign next to an already added time slot. If you want to remove the added time slot, click the ‘Remove’ sign next to it.
- Instance Details:
- To edit any instance details, click the Previous button.
- Click Add Instance. The Configured Data Sources page is displayed with a success prompt.
Scans
You can scan the instances to find out potential locations where personal sensitive information might be stored. You can perform the following types of scans in Seqrite Data Privacy.
- Deep Scan:
This is the first scan that you can perform on the configured instances. The deep scan finds out potential locations of sensitive private information. These potential locations are listed on the Verify Classification page. - Re-Indexing Scan:
After you perform a deep scan, the data found in potential locations may not be verified immediately. If you need to scan an instance again after some time, you can perform a re-indexing scan to save time as compared to performing a deep scan again. A re-indexing scan ensures that any new data added is detected in the scan. You may also use the Re-indexing scan option to locate more sensitive information if available. This can be carried out after a Deep Scan is carried out. The potential locations are listed on the Verify Classification page.
Performing a scan
To perform a deep scan, follow these steps.
- Log on to Seqrite Data Privacy portal. Navigate to Data Sources.
- Click the desired data source on the left pane.
- Click the three dot menu appearing next to the Owners column of the instance for which you wish to perform the scan.
From the listed options, click Start Deep Scan.
The configured instances for that data source are displayed.
Performing a re-indexing scan
To perform a re-indexing scan, follow either of the following steps.
- Click the three dot menu appearing next to the Owners column.
From the listed options, select Start Re-Indexing Scan.OR
- Click the instance name. A pane appears on the right side.
In the Action tab, click Start Re-Indexing Scan button.
Available connectors
On this page, you can view the available connectors that can be configured. The Tenant Administrator can add new data sources.
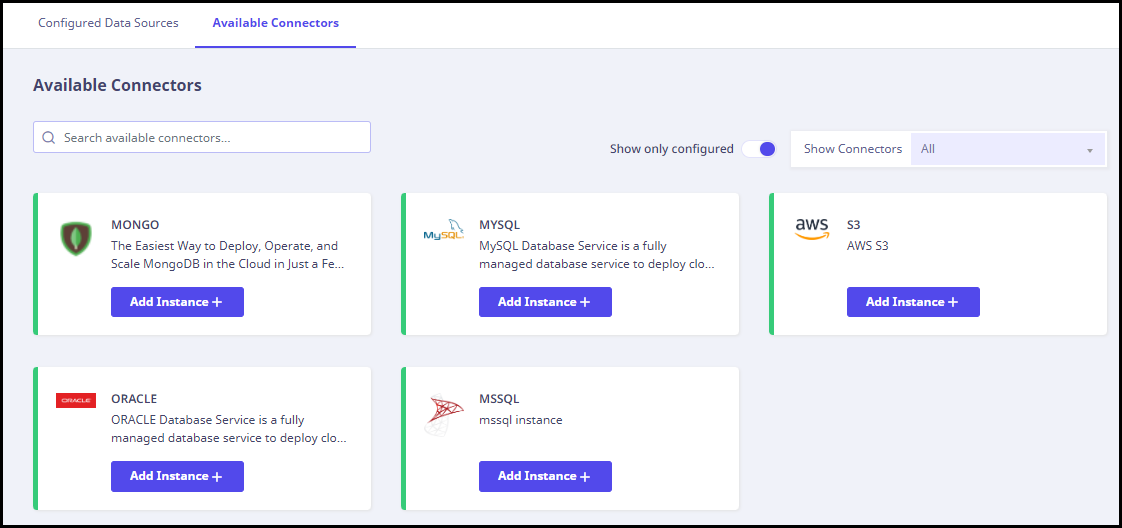
This page displays all the configured and un-configured connectors. Configured connectors are marked with a green stripe on the left side.
You can add a new instance for any of the connectors using the corresponding Add Instance button.
Actions available
- Use the search box on left to search for available connectors.
- Use the Toggle button to view either the configured or un-configured connectors.
- Click Show connectors to view the available connectors on the basis of their type with respect to Database, Application, and Communication.

