

To configure Microsoft Outlook as a connector in Seqrite Data Privacy, follow two steps: :
- Configure the App Registration in Microsoft Entra
- Add Microsoft Outlook Connector Configuration in Seqrite Admin Console
Configure the App Registration in Microsoft Entra
Follow these steps to configure the App Registration in Microsoft Entra:
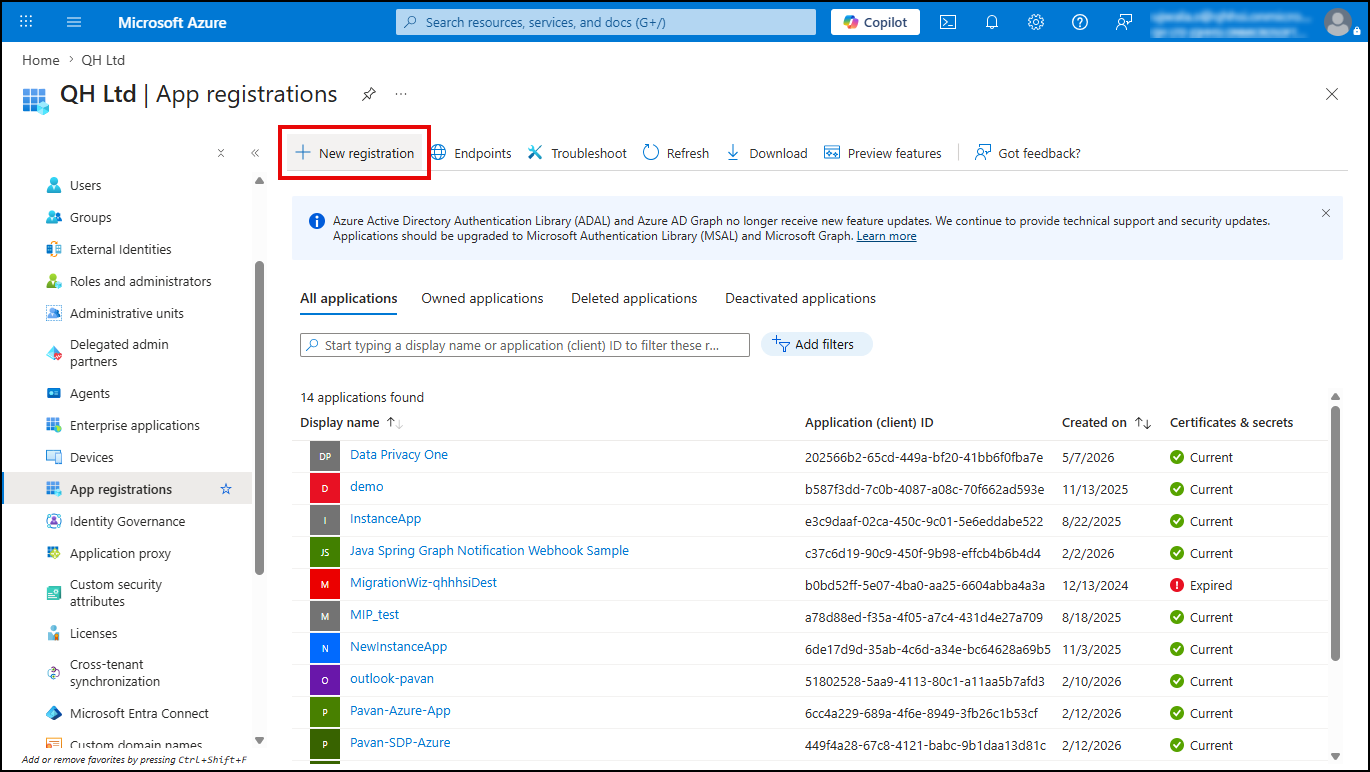
- Login to the Microsoft Entra to create a New App Registration.
- Click New registration.
- Enter Name, Support account types and click Register.
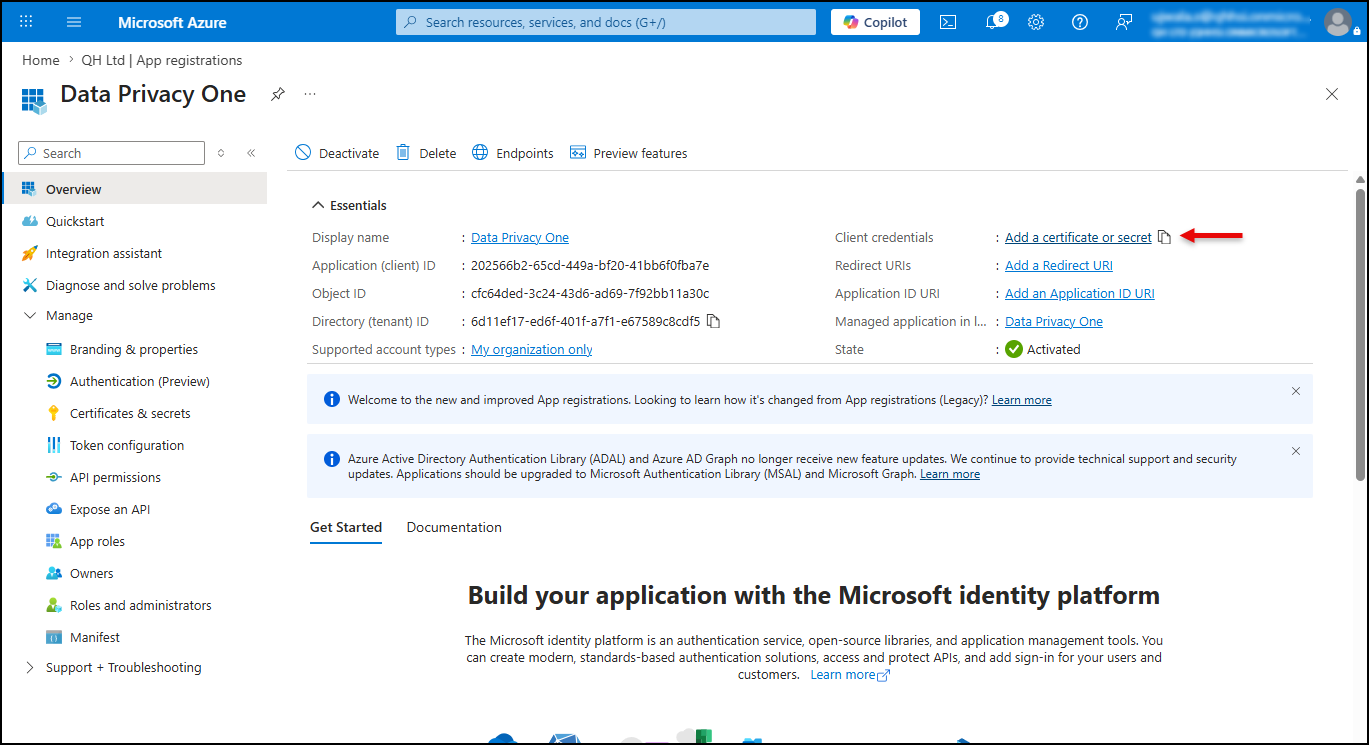
- Once the app is registered navigate to the Overview of newly created App Registration.
- Note the Application Client ID, Directory(Tenant)ID which will be used in the Creation of One Drive Instance in Seqrite Data Privacy Console.
- Create a Client Credentials from the Overview page.
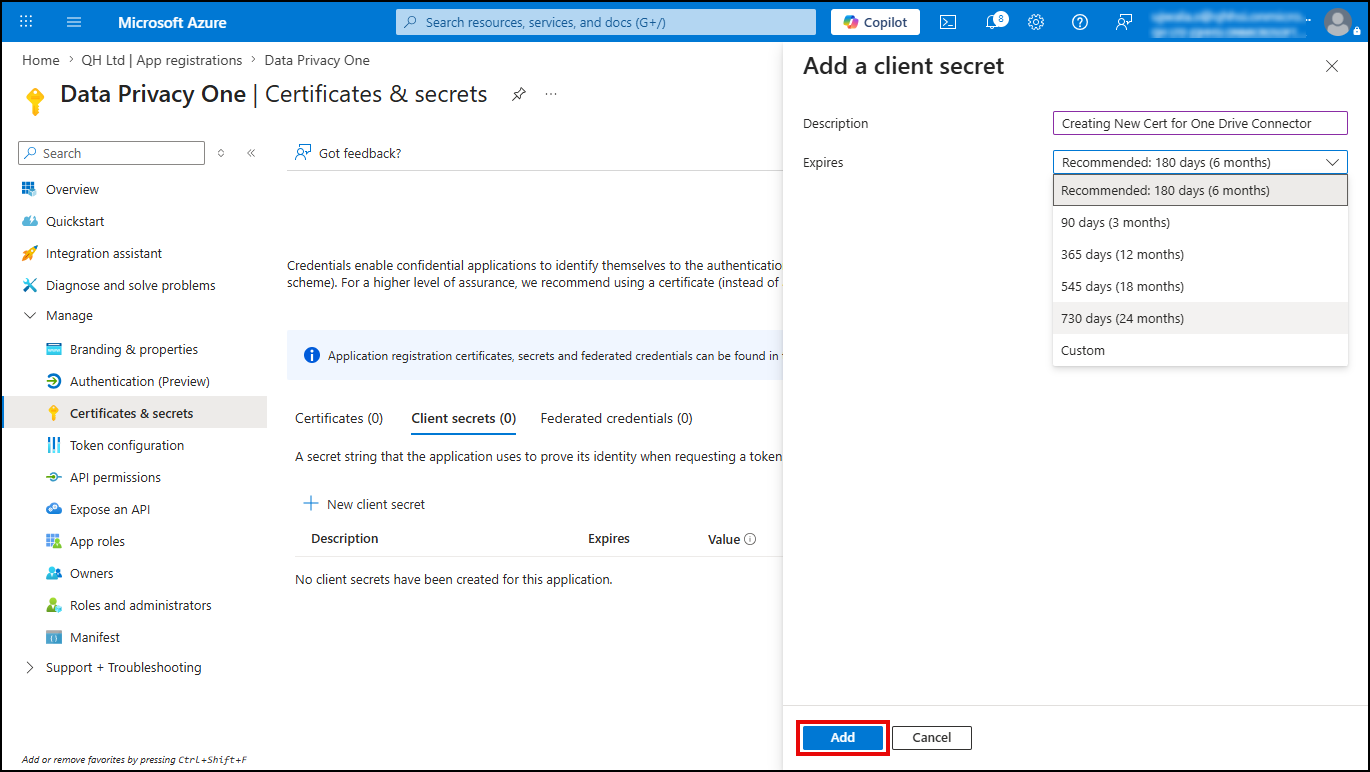
- To create a New Client Secret, go to Certificate & secret and click +New Client Secret.
- Enter Description, select the maximum time duration for the Client secret Expiry and click Add.
- Save the Value (client secret) and use this as a Client Secret in Seqrite Data Privacy Admin Console during instance creation.
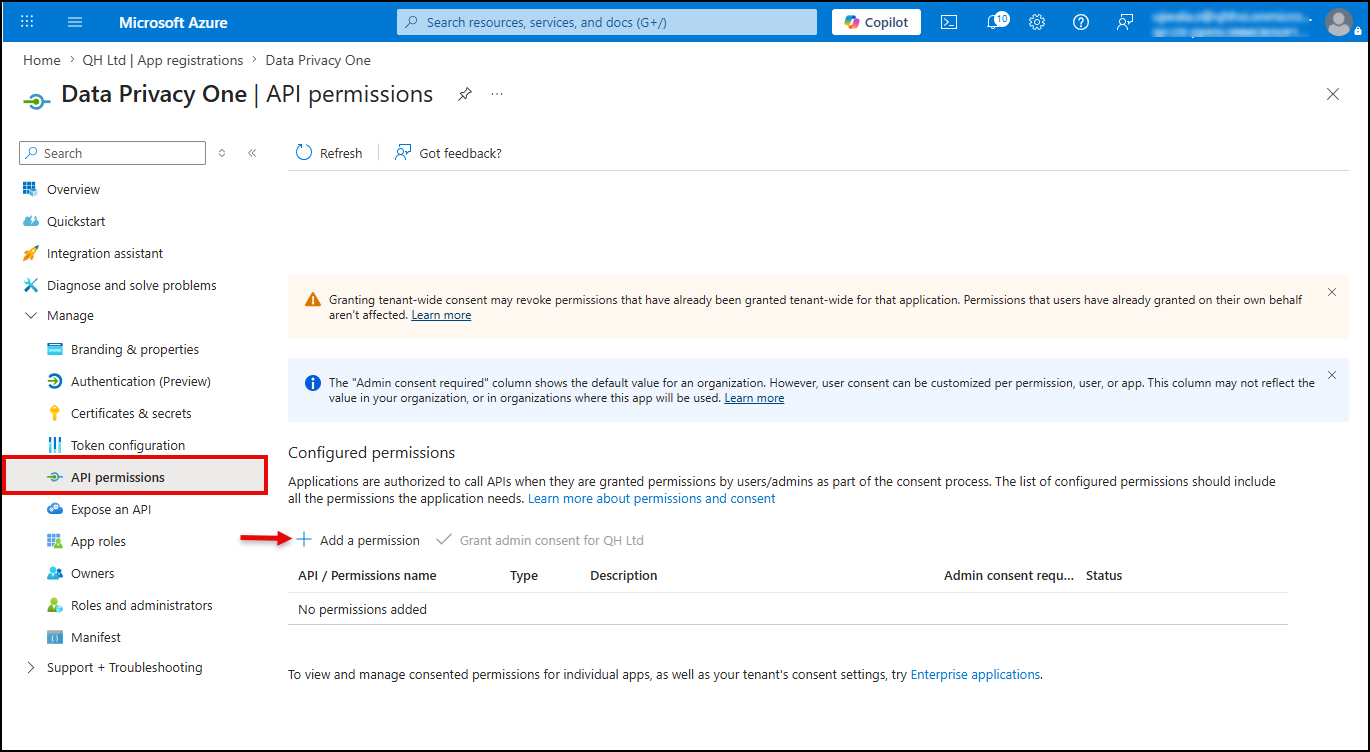
- From left navigation menu of same App Registration, select the API Permissions under Manager and click + Add a permission.
- Click Microsoft Graph.
- Click Application permissions, choose the required permissions from the dropdown list (See the table below for reference) and click Add Permissions.
- After adding the permissions, be sure to Grant Admin Consent. Without granting consent, the configuration may not function as intended
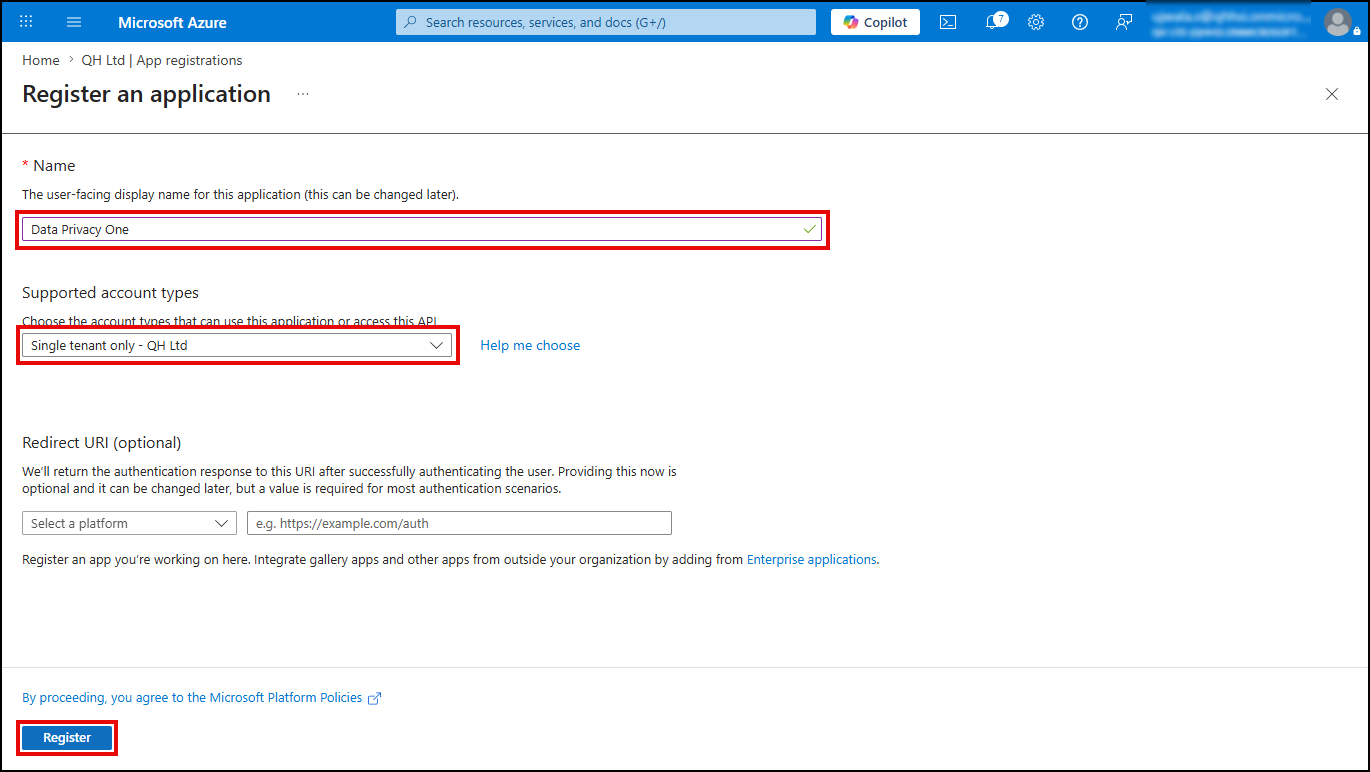
Note: Redirect URL field is optional.
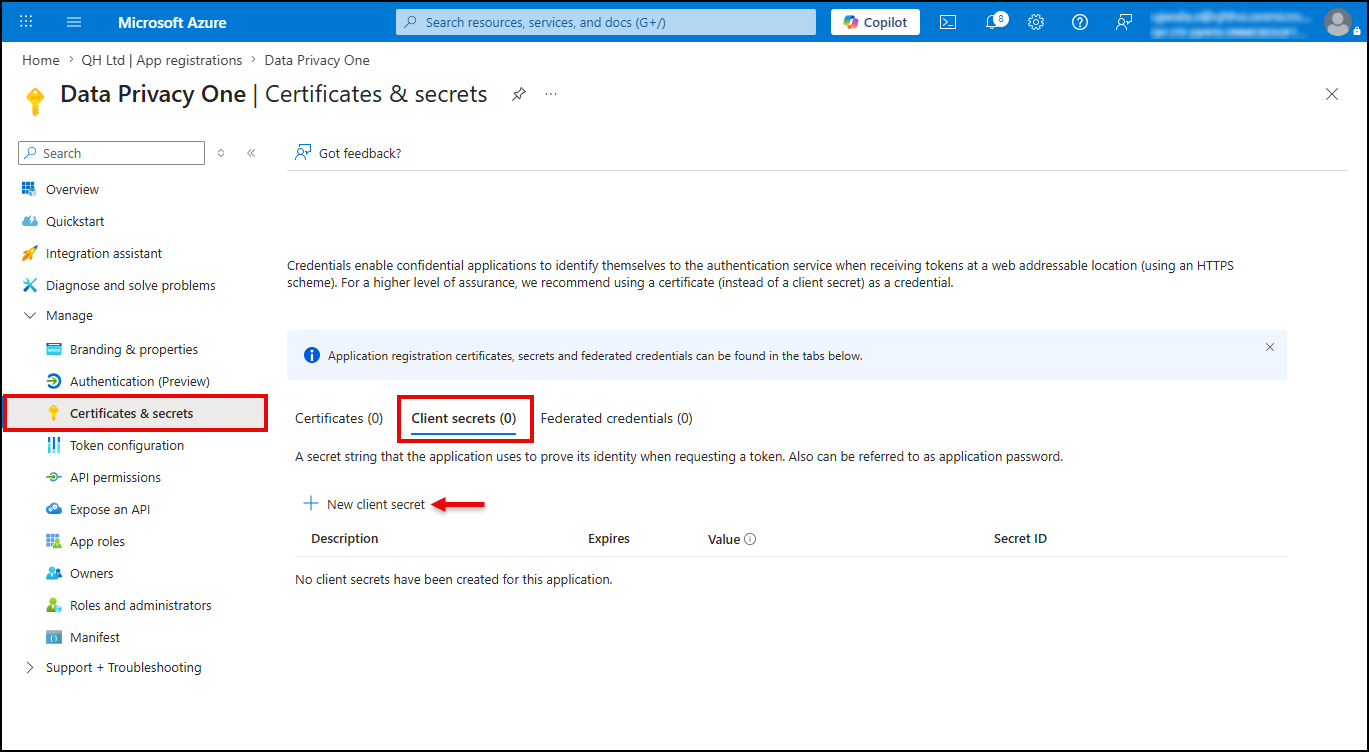
Add a client secret popup appears.
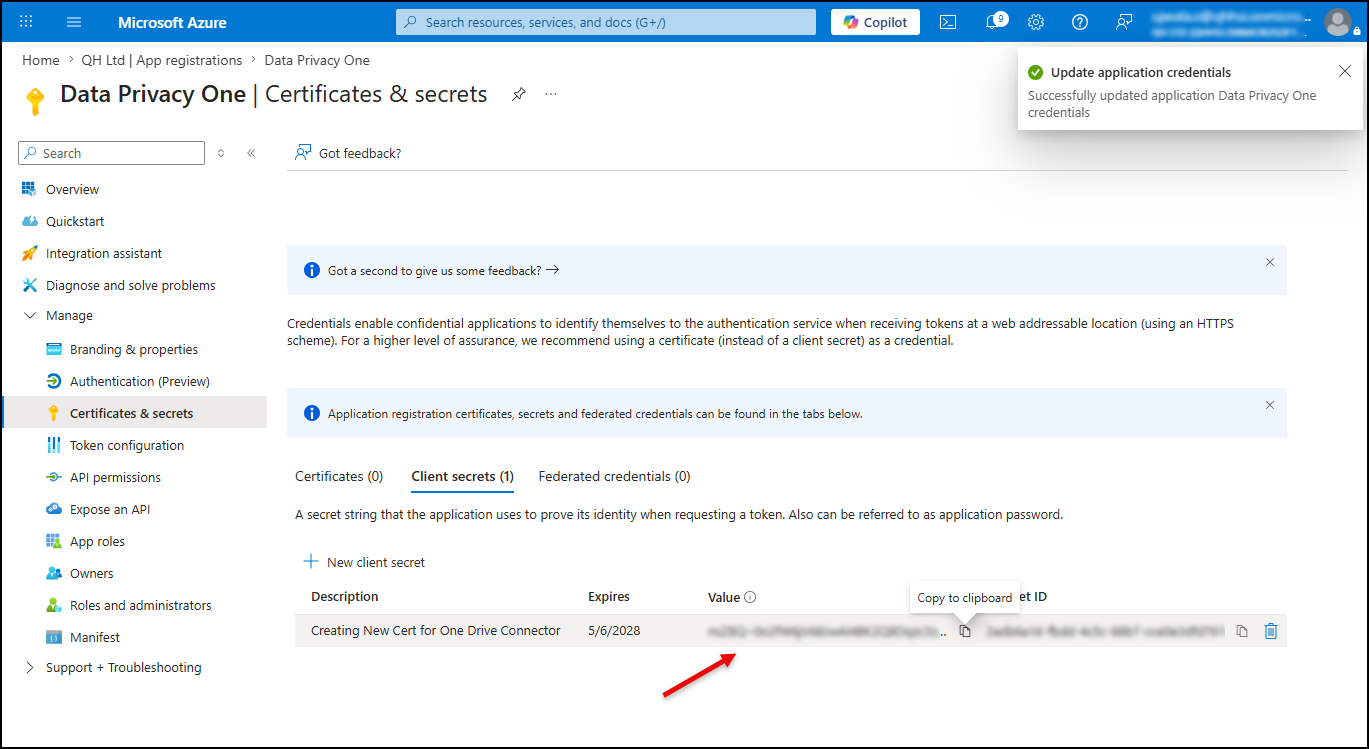
Important:
Once you generate a client secret, make sure to copy and store it immediately. If you leave the page and return later, the client secret/value will appear masked and cannot be retrieved in full. In that case, you will need to create a new client secret.
Request API permission popup appears.
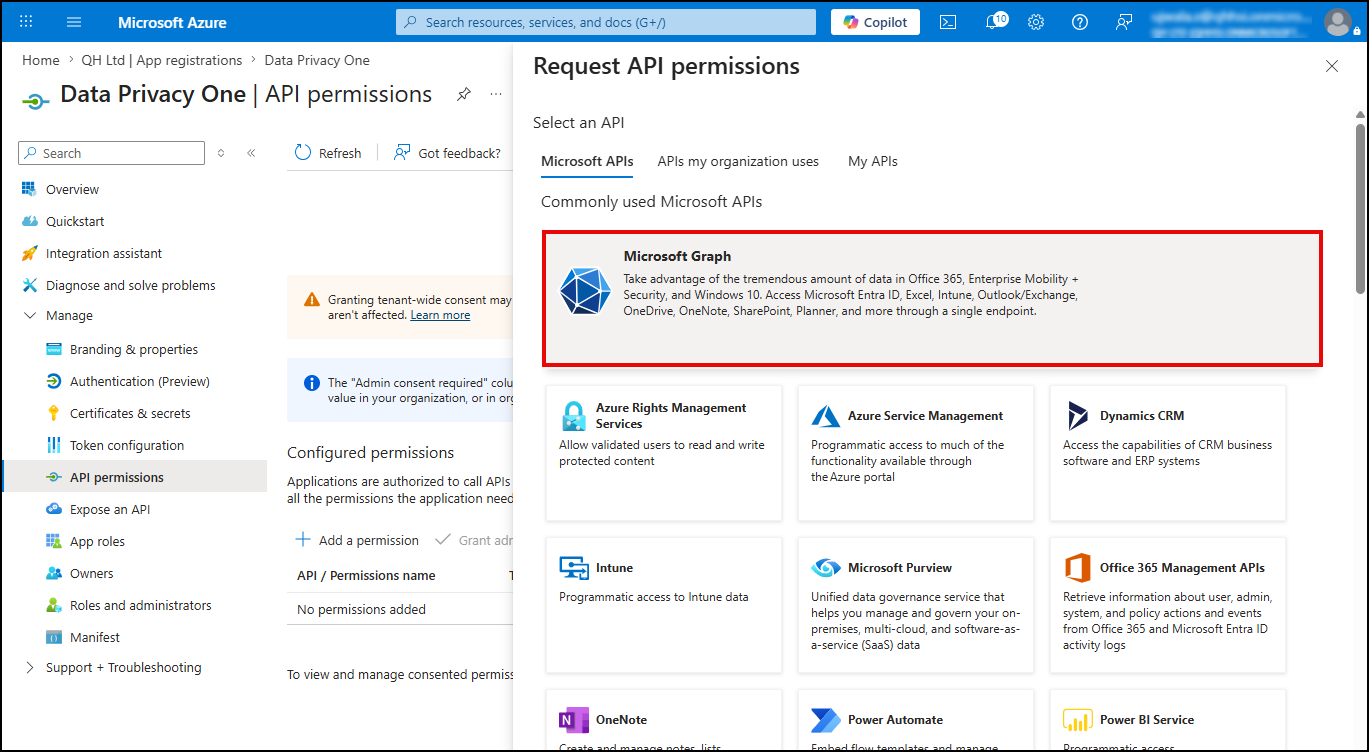
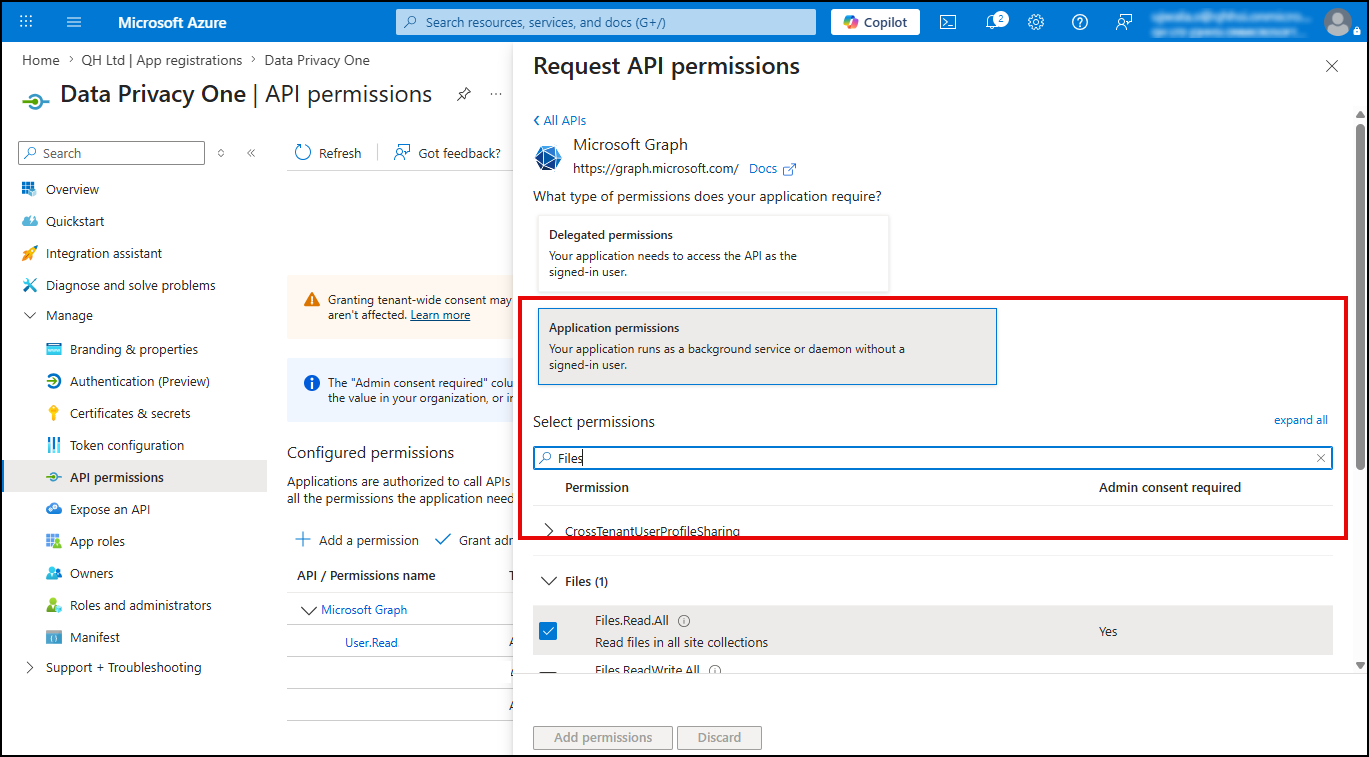
Note: By default, the User.Read API permission is included. You can select and add API permissions as required by your connector.
| API / Permissions name | Type | Permission | Admin Consent Required |
| Calendars.Read | Application | Read calendars in all mailboxes | Yes |
| Contacts.Read | Application | Read contacts in all mailboxes | Yes |
| Directory.Read.All | Application | Read directory data | Yes |
| Group.Read.All | Application | Read all groups | Yes |
| GroupMember.Read.All | Application | Read all group memberships | Yes |
| Mail.Read | Application | Read mail in all mailboxes | Yes |
| MailboxSettings.Read | Application | Read all user mailbox settings | Yes |
| User.Read.All | Application | Read all users’ full profiles | Yes |
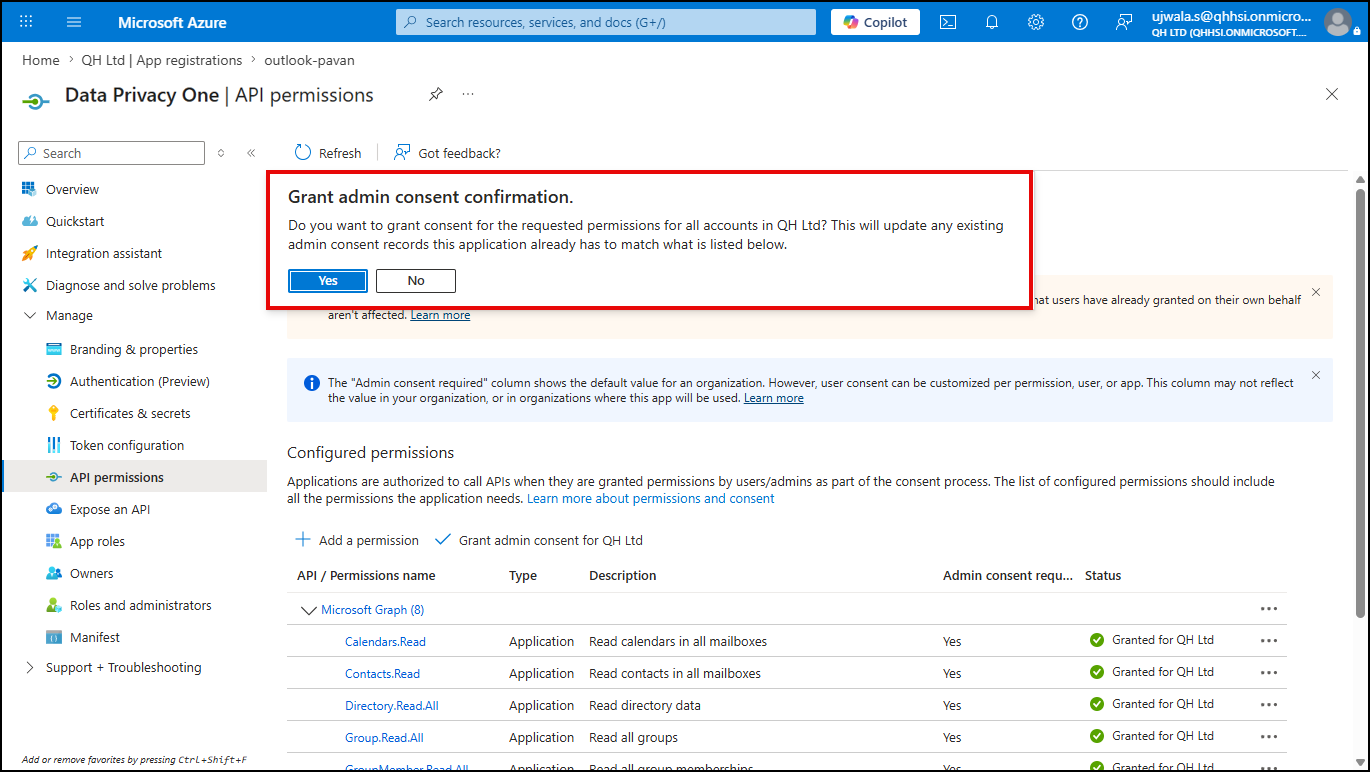
Note: These Permissions and Grant Consent is necessary for the Connector Discovery and Classification of Data.
Add Microsoft Outlook Connector Configuration in Seqrite Admin Console
Follow these steps to configure Microsoft Outlook as a Connector:
- In the left navigation pane, click Discovery and Classification and then click Connectors.
Configured Data Sources page is displayed. - Select Microsoft Outlook from the configured data source list, and then click Add Instance.
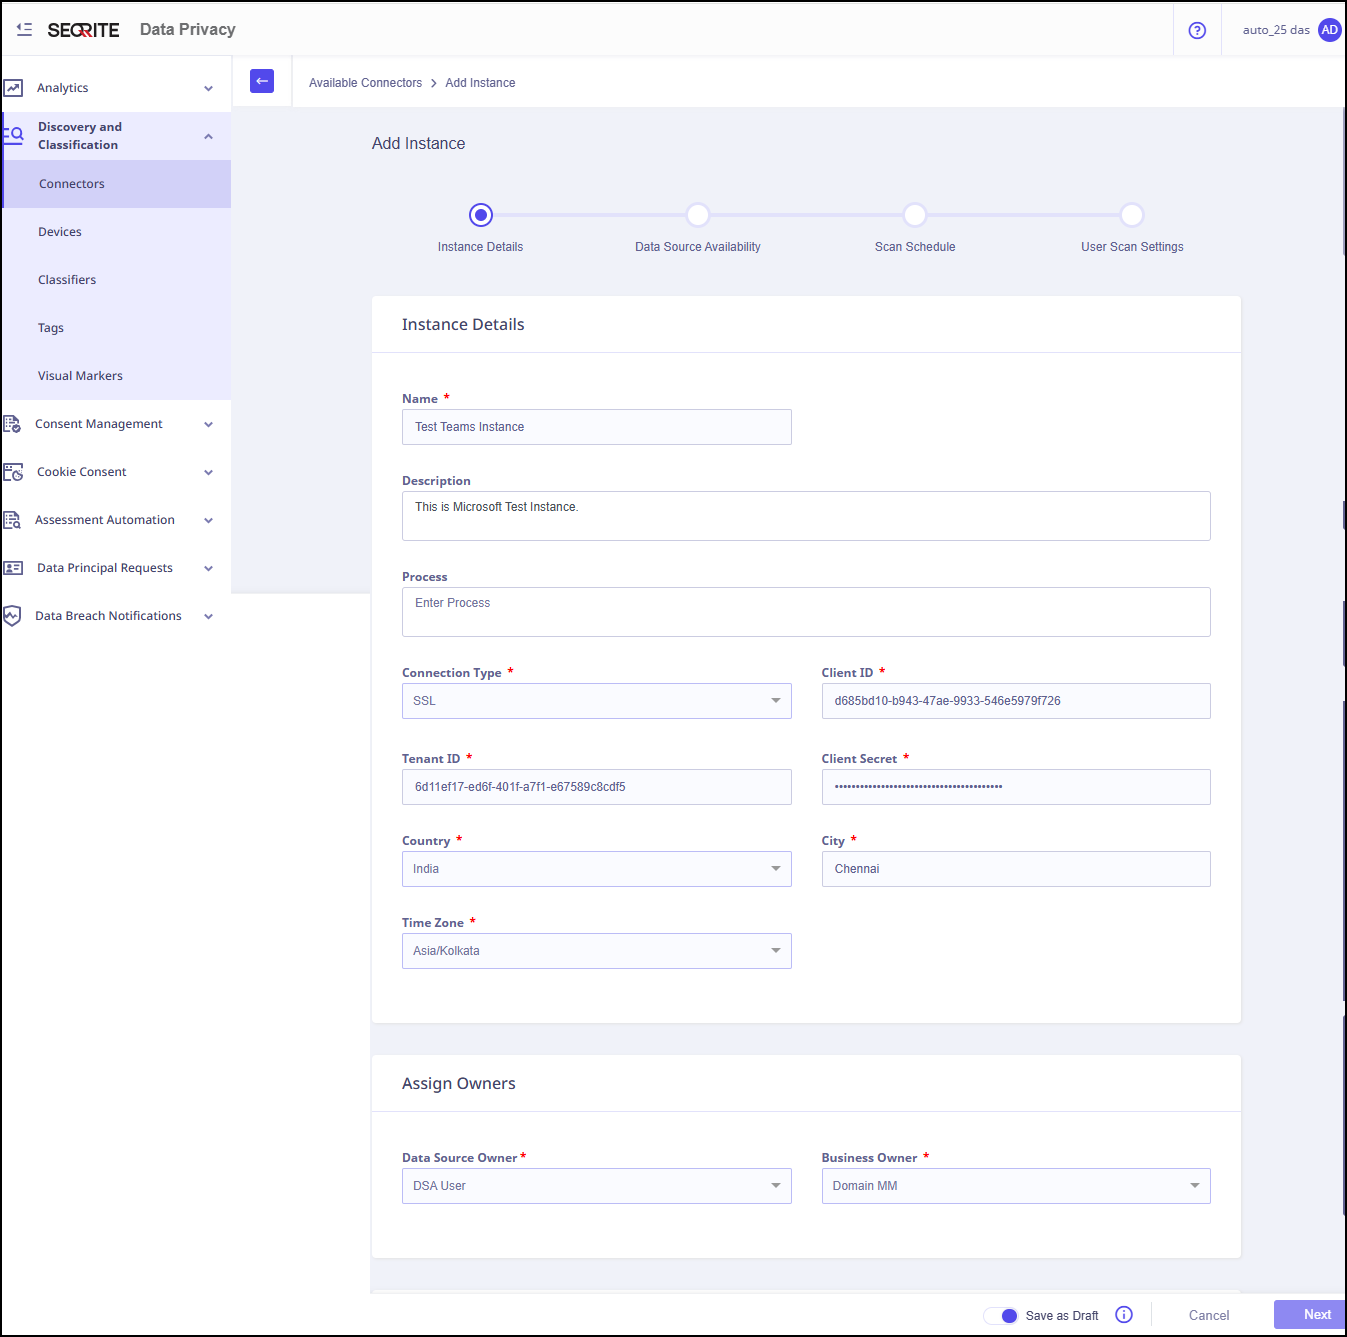
- Enter Instance Details and Owner details:
- Name
- Description
- Process
- Connection Type
- Client ID
- Tenant ID
- Client Secret
- Country
- City
- Time Zone
- Data Source Owner: The person who owns the data source and makes technical decisions about it.
- Business Owner: The person who is responsible for the business decisions about the data source
Note: The Client Secret and Tenant ID generated during Configure the App Registration in Microsoft Entra are required to complete this configuration.
- Click Check Connection .
- Click Next.
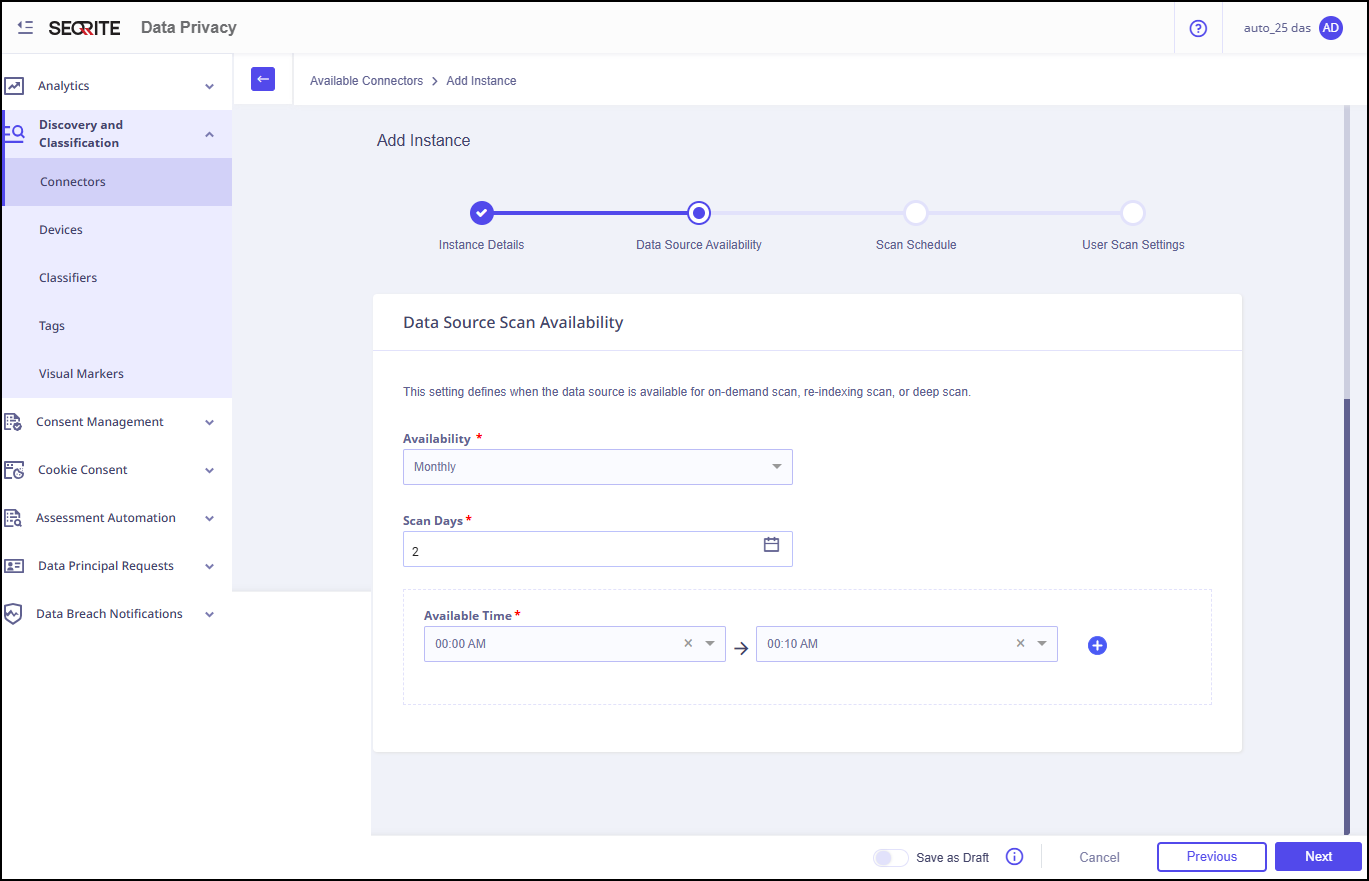
- Enter the Data Source Scan Availability details.
- Availability: Monthly, Weekly or Daily
- Scan Days
- Available Time
- Click Next.
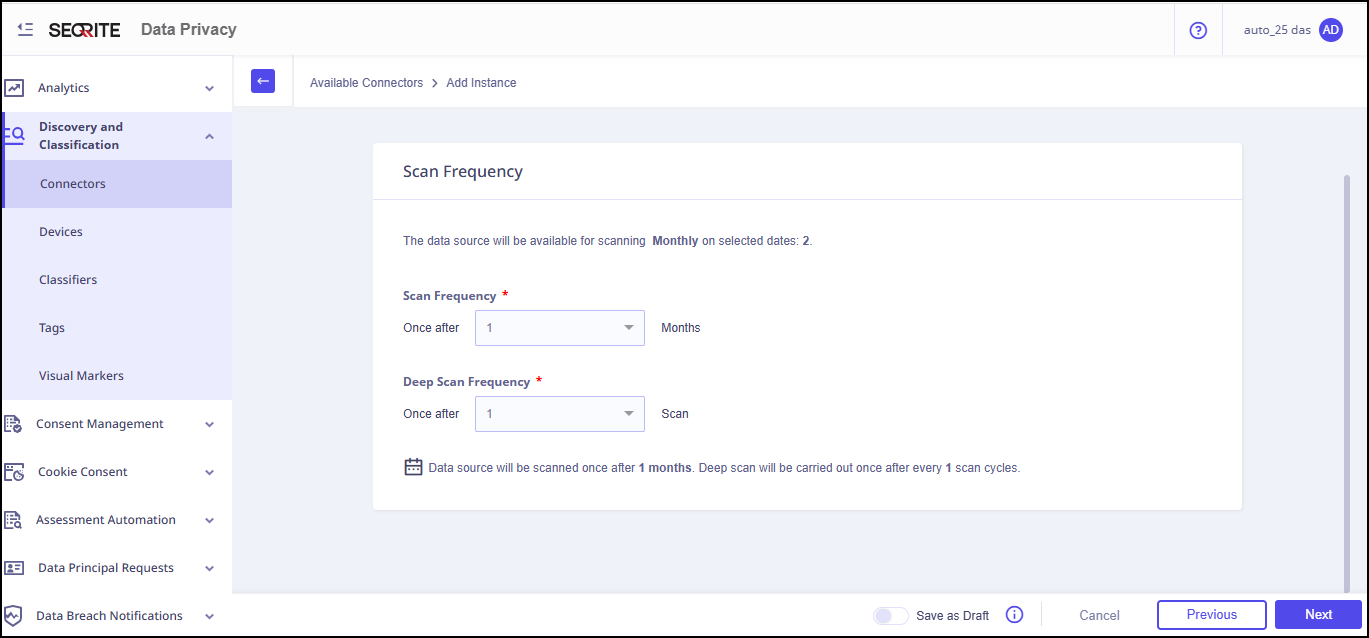
- Enter Scan Schedule/Scan Frequency details:
- Scan Frequency
- Deep Scan Frequency
Note:
- The data source will be available for scanning monthly on selected date.
- The data source will be scanned based on the user‑defined interval. A deep scan will be performed after the number of scan cycles specified by the user.
- Click Next.
- In Users Scan Settings, select Scan Type that is either Full User or Selective User Scan.
- By default, the data source scan includes all registered users. For a more customised approach, opt for the Selective User Scan option.
- Choose specific user tags based on your selected scan mode to include or exclude particular users or user groups.
- Click Add Instance.
If the provided details are accurate, the connection with Microsoft Outlook will be established successfully.

This setting defines when the data source is available for on-demand scan, re-indexing scan, or deep scan.
Note:
Instance of the data source is added successfully.