

In this section, you can add, edit and download cookie consents for the selected websites.
Adding Cookie Consent Manager
To add a cookie consent manager, follow these steps:
Step 1: Access Cookie Consent Manager
- Log on to Seqrite Data Privacy portal.
- Navigate to Cookie Consent and click Cookie Consent Manager.
- Click the Add Cookie Consent Manager.
Step 2: Cookie Consent Setup Wizard
After clicking Add Cookie Consent Manager, the New Cookie Consent Manager screen appears with a progress
tracker consisting of the following phases:
2.1 Setup
2.2 Discovered Trackers
2.3 Cookie Consent Manager Experience
2.4 Design
2.5 Publish
2.1 Setup
In the Setup phase, enter the following scan configuration details:
- Cookie Consent Manager Name: Enter the name for cookie consent manager.
- Website Address: Enter the URL of the website to be scanned.
- Select the Include sub-domain checkbox, include all sub-domains identified during the cookie consent scan.
- Select the scan type:
- Scan Full Website: Select this option to scan the entire website. Then specify the following parameters.
- Page Depth:Specify how many levels of pages the scanner should traverse from the starting page.
- Page Limit:Specify the maximum number of pages to scan.
- Select the URL and domain option as required from:
- Add specific URLs: Include one or more specific URLs in the cookie scan.
- Add specific sub-domains: Include selected sub-domains in the cookie scan.
- Add exclusion URLs: Exclude specific URLs from the scan.
- Add exclusion Keywords: Exclude pages that contain the specified keyword(s) from the scan.
- Limited Scan: To include one or more URLs in the cookie scan.
- To add Scan Schedule :
- select a Start Date.
- Specify Repeat every value and Frequency .
- Choose how often the website should be scanned for cookies. You can schedule scans to recur every:
- 1 to 3 weeks
- 1 to 11 months
- 1 to 2 years
The scan starts on the selected date and runs according to the configured schedule.
- Click Add & Start Scan to proceed.
Maximum limit for page depth is 99.
Maximum limit for page limit is 999.
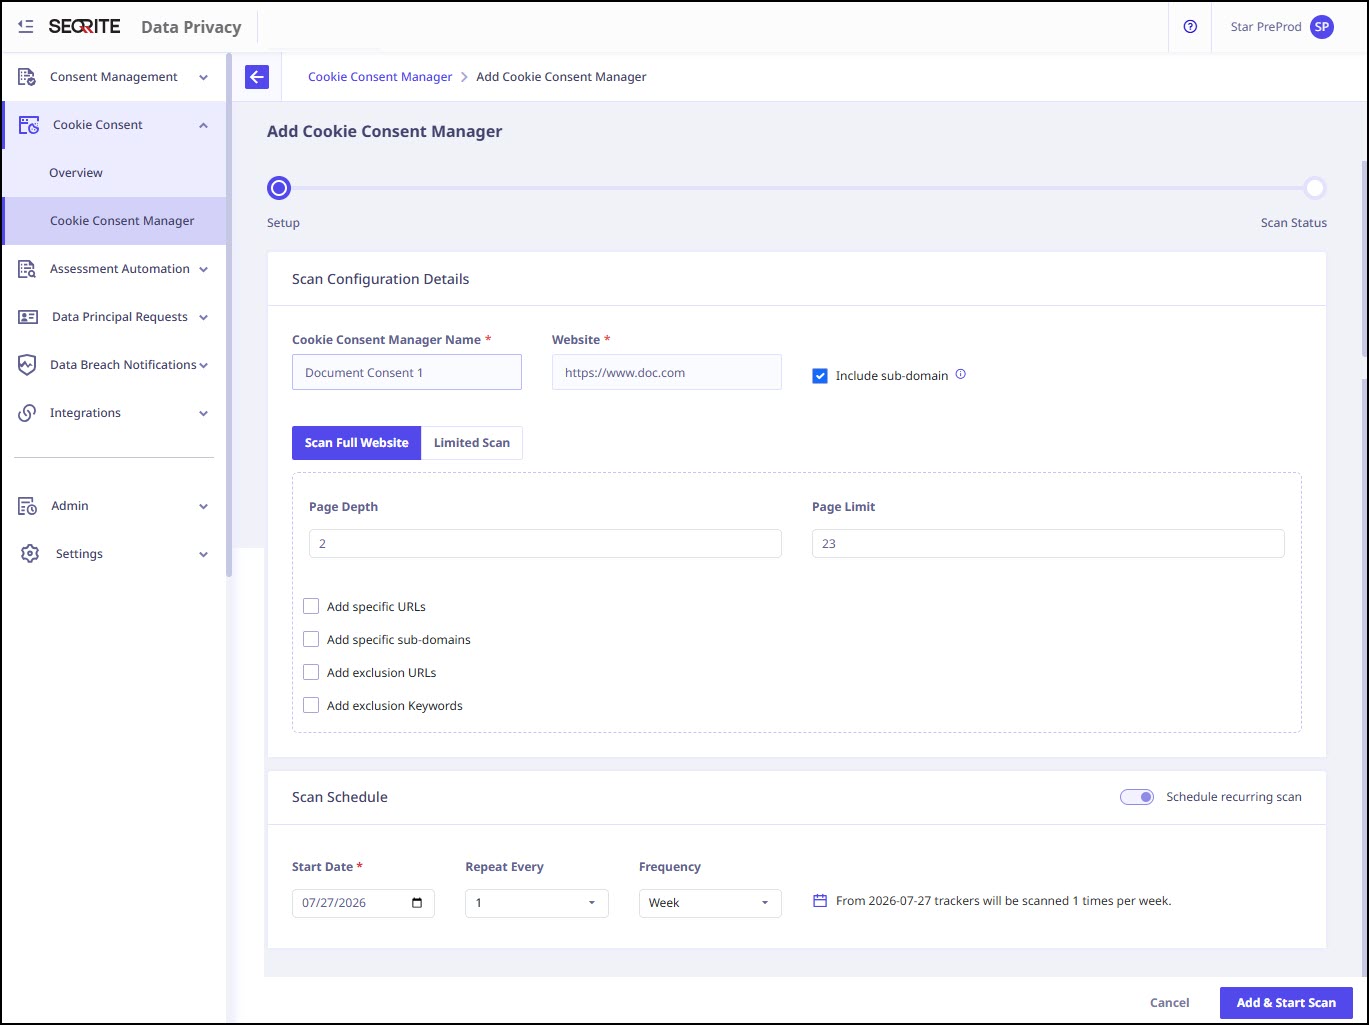
After the scan starts, to leave the page while the scan continues, click Exit & Continue Scanning. You are redirected to the Cookie Consent Manager list page, and the scan continues in the background.
2.2 Discovered Trackers
After scanning, if cookies are detected, the cookie list appears along with the assigned cookie categories.
- To scan for cookies, click Scan Now.
The system scans the specified website and identifies cookies. Detected cookies are then listed and automatically grouped into the appropriate cookie categories.
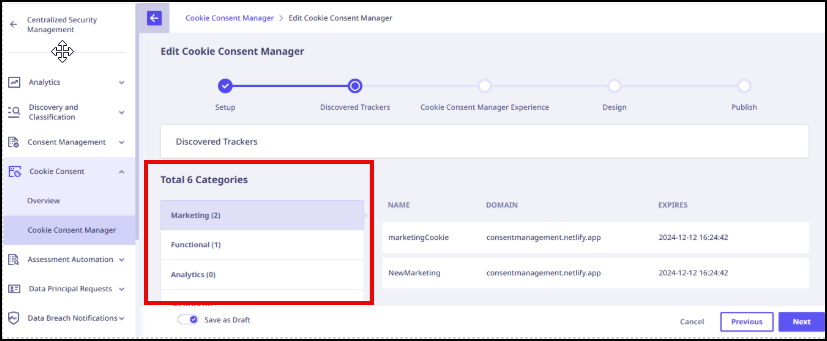
Actions on Categories
You can perform the following actions on cookie categories:
- Add new category
- Edit existing category
- Sort cookie category as required
- Delete category
2.3 Cookie Consent Manager Experience Trackers
To add further details for cookie consent manager, follow these steps:
- On the cookie consent manager list page, click and select Configure Consent Experience.
- Select the default consent option:
- Opt-in: For regimes (Such as DPDPA and GDPR) where cookies need to be disabled by default, choose Opt In.
- Opt-out: For Regimes (Such as CCPA) where cookies need to be enabled by default, choose Opt Out.
- Double-opt-in: By default all cookie categories are disabled. User can enable the cookie categories after which an additional confirmation prompt will be displayed.
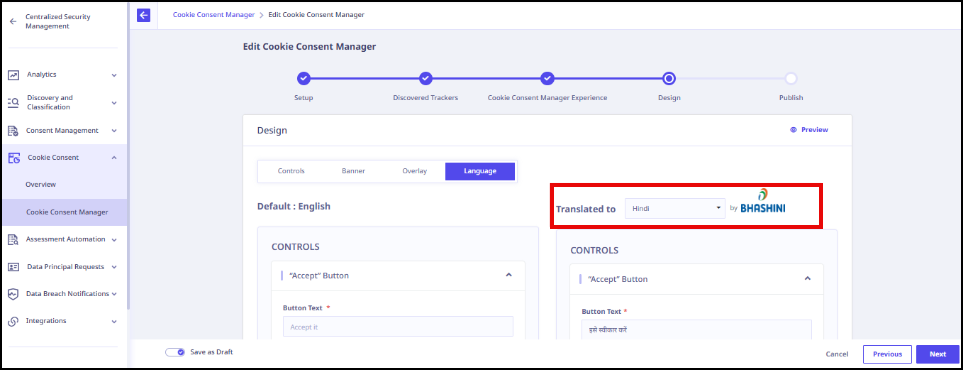
- Select the languages (Preview how the cookie consent looks in different languages) in which the cookie consent will be published.
- Enter the desired language(s).
- To add Indian languages, click Add All Indian Languages in the Quick Selection section.
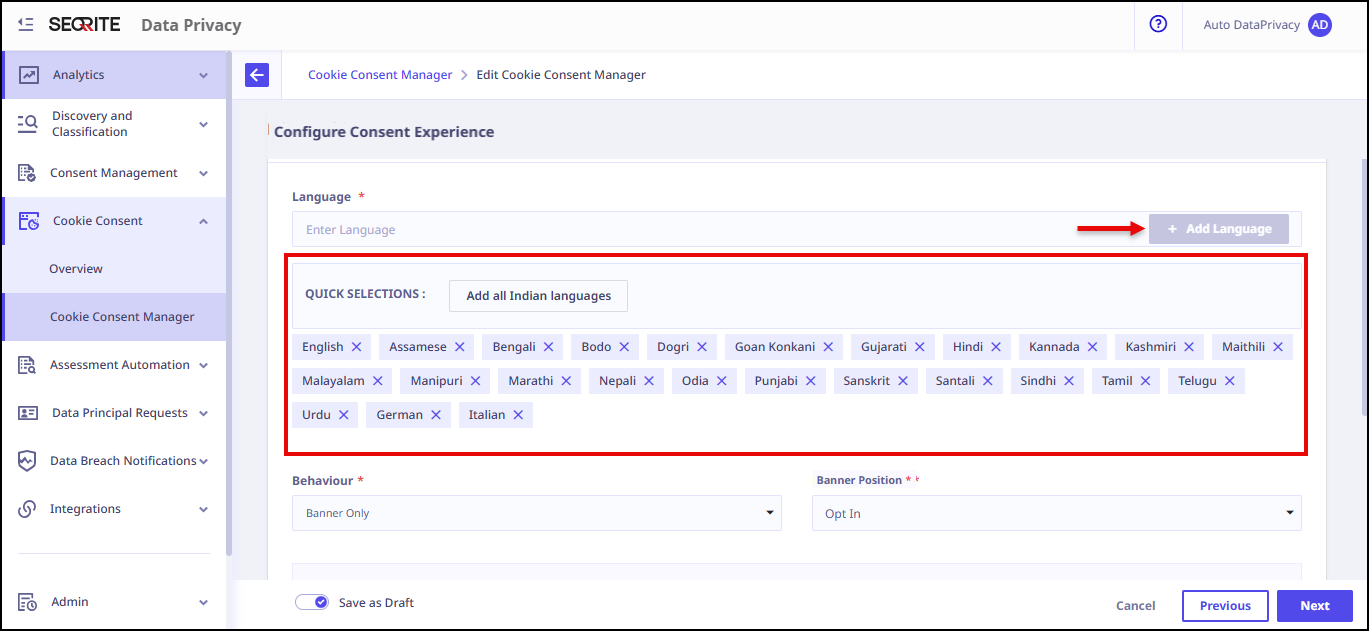
- Support is available for 100+ languages including 22 Indian Languages.
- Use the Preview option to review the consent experience.
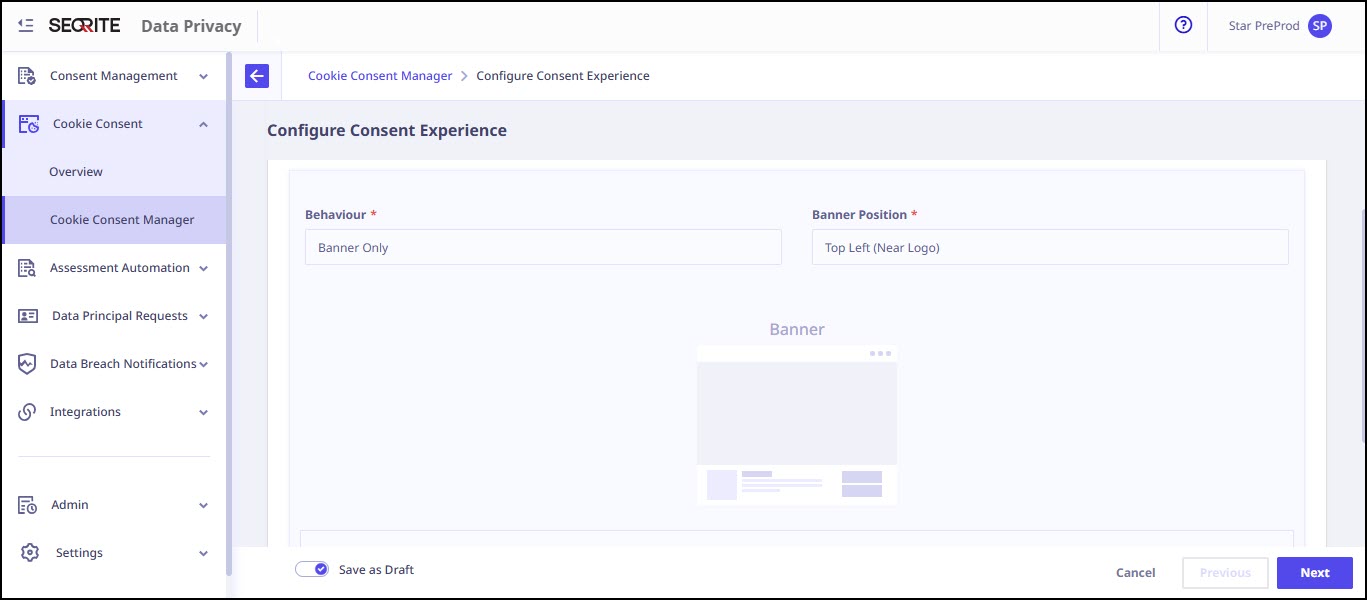
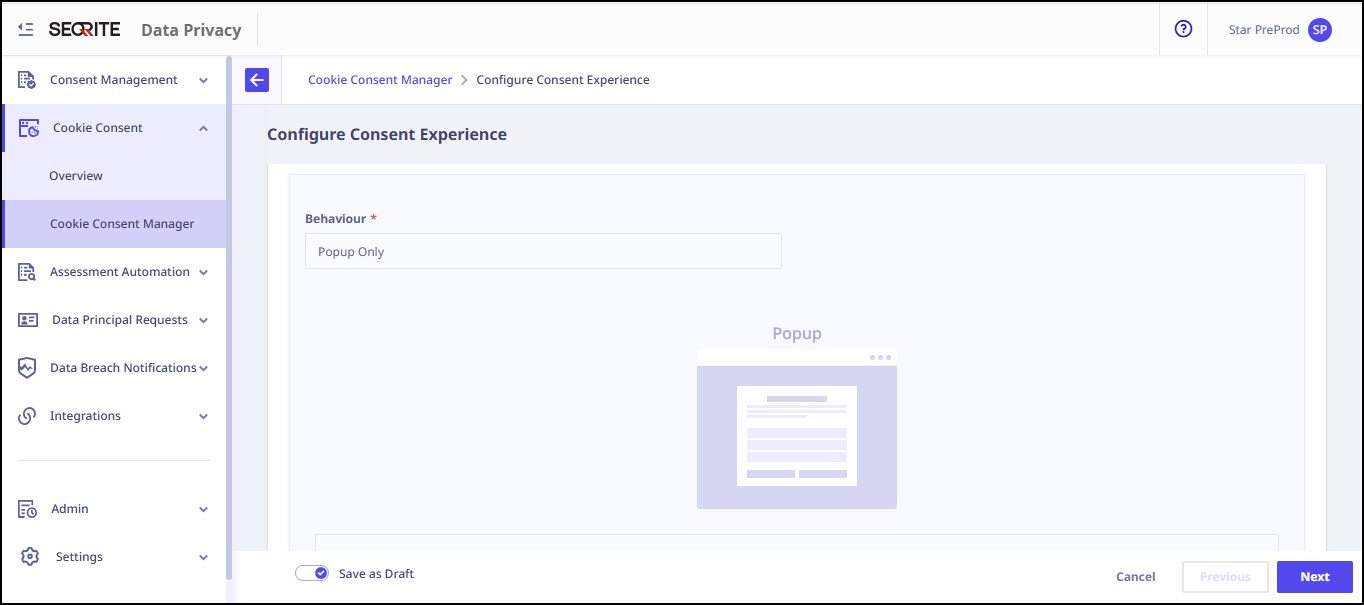
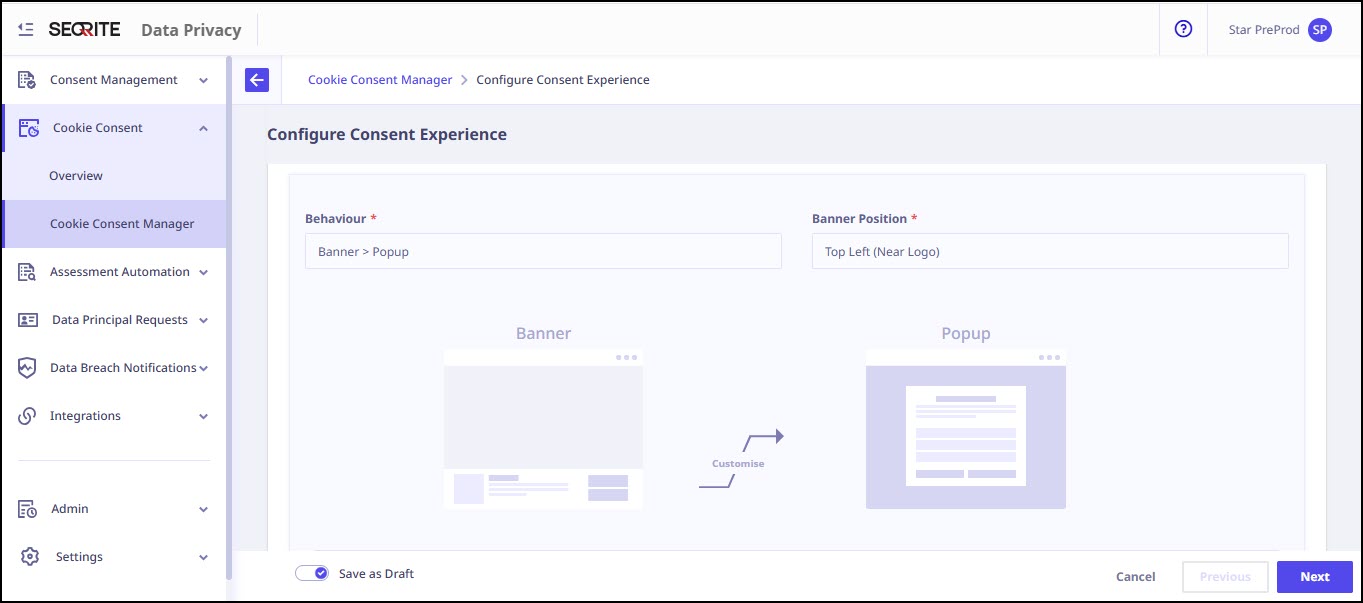
- Choose the consent display behavior:
- Banner Only: Only Cookie Consent Banner is displayed.
- Popup Only: Only Cookie Consent popup is displayed.
- Banner > Popup: First Cookie Banner is displayed, on clicking customize, and then popup is displayed.
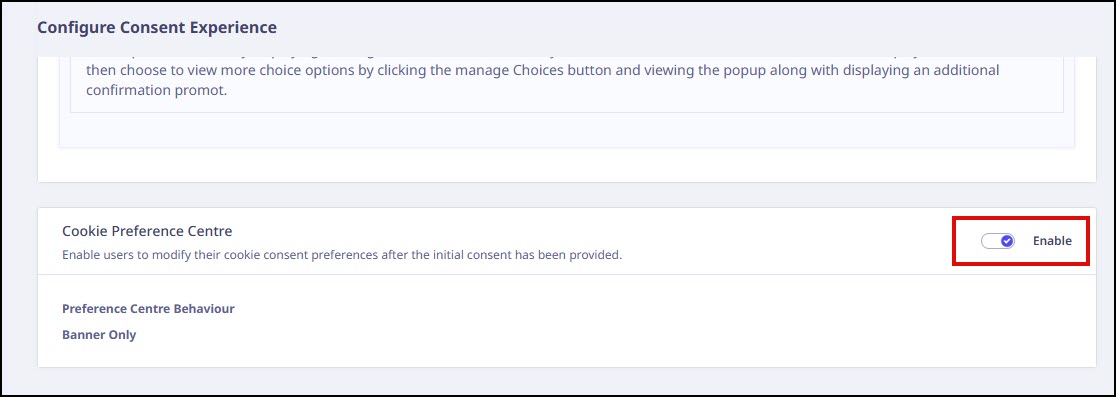
- To allow the data principal (website visitor) to modify their consent after the initial submission, enable this toggle.

Note:
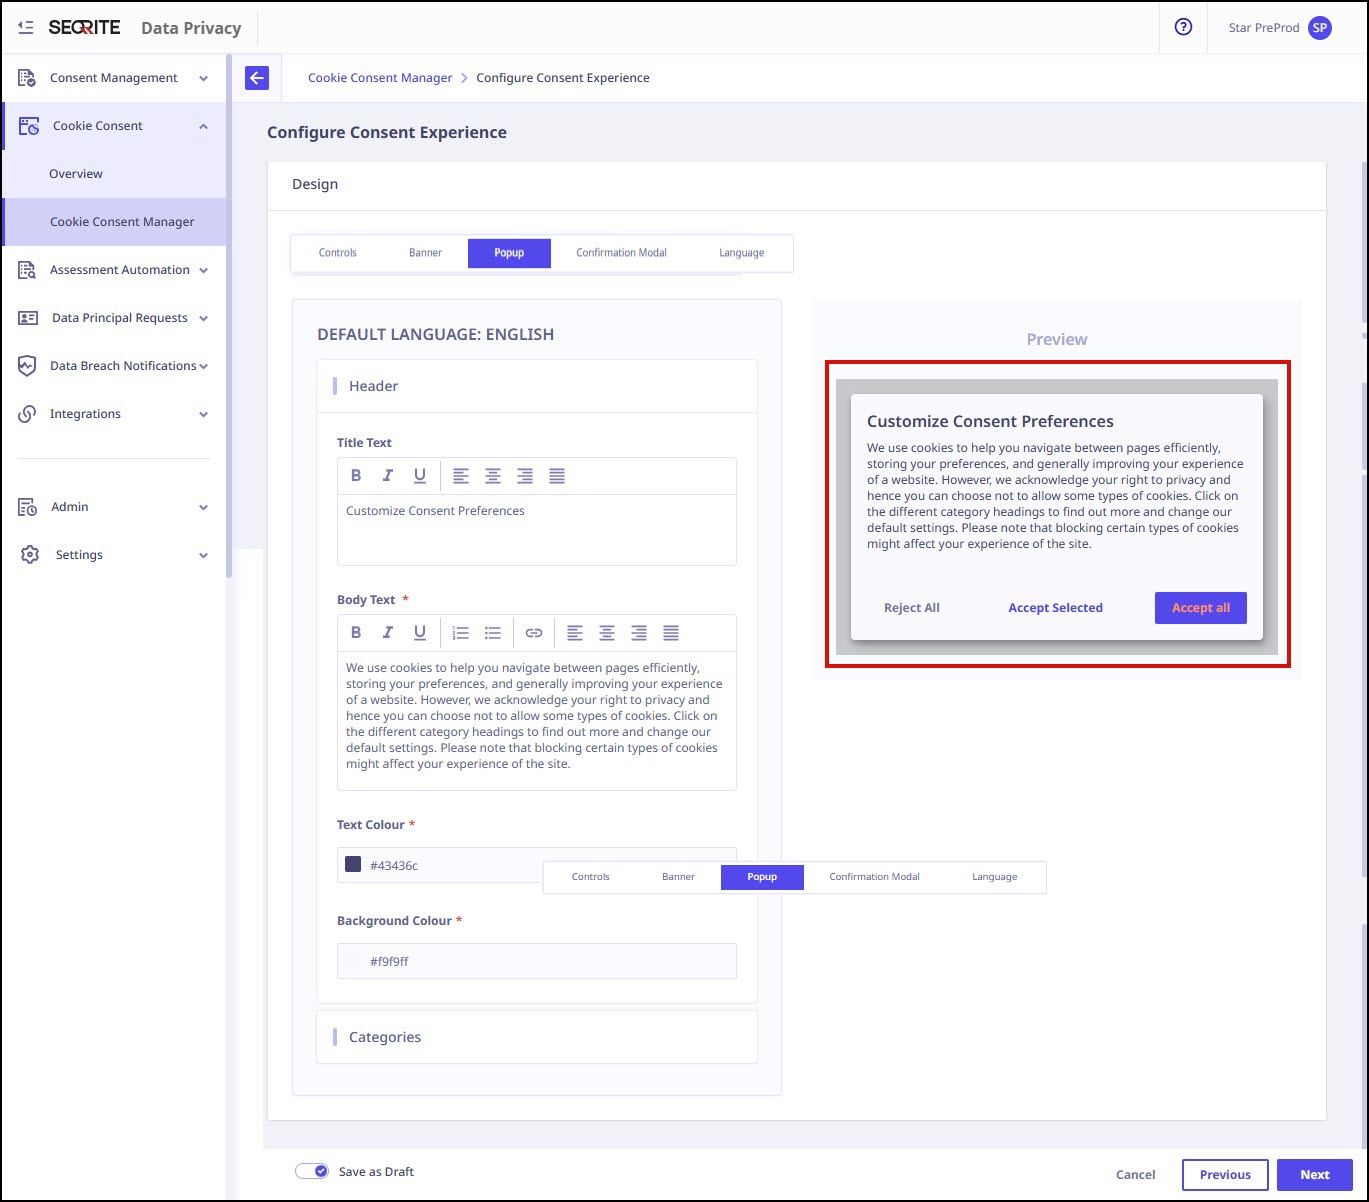
2.4 Design
- In the Design phase, select the consent message design.
- Customize the layout and styling as required.
- Preview the design before proceeding.
2.5 Publish
- Once all phases are completed, review the final preview.
- Click Publish to activate the cookie consent manager.
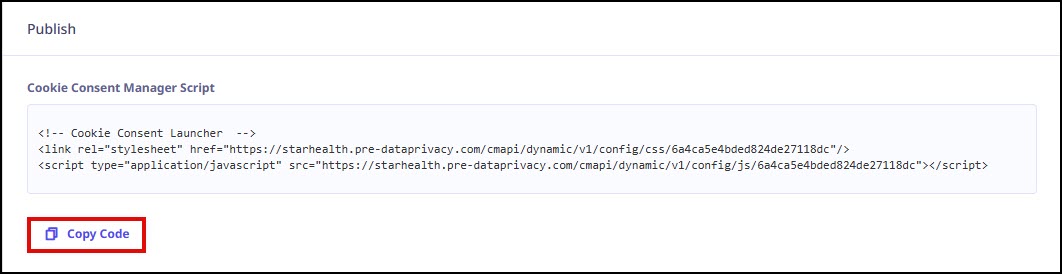
Step 3: Deploy Cookie Consent Manager Script
- Copy the Cookie Consent Manager Script.
- Paste the script into the website’s index.html file.
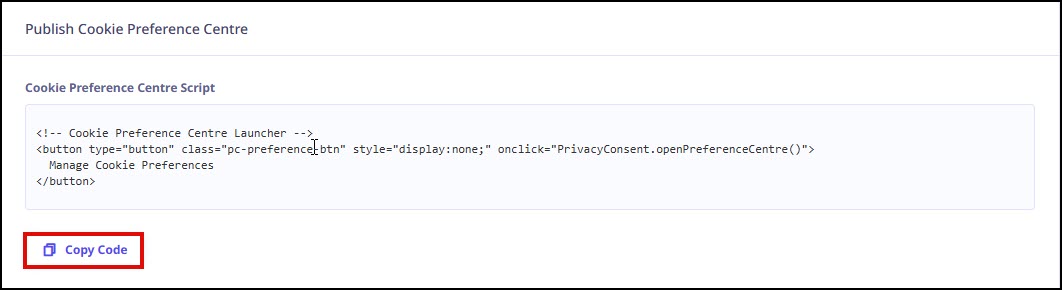
4.Deploy Cookie Preference Center Script
- Copy the Cookie preference center script.
- Paste the script into the website’s index.html file.
Step 4: Verify Cookie Consent on Website
- Navigate to the website where the changes are deployed.
- Verify that the cookie consent banner is displayed.
- Click Accept on the banner.
- Click Edit Cookies to modify cookie preferences if required.
Step 5: Cookie Consent Enforcement
Website owners must ensure that cookies are activated or blocked in accordance with the consent choices submitted by the user.
For cookie consent enforcement refer to, Cookie Consent Enforcement Integration Guide