
To add a Salesforce instance as a connector in Seqrire Data Privacy, follow these steps:
- Obtain Client_ID and Client Secret Values
- Add Connected App as an Instance in Seqrite Data Privacy Admin Console
1. Obtain Client_ID and Client Secret Values
To add Salesforce instance as a connector in Seqrite Data Privacy, complete the following Connected App prerequisite step in Salesforce Admin console.
To obtain the Client_ID and Client_Secret values for configuring Salesforce in the Seqrite Data Privacy application, follow these steps:
- Log in to the Salesforce organization you want to index using an administrator account.
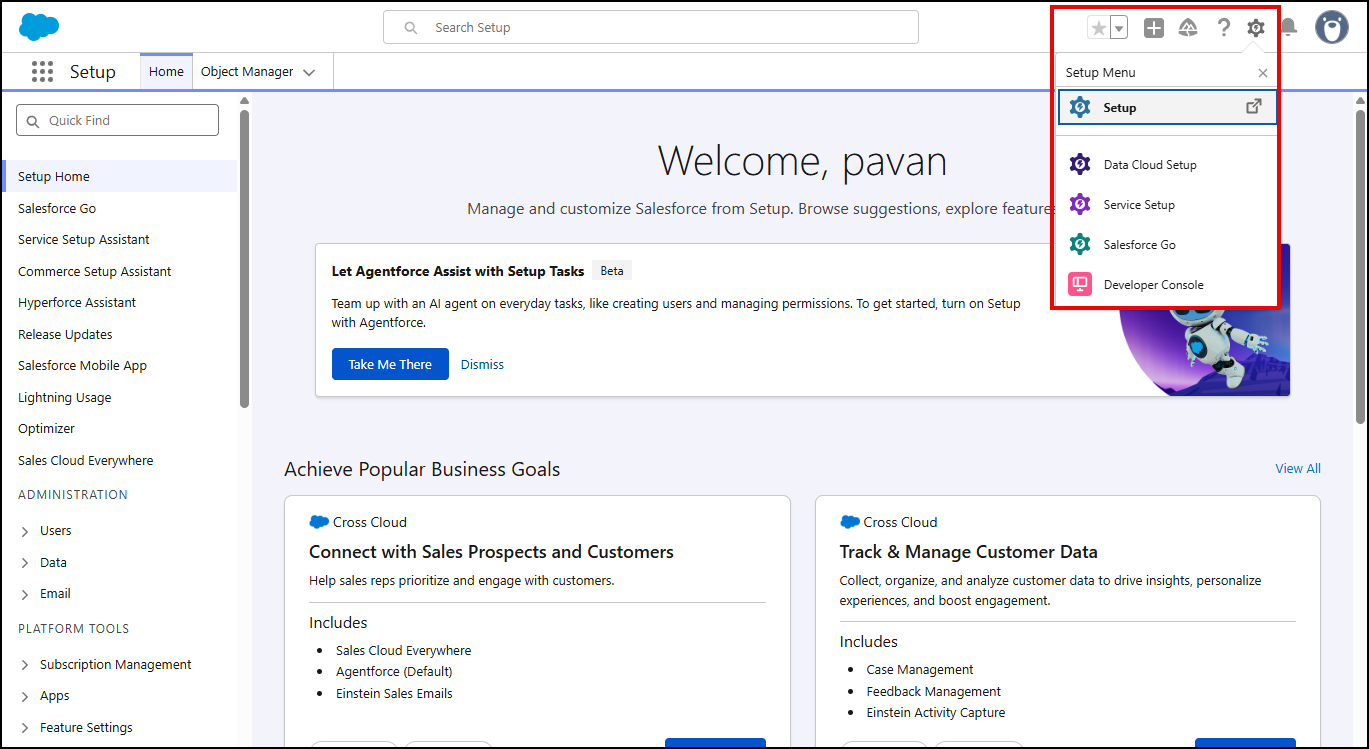
- Select Setup from the User Menu.
- In the left navigation menu, expand Create under App Setup and click Apps.
- On the Apps page, go to the Connected Application section and click New to create a new application that will use OAuth2 to access the organization.
- In the New Connected App page, fill in the details.
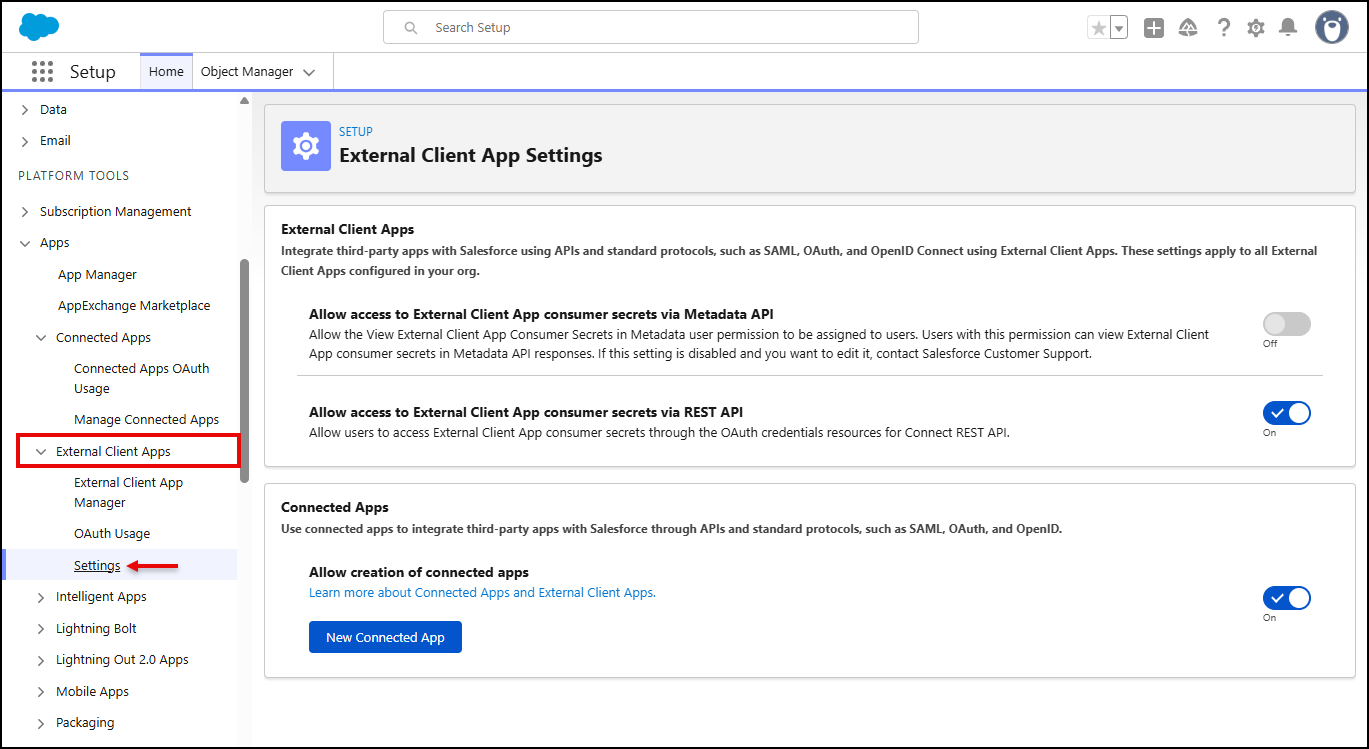
Note: If You are unable to create a Connected App, please make the sure the permission for creating Connected App is enabled in External Client App >> Settings.
In the Basic Information section,
- Enter Connected App Name and the API Name (Auto Populated based on Connected App name).
- Enter your email address in the Contact Email to receive important notifications and messages from the application.

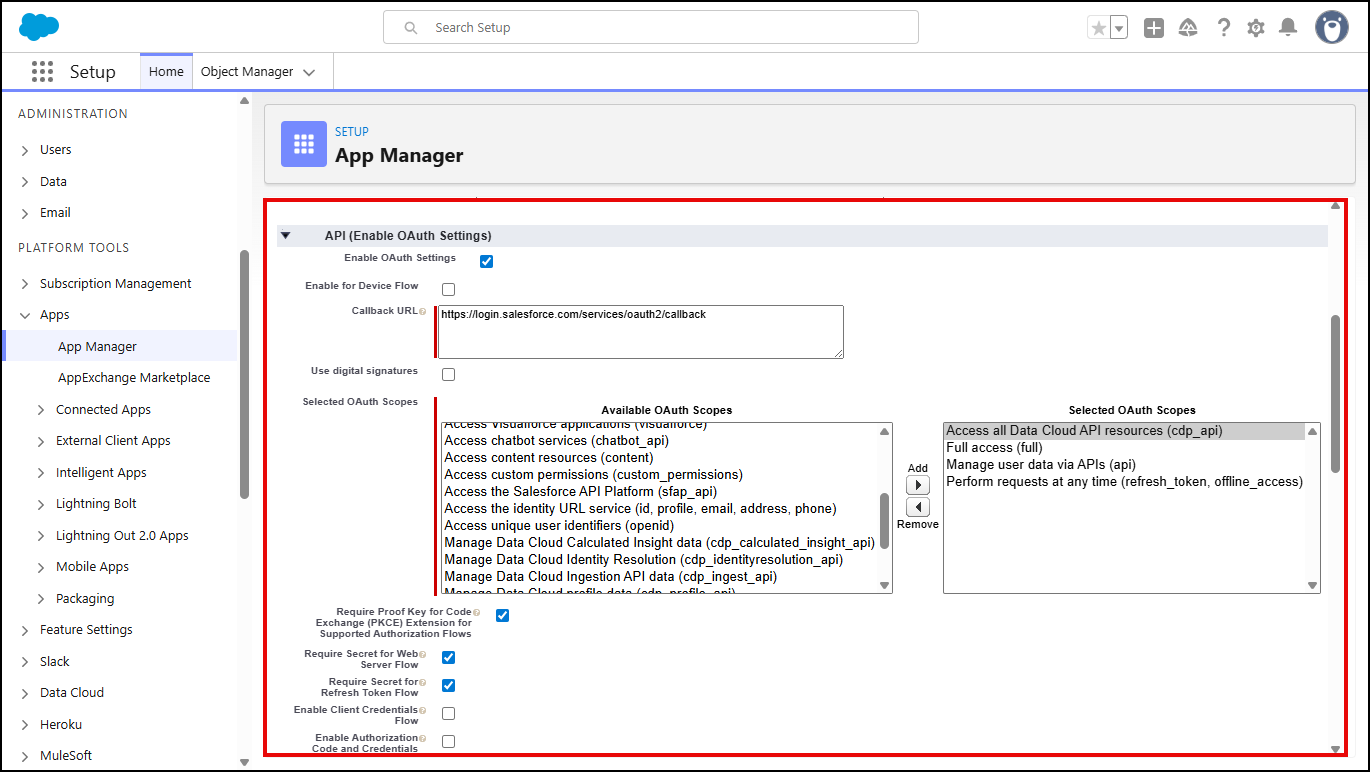
In the API (Enable OAuth Settings) section,
- Select the Enable OAuth Settings checkbox.
- In the Callback URL, enter secured URL (https://) as https://login.salesforce.com/services/oauth2/callback.
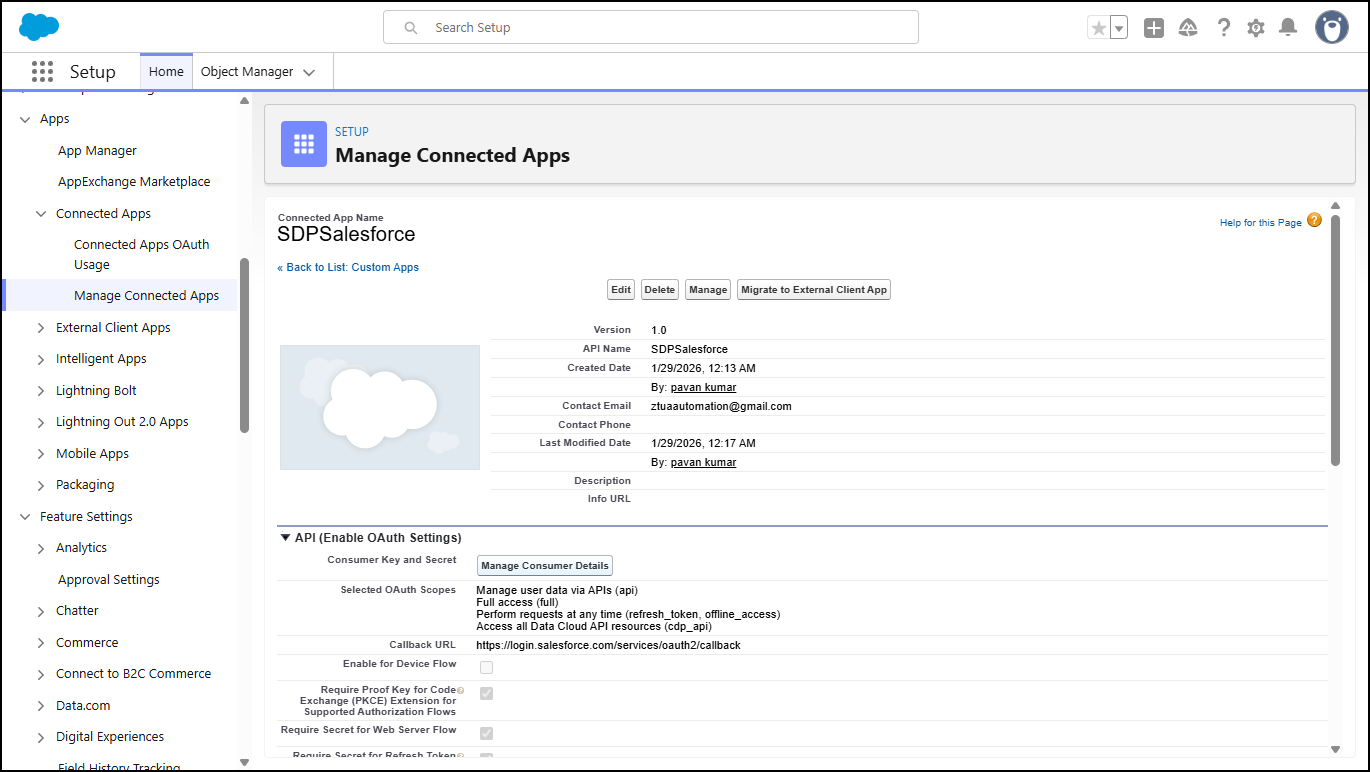
- From the Available OAuth Scopes list, select the following items and add these to the Selected OAuth list.
- Access at Data Cloud API Resources (cdp_api)
- Full access (full)
- Perform requests on your behalf at any time (refresh_token, offline_access)
- Manage User Data via APIs (api)
- Enable the Client Credentials Flow in the OAuth Settings.

- Click Save.
- Once the Connected App is saved, navigate to the page of your newly created connected application, and then locate the API (Enable OAuth Settings) section.
- Locate the Consumer Key value, which is your Client_ID, and copy it. Then, paste it into a secure reference document.
- Click Click to reveal button next to the Consumer secret field to reveal your Client_Secret value. Copy this value, and then paste it into your secure reference document.
- Save your reference document, and store it in a safe location.
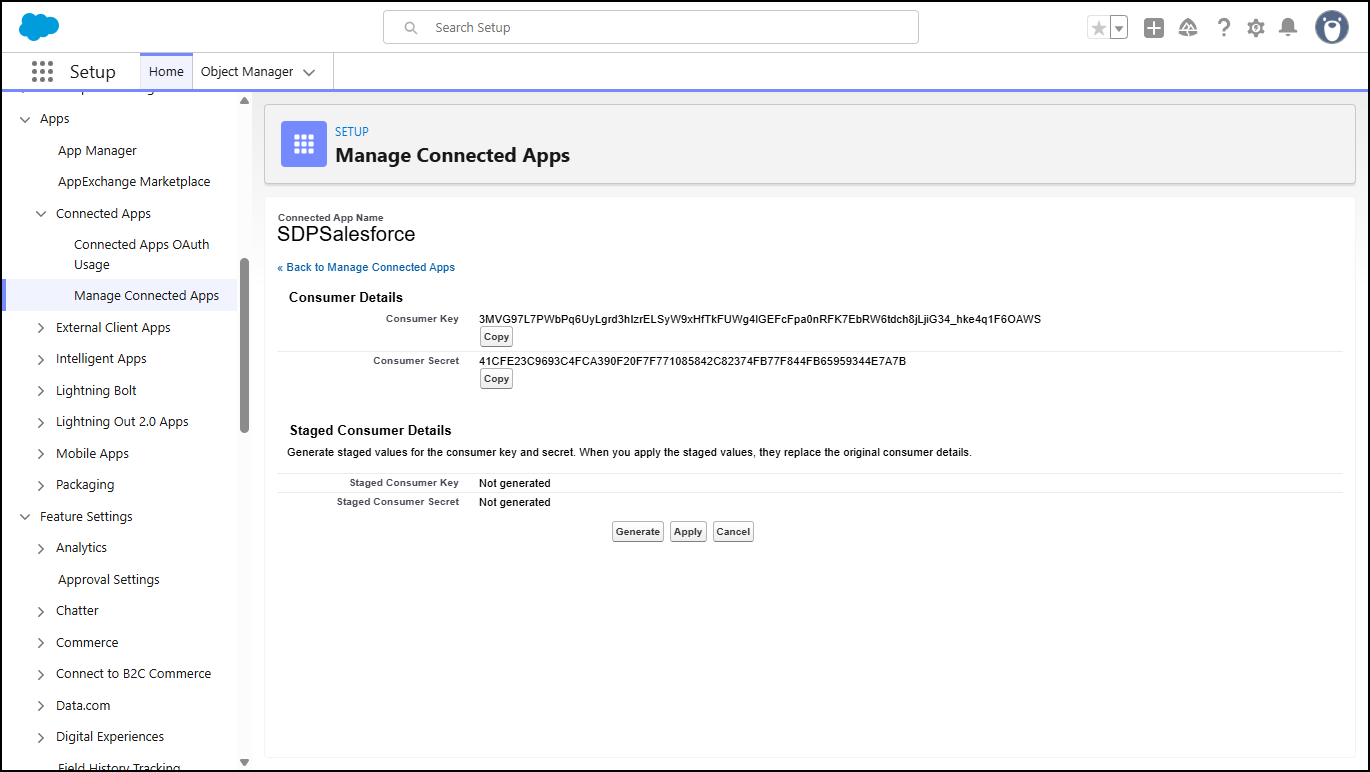
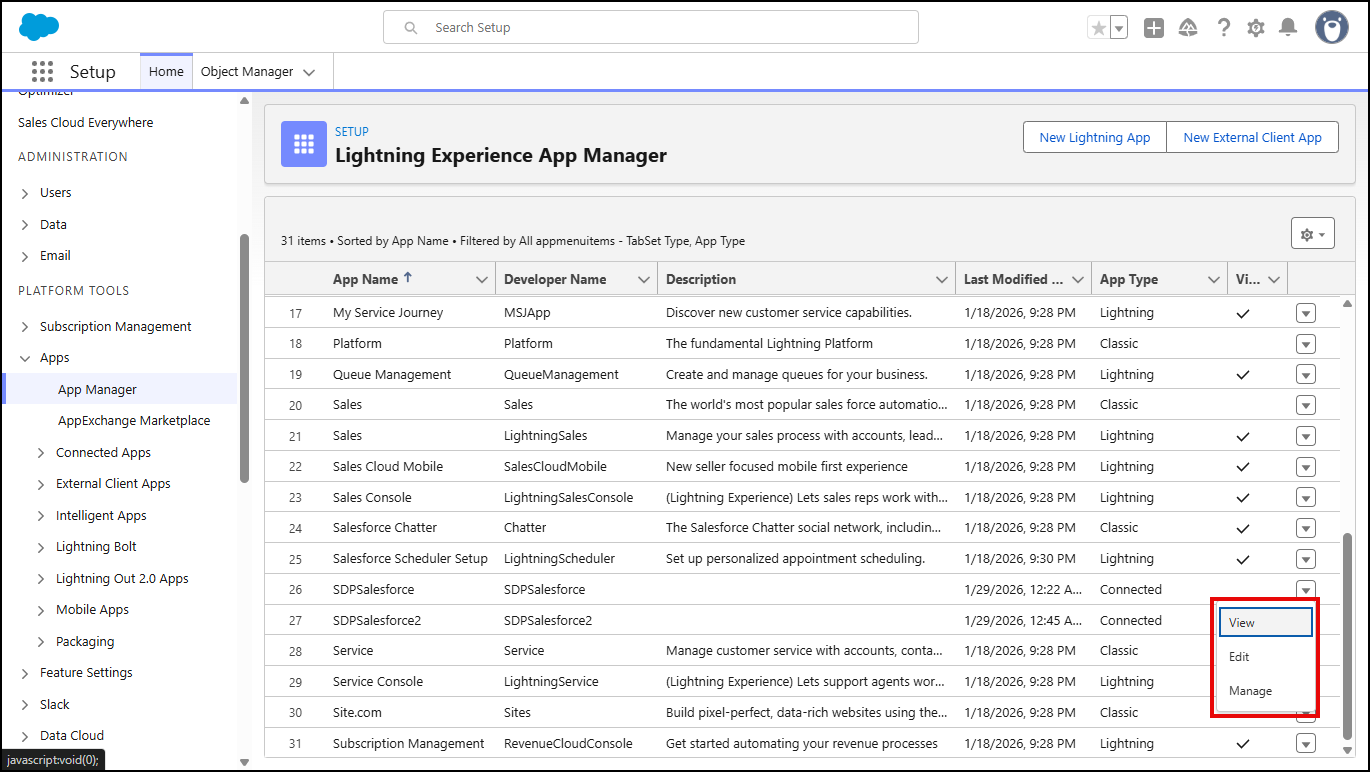
Note: To access Manage Consumer Details values in the future, go to: Setup >> Apps >> App Manager. Then click the name of the application in the Connected Apps list.
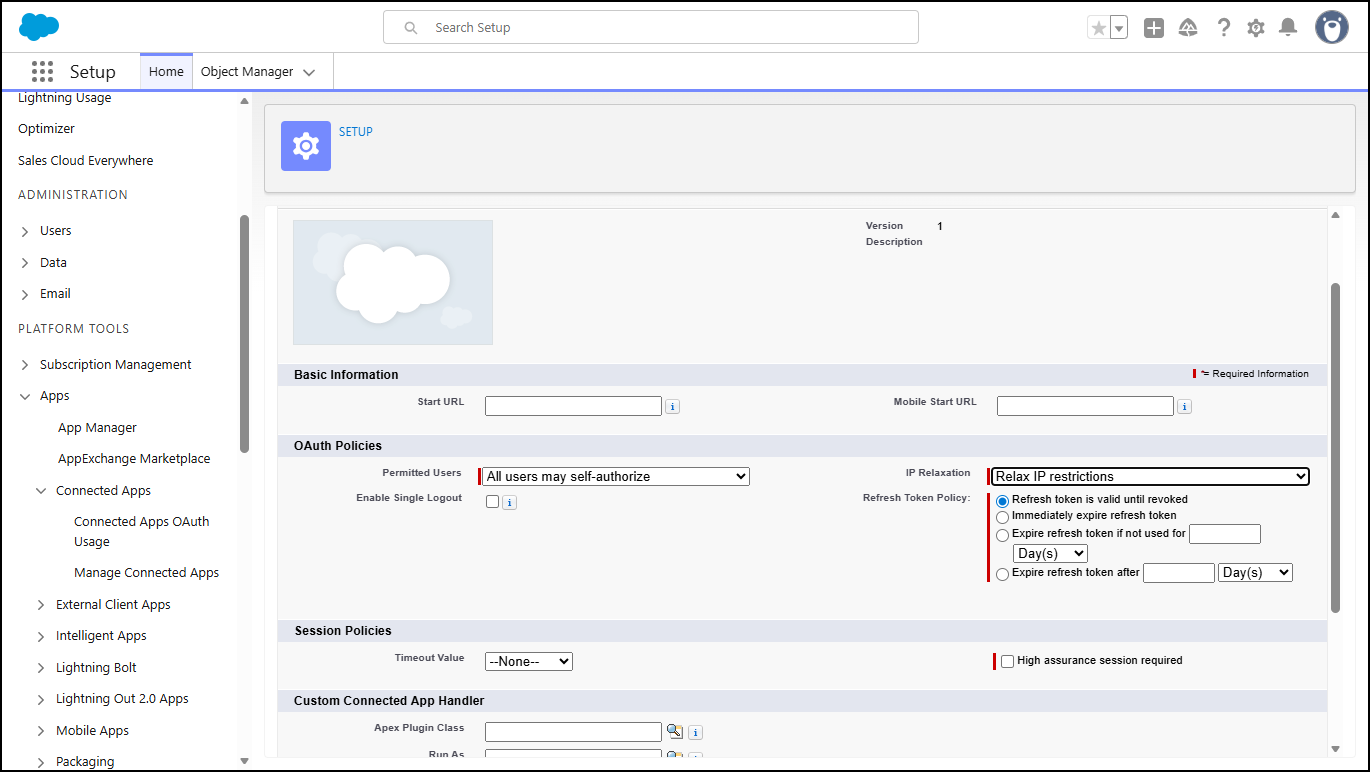
Note: Default IP Restrictions value is Enforce IP Restrictions, change it to Relax IP Restrictions.
2. Add Connected App as an Instance in Seqrite Data Privacy Admin Console
Follow these steps to configure Salesforce as a Connector:
- In the left navigation pane, click Discovery and Classification and then click Connectors.
Configured Data Sources page is displayed. - Select Salesforce from the configured data source list, and then click Add Instance.
- Enter Instance Details and Owner details:
- Name
- Description
- Process
- Client ID
- Client Secret
- Country
- City
- Time Zone
- Version
- User Name and Password (with Admin Role Permissions for Salesforce)
- Data Source Owner: The person who owns the data source and makes technical decisions about it.
- Business Owner: The person who is responsible for the business decisions about the data source.
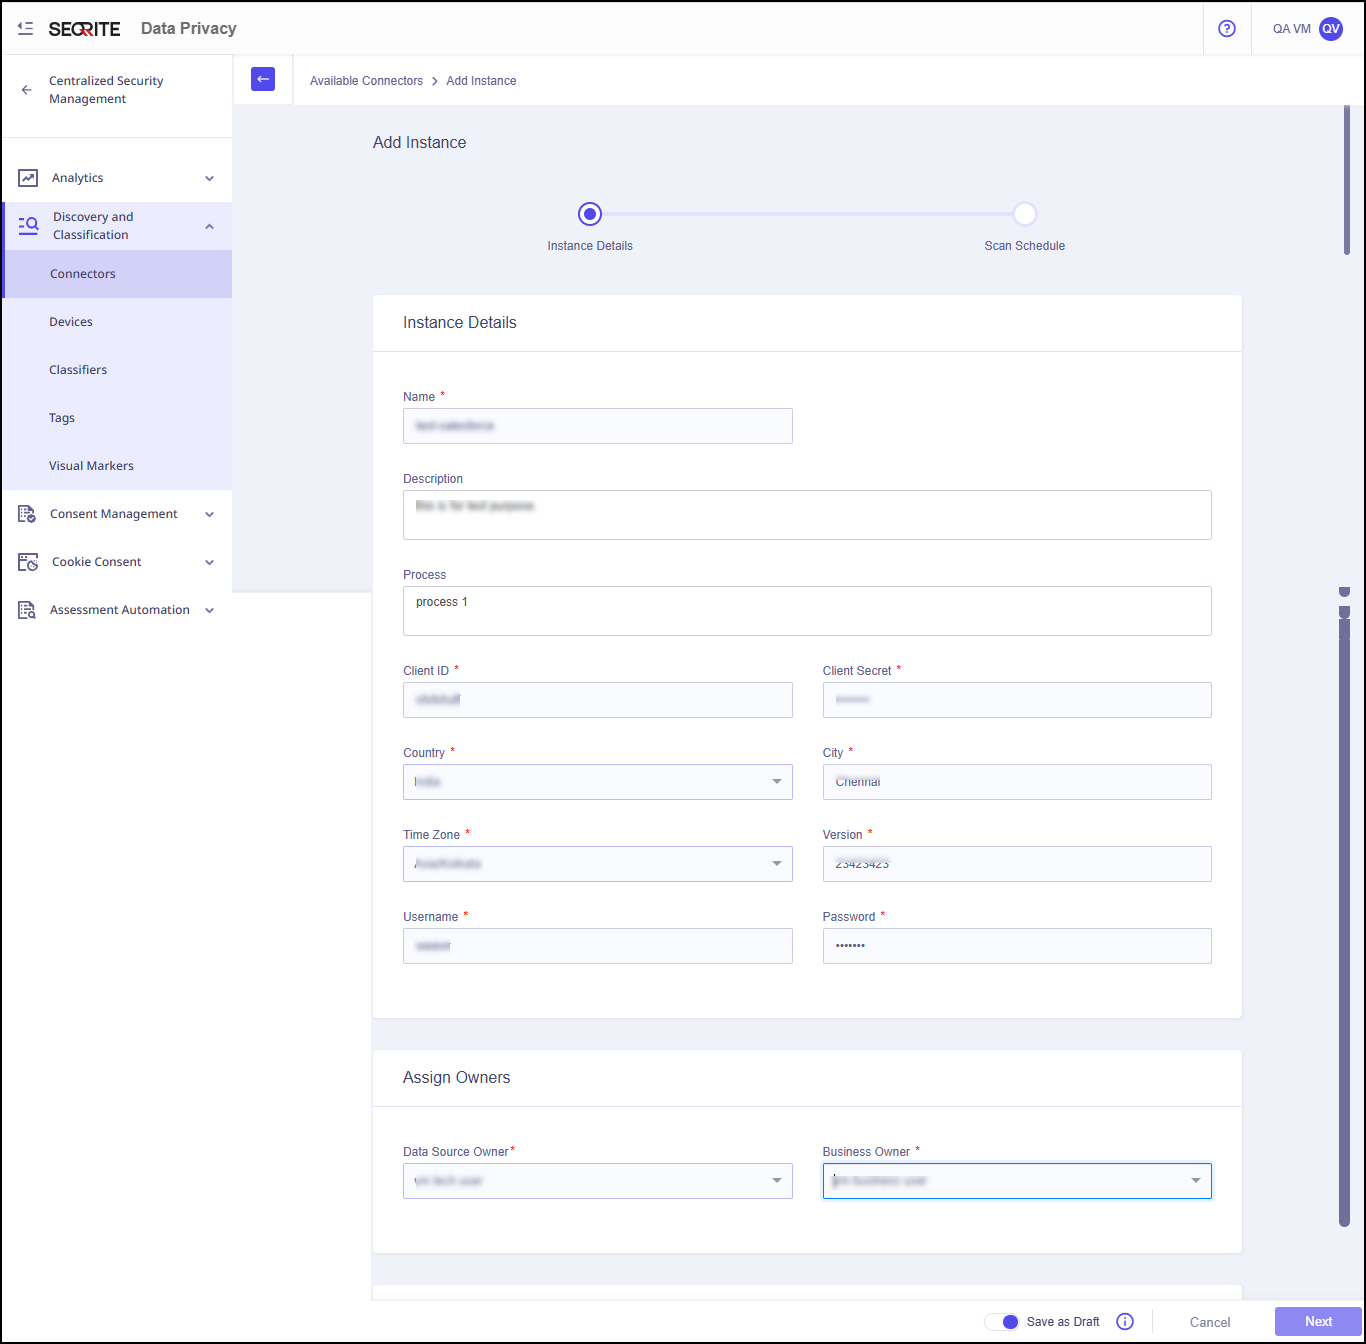
- Click Check Connection.
If the provided details are accurate, the connection with Salesforce will be established successfully.

- Click Next.
- Enter Scan Schedule/Scan Frequency details:
- Scan Frequency
- Deep Scan Frequency
Note:
- The data source will be available for scanning monthly on selected date.
- The data source will be scanned based on the user‑defined interval. A deep scan will be performed after the number of scan cycles specified by the user.
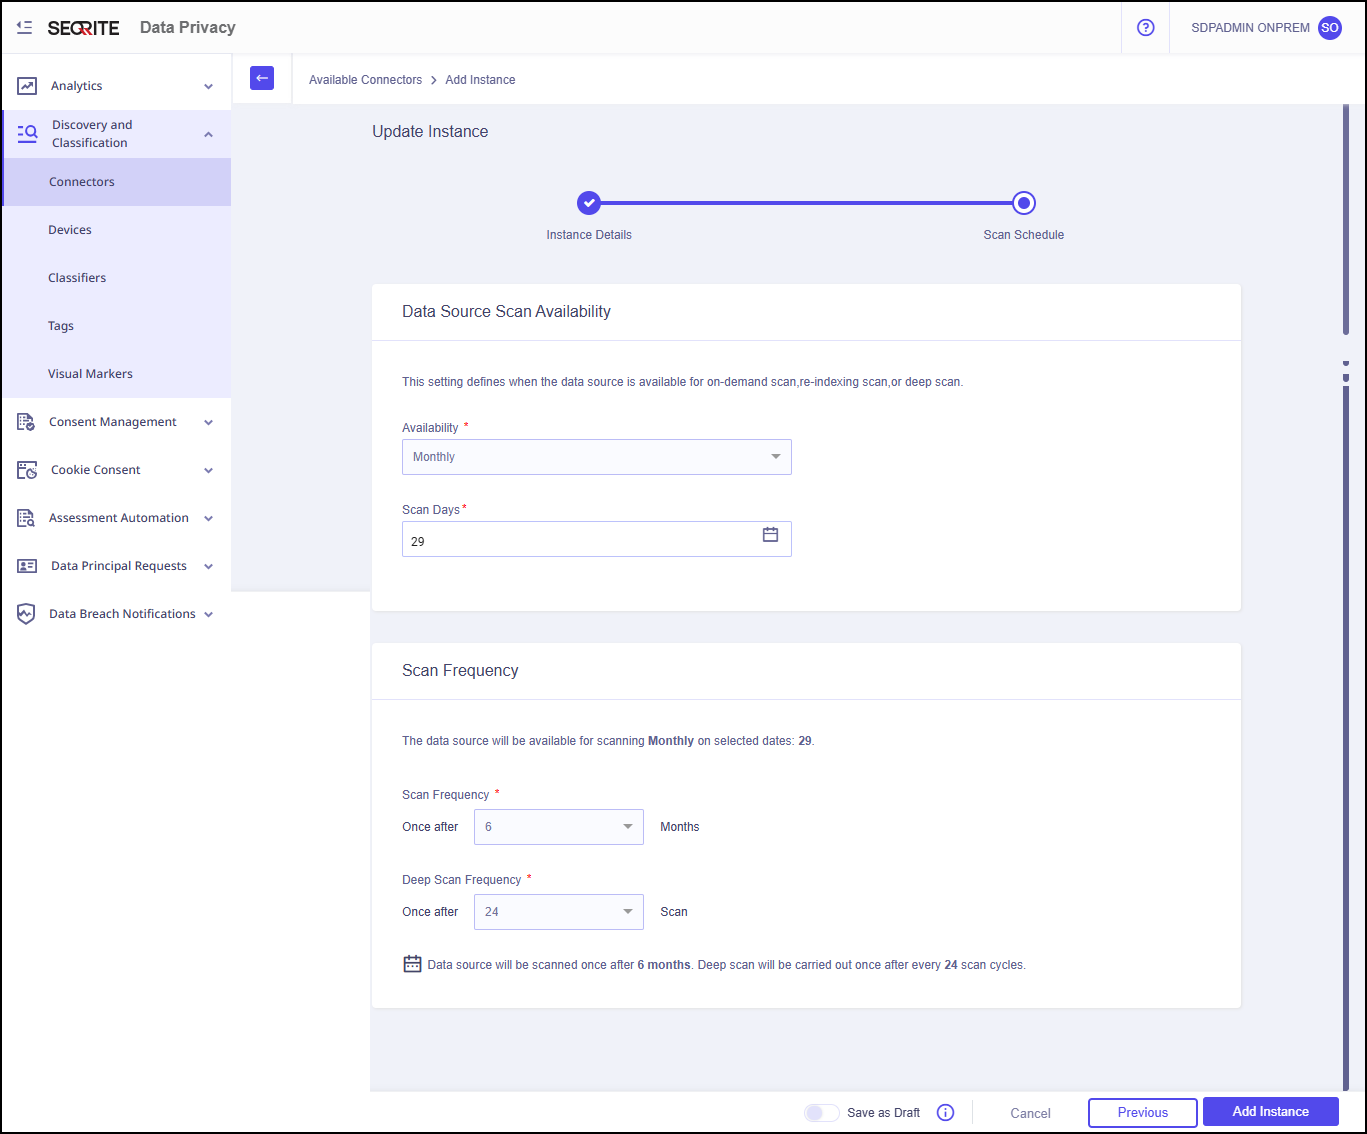
- Click Add Instance.
Instance of the data source is added successfully.