Pre-requisites
Before initiating the deployment of Seqrite Data Privacy in an On-Premise environment, it is crucial to ensure that the following prerequisites are met and configured:
- Terraform V1.4.2 needs to be installed on the machine from where scripts will be executed (the OS of this machine should be Ubuntu). This machine will act as a host.
- From the host machine, vSphere should be accessible.
- Admin access to VMWare vSphere is needed.
- Need the following information from VMWare/ vSphere:
- vSphere user name (with Administrator access)
- vSphere password
- vSphere host/IP
- Name of datastore
- Datacenter name
- Cluster name
- Network name
- Additional information
- IPv4 address (which will be assigned to the newly created machine)
- Domain (this will be assigned to machine)
- IP netmask
- Ubuntu 22.04 OS VM templates
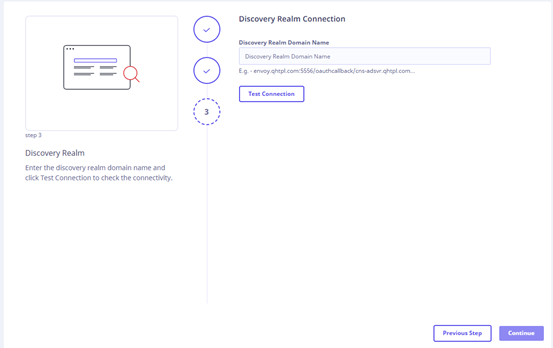
- Domain as well as SSL (For exposing the Discovery realm for secure communication with the Presentation realm)
Whitelisting of URLs and Ports
Whitelisting During Deployment
The Discovery Realm is created using a script. This script, during installation, downloads certain components from Internet. To facilitate this process, it is essential to whitelist the following URLs:
| Sr. No. | URLs/Domains | Ports | Comments |
|---|---|---|---|
| 1 | mehrwertmacher.github.io | 80, 443 | |
| 2 | *.github.com | 80, 443 | |
| 3 | googlecloudplatform.github.io | 80, 443 | |
| 4 | charts.bitnami.com | 80, 443 | |
| 5 | gcr.io/spark-operator/spark-operator | 80, 443 | |
| 6 | auth.docker.io | 80, 443 | |
| 7 | index.docker.io | 80, 443 | |
| 8 | hub.docker.com | 80, 443 | |
| 9 | production.cloudflare.docker.com | 80, 443 | |
| 10 | registry-1.docker.io | 80, 443 | |
| 11 | gcr.io | 80, 443 | |
| 12 | k8s.gcr.io | 80, 443 | |
| 13 | *. gcr.io | 80, 443 | Allow all subdomains of this domain, as data is sourced from various subdomains during downloads. |
| 14 | *.cloudfront.net | 80, 443 | Allow all subdomains of CloudFront, as the Elasticsearch Docker image is downloaded from dynamic URLs. |
| 15 | docker.elastic.co | 80, 443 | |
| 16 | quay.io | 80, 443 | |
| 17 | *.quay.io | 80, 443 | All subdomains of quay.io need to be whitelisted. |
| 18 | access.redhat.com | 80, 443 | |
| 19 | cdn.quay.io | 80, 443 | |
| 20 | cdn01.quay.io | 80, 443 | |
| 21 | cdn02.quay.io | 80, 443 | |
| 22 | cdn03.quay.io | 80, 443 | |
| 23 | *.amazonaws.com | 80, 443 | All services URLS of aws need to be white listed. |
| 24 | api.segment.io | 80, 443 | |
| 25 | api.snapcraft.io | 80, 443 | |
| 26 | *. snapcraft.io | 80, 443 | |
| 27 | asia-south1-docker.pkg.dev | 80, 443 | |
| 28 | *.pkg.dev | 80, 443 | |
| 29 | *.snapcraftcontent.com | 80, 443 | |
| 30 | *.cdn.snapcraftcontent.com | 80, 443 | |
| 31 | *.cloudflare.net | 80, 443 | |
| 32 | *.cdn.cloudflare.net | 80, 443 | |
| 33 | compass.mongodb.com | 80, 443 | |
| 34 | *.cloudfront.net | 80, 443 | |
| 35 | *.ubuntu.com | 80, 443 | |
| 36 | dl.bintray.com | 80, 443 | |
| 37 | *.bintray.com | 80, 443 | |
| 38 | docker.elastic.co | 80, 443 | |
| 39 | docker-auth.ea-registry-production.elastic.co | 80, 443 | |
| 40 | docker-auth.elastic.co | 80, 443 | |
| 41 | *. elastic.co | 80, 443 | |
| 42 | get.helm.sh | 80, 443 | |
| 43 | gethelm.azureedge.net | 80, 443 | |
| 44 | ghcr.io | 80, 443 | |
| 45 | googlecode.l.googleusercontent.com | 80, 443 | |
| 46 | *.googleusercontent.com | 80, 443 | |
| 47 | grafana.com | 80, 443 | |
| 48 | in.archive.ubuntu.com | 80, 443 | |
| 49 | ipv4only.arpa | 80, 443 | |
| 50 | pkg-containers.githubusercontent.com | 80, 443 | |
| 51 | *. githubusercontent.com | 80, 443 | |
| 52 | *. docker.com | 80, 443 | |
| 53 | production.cloudflare.docker.com | 80, 443 | |
| 54 | raw.githubusercontent.com | 80, 443 | |
| 55 | registry.ea-registry-production.elastic.co | 80, 443 | |
| 56 | registry.k8s.io | 80, 443 | |
| 57 | repo1.maven.org | 80, 443 | |
| 58 | storage.googleapis.com | 80, 443 | |
| 59 | *. projectcalico.org | 80, 443 | |
| 60 | *. googleapis.com | 80, 443 | |
| 61 | registry.terraform.io | 80, 443 | |
| 62 | *.terraform.io | 80, 443 | |
| 63 | releases.hashicorp.com | 80, 443 | |
| 64 | *.hashicorp.com | 80, 443 |
Note:
- The URLs listed above are necessary solely for the installation of the Discovery Realm. After the installation process is complete, they may be removed from the whitelist.
- It is advised to allow all URLs that begin with the mentioned domain and its subdomains.
Whitelisting During Application Lifecycle
The following URLs are essential for retrieving Seqrite Data Privacy builds from the Elastic Container Registry (ECR). This is a crucial requirement for the automatic recovery of any Seqrite Data Privacy component deployed within a container in the Kubernetes cluster.
| Sr. No. | URLs/Domains | Ports | Comments |
|---|---|---|---|
| 1 | 102539048997.dkr.ecr.ap-south-1.amazonaws.com | 80, 443 | |
| 2 | *.amazonaws.com | 80, 443 | All subdomains of AWS must be permitted. |
| 3 | hs-agent-comm.seqrite.com | 443 | This is a requisite for the agent workflow. |
| 4 | cbs.seqrite.com | 443 | This is a requisite for the agent workflow. |
| 5 | cbshef.seqrite.com | 443 | This is a requisite for the agent workflow. |
| 6 | download.quickheal.com | 443, 80 | |
| 7 | cbsdevice.seqrite.com | 443 | |
| 8 | cbssecured.seqrite.com | 443 | |
| 9 | 35bhfv3atb.execute-api.ap-south-1.amazonaws.com | 443 | |
| 10 | dlupdate.quickheal.com | 443 | |
| 11 | *.seqrite.com | 443 | |
| 12 | 3.111.89.140 | 80, 443 | This will be an inbound call. The Seqrite Data Privacy presentation will invoke the Discovery Realm API, which is hosted on-premises. |
Note: All URLs beginning with the domains and subdomains mentioned above are allowed.
Whitelisting After Deployment
The browser-based Data Management Application, residing within the Presentation Realm and hosted on the Seqrite cloud, interacts with the Discovery Realm by making API calls to retrieve data for the purpose of presentation. To enable this communication, the Discovery Realm will have to be exposed outside by creating appropriate rules in the firewall. The firewall configuration will require source IP. In this context, the source IP address for API calls from the Discovery Realm is 3.111.89.140.
For accessing the Data Management Application, whitelist the following URLs:
Deployment of Seqrite Data Privacy

Prerequisites
Before proceeding, ensure you have the following prerequisites in place:
- A host machine with Terraform installed.
- Access to the Seqrite Data Privacy deployment wizard with the necessary URL.
- A login user account on the host machine.
Procedure
Follow these steps to deploy the Seqrite Data Privacy on your host machine.
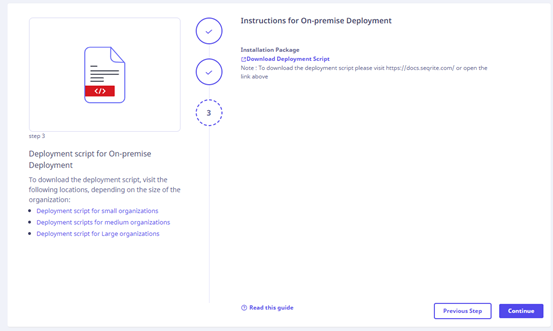
Step 1. Download the Seqrite Data Privacy Terraform Script
- Navigate to the URL specified in the Seqrite Data Privacy deployment wizard.
- Download the zip file containing the Terraform script.
-
Save the downloaded zip file on the host machine to the /home/{USER} directory, where {USER} represents your login username.

Step 2. Extract the Downloaded Zip File
- On the host machine, extract the downloaded zip file.
- Ensure that the extracted folder is named "qh_hawkkscan."
- The folder should be located at /home/${USER}/qh_hawkkscan.
Step 3. Generate SSH Key Pair
- Run the following command to create an SSH key pair:
ssh-keygen -t rsa
This will generate a private key and a public key.
Step 4. Edit the Hostname Configuration
- Locate the "hostname_vm.txt" file within the "qh_hawkkscan" folder.
- Edit this file to update the IP addresses and hostnames of the target machines as needed.
Step 5. Modify Terraform Variable Values
- Navigate to the "master" folder within the "qh_hawkkscan" directory: /home/${USER}/qh_hawkkscan/master.
- Edit the "terraform.tfvar" file to update the following variable values according to your requirements:
. vsphere_user: The user account for vSphere with administrator privileges.
. vsphere_passwd: The password for the vSphere user.
. vsphere_host: The IP address or DNS name of the vSphere server.
. vsphere_dc: The name of the vSphere datacenter.
. vsphere_ds: The name of the vSphere datastore.
. vsphere_cluster: The name of the vSphere cluster.
. vsphere_network: The name of the vSphere network.
. vsphere_temp: The name of the template to be used.
. name_vm: The desired name for the newly created virtual machine. It should match the name specified in the "hostname_vm.txt" file.
. cpu: The number of CPUs required for the virtual machine.
. memory: The amount of memory (RAM) required for the virtual machine.
. local_user: The user account on the local machine where Terraform and the script are saved.
. machine_ip: The IP address to be assigned to the newly created virtual machine. Ensure it corresponds to the name specified in the "hostname_vm.txt" file.
. domain: The domain name to be assigned to the newly created virtual machine.
. ipv4_netmask: The IPv4 netmask for IP addressing. - In the "worker1," "worker2," and "worker3" folders, edit the "terraform.tfvar" file in each folder to update the same variables mentioned above along with the following variables:
. master_ip: This refers to the IP address of the master machine, which should match the address specified in the master variable file.
. master_user: This is the username associated with the master machine.
. master_passwd: This password corresponds to the master machine’s login credentials.
Step 6. Initialize and Execute Terraform Commands
- From the master folder ("/home/${USER}/qh_hawkkscan/master") execute the following commands:
terraform initterraform planterraform apply
- From the worker1, worker2, worker3 folder execute the following commands:
terraform initterraform planterraform apply
Step 7: Post-Deployment Actions
- After completing the deployments, the Discovery Realm will be deployed on-premises.
- To make the Discovery Realm accessible externally, configure the necessary firewall rules.
- Configure domain and SSL settings for the firewall NAT rule to ensure proper functionality.


