Adding devices
To add a new device, follow these steps:
-
Log on to the Seqrite EMM console and in the left pane, click Devices.
-
On the Devices page, click Add Device available on the right-hand side. Click one of the following options.
-
Add: Click Add to add a device.
-
Import: Click Import to import a list of devices.
The Add Device page is displayed.
-
-
Enter the Device Name and Ownership and then assign Owner and Group.
-
Click Save.
Enrollment for Android
Device Enrollment is the process of enrolling the mobile device with the Seqrite Enterprise Mobility Management console. After enrollment, the mobile device users become members of the Seqrite Enterprise Mobility Management console. When you complete the enrollment, you can manage the device functionality, configurations, and perform the actions remotely. The device can be enrolled using Email/SMS, QR Code, or Enrollment with ADO Enablement.
You can enroll your device in the following ways using Seqrite Enterprise Mobility Management for device management option:
a. Enrollment using Email/SMS
b. Enrollment using QR Code
c. Enrollment using ADO enablement
d. Android Enterprise Enrollment using AMA
Enrollment using Email/SMS
- On the Seqrite EMM console you can submit the request for enrollment in 2 ways as follows:
- Navigate to the Users tab in the left pane and select the user from the list.
From the Take Action list, select Enrollment Request > For Device Management > Using Email / SMS and click Submit.
- Navigate to the Devices tab in the left pane and select the device that is to be enrolled from the list. From the Take action list, select Enrollment Request > For Device Management > Using Email / SMS and click Submit.
- Navigate to the Users tab in the left pane and select the user from the list.
- After sending the enrollment request, the device user will receive the enrollment details (Company Code and OTP) through email and SMS as shown below.
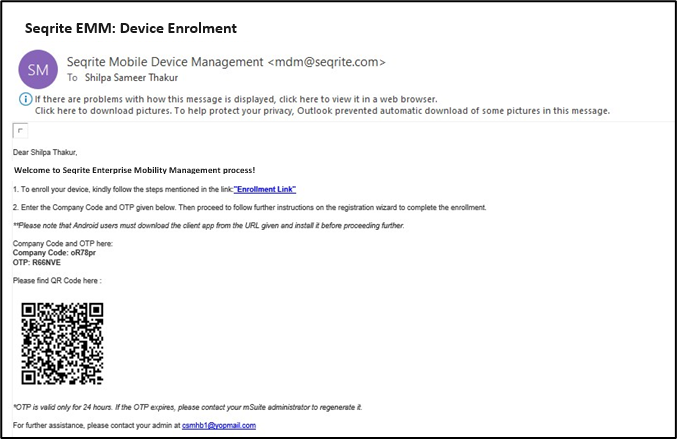
- Tap the enrollment link, you are navigated to the Seqrite App store.
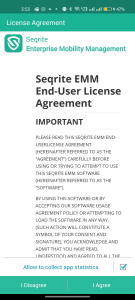
- Click Download. The file is downloaded on your device. Tap the downloaded file to start the app installation. The License Agreement screen is displayed.
- On the License Agreement screen, tap I Agree.
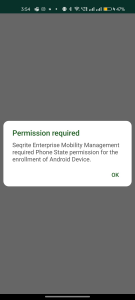
- On the Permission required screen, tap OK.

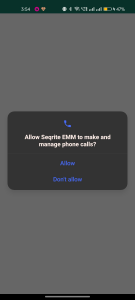
- Tap Allow to grant the app permission to manage phone calls.

- Tap Proceed to grant device admin permission.

- Enter the displayed captcha verification code, which may appear only on some devices. On certain devices, you may see only the Activate option. Tap Activate.
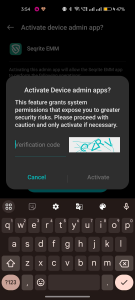
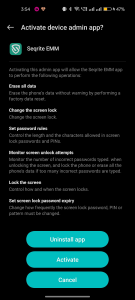
- Tap Activate on the Activate device admin app screen.

- Enter the enrollment details that the user received in the email and tap Enroll or use the Scan QR Code option to scan the QR code received in email.

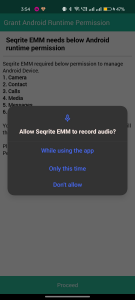
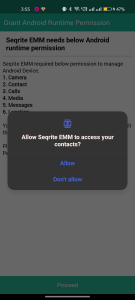
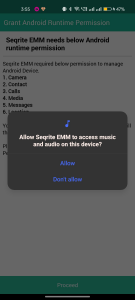
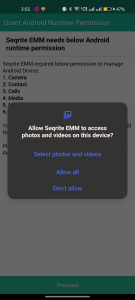
- Tap Proceed to grant Android Runtime Permission.

- To allow Seqrite EMM to take pictures, record video and audio, tap While using the app.

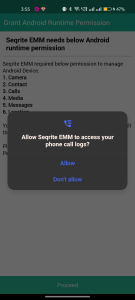
- To allow Seqrite EMM to access phone logs, contacts and determine nearby devices, tap Allow.
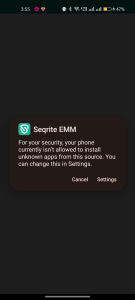
- Tap Settings to allow installation of the app.
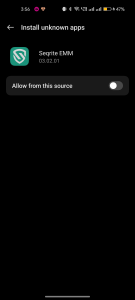
- Enable toggle to allow installation of apps from this source.
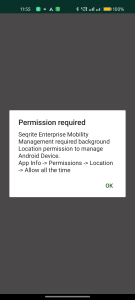
- Tap OK to grant background location permission to the Seqrite EMM app.
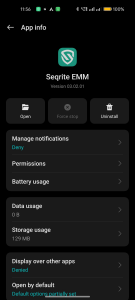
- Tap Permissions on App Info screen.
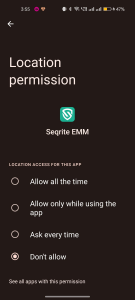
- Tap back arrow and navigate to Location Permission. On the Location Permission screen select Allow all the time.
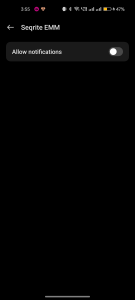
- Tap back arrow and enable the option to allow notifications.
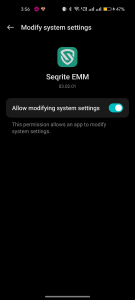
- Tap back arrow and enable the option to allow modify system settings.
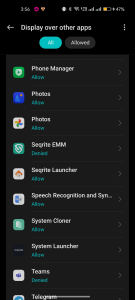
- Tap back arrow and select Seqrite EMM on the Display over other apps screen.
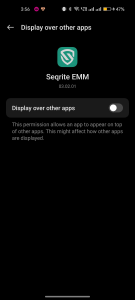
- Enable the toggle to allow Seqrite EMM app to display over other apps.
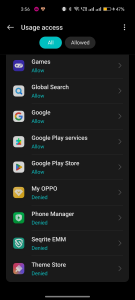
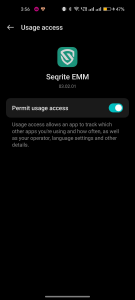
- Tap back arrow and select Seqrite EMM on the Usage access screen.
- Tap back arrow and enable the toggle to Permit usage access for Seqrite EMM app.
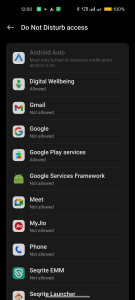
- Tap back arrow and select Seqrite EMM on Do Not Disturb screen.
- On the Do Not Disturb screen enable the toggle Allow Do Not Disturb and tap Allow.

The Seqrite EMM app home screen is displayed. - Tap the icon in the centre of the screen to grant device accessibility permission.
- Tap Seqrite EMM to enable accessibility permission for the Seqrite EMM app.
- Tap Allow to let the Seqrite EMM app always run in the background.
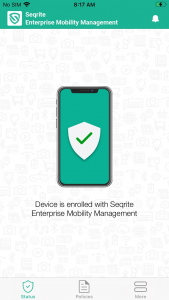
Seqrite EMM app is enrolled.


Enrollment using QR Code
In this process, the admin generates a QR Code on the Seqrite Enterprise Mobility Management console and scans the generated QR code on console through the Seqrite EMM app on the device. Alternatively, the generated QR code can be printed and shared with the users for scanning through the device.
Action on Seqrite EMM Console
- On the Seqrite EMM console, you can perform the enrollment using QR code in 2 ways as follows:
- Navigate to the Users tab in the left pane and select the user from the list.
From the Take Action list, select Enrollment Request > For Device Management > Using QR Code and click Submit.
- Navigate to the Devices tab in the left pane and select the device that is to be enrolled from the list.
From the Take Action list, select Enrollment Request > For Device Management > Using QR Code and click Submit.
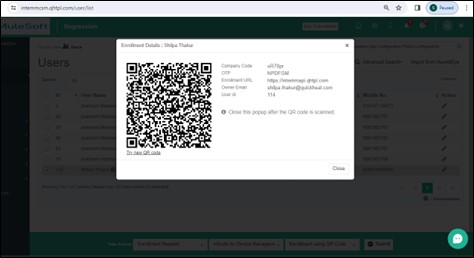
A QR Code is generated and displayed on the Seqrite Enterprise Mobility Management console. You will need to scan this QR code while installing the Seqrite Enterprise Mobility Management app on the device.
- Navigate to the Users tab in the left pane and select the user from the list.
Installing Seqrite EMM on Android device
You must download and install the Seqrite EMM app on your device first before you can proceed with the enrollment process.
- On your device, open the link in your browser,
- Click Download for Seqrite EMM. A file is downloaded on the device. Tap the downloaded file to start the installation process and tap Install.
- the License Agreement screen, tap I Agree.

- On the Permission required screen, tap OK.

- Tap Allow to grant the app permission to manage phone calls.
- Tap Proceed to grant device admin permission.

- Tap Activate to activate device administrator.
- Tap Scan QR Code to scan the QR code displayed on the Seqrite EMM console or shared with user (as described earlier).

- Tap Allow to allow Seqrite EMM app to take pictures and record video.

- Tap Proceed to grant Android runtime permissions as requested.
- Tap Allow to grant the respective permissions.


- Tap Settings to allow installation of app.

- Enable the toggle to allow unknown apps to be installed.

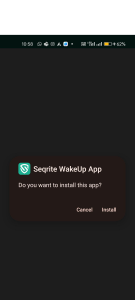
- Tap INSTALL to install the Seqrite WakeUp app.
- Tap DONE on the Seqrite WakeUp App screen.
- Enable the toggle to modify system settings.

- Enable the toggle to permit usage access.

- Enable the toggles for Seqrite EMM and Seqrite WakeUp App.
- Seqrite EMM app is enrolled.
- Tap on the centre of the displayed icon and grant the device accessibility permissions as requested.

Enrollment using ADO Enablement
You can do enrollment using ADO in the following two ways:
- Using QR codes
- Using ADB (Android Debug Bridge).
The ADB is a command tool that allows communication between a computer and a connected Android device.
ADO Enrollment using QR Codes
For enrollment using ADO enablement, you can either use a new device or you need to perform a factory reset on your device.
Note: When you perform a factory reset, all the data on the device is permanently deleted. Ensure that you take a backup of your data.
A. Performing a factory reset on your phone
- On the device, tap Settings > System > Reset. Please note that the terminology in your device may differ.
- Tap Reset Phone.
A Welcome screen is displayed after a factory reset of the device.
Next, you need to do ADO enrollment of your device using a QR Code.
B. Enrollment of a device using QR code
The admin or the end user can both enroll the device.
- If you (admin) are enrolling the device, you can use the QR codes displayed on the Seqrite Enterprise Mobility Management console during the enrollment process in either of the following ways.
- Navigate to the Users tab in the left pane and select the user from the list.
From the Take Action list, select Enrollment Request > For Device Management > Using ADO Enablement and click Submit.
- Navigate to the Devices tab in the left pane and select the device that is to be enrolled from the list. From the Take action list, select Enrollment Request > or Device Management > Using ADO Enablement and click Submit.
- Navigate to the Users tab in the left pane and select the user from the list.
QR codes are generated on the Seqrite Enterprise Mobility Management console that need to be scanned later on the device.
- If the user is performing the enrollment, the user can scan the QR codes that are shared by admin with the user.
- On the Welcome screen, quickly tap 6-7 times below the word Welcome. Devices may show “Welcome”, “Hi” or “Hello” as per the device models. A QR code scanner appears.
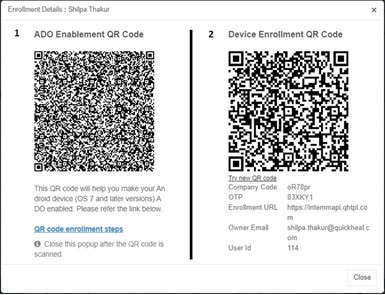
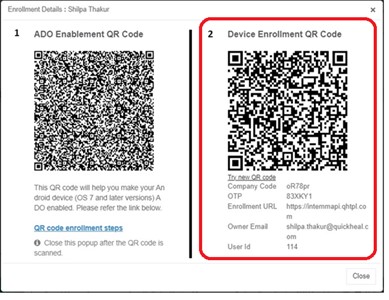
If the scanner does not appear, you may need to connect to the Internet and download a QR code scanner application. - Scan the first QR code (ADO Enablement QR Code) displayed on the Seqrite Enterprise Mobility Management console. Alternatively, the end user performing the enrollment process can scan the QR code shared by admin or received by email.
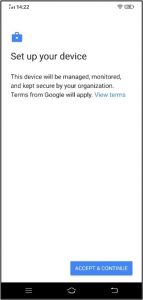
- Next, choose the appropriate option to connect to the Internet. You are redirected to Set Up Your Device screen. Tap ACCEPT & CONTINUE.
The Seqrite EMM app is downloaded on your device and displayed on the Home screen.
- Tap Seqrite EMM app. You are redirected to the license agreement screen.
- Tap I Agree. You are redirected to the permission required dialog box.

- Tap OK.
- Tap Allow to allow Seqrite EMM to manage phone calls.

- On the Enrollment Details screen, tap Scan QR Code.
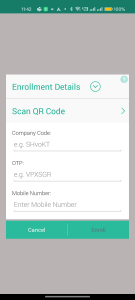
- Scan the second QR code displayed on the Seqrite EMM console.
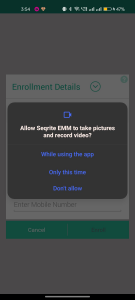
- Tap Allow to allow Seqrite EMM to take pictures and record video. You are redirected to Device Enrollment screen.
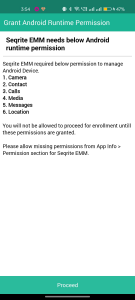
- Tap Proceed to grant Android runtime permission.
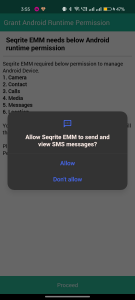
- To allow Seqrite EMM to send message, and access your phone call logs, tap Allow.

- Enable the toggle on modify system settings screen.

- Tap back and select Seqrite EMM on Apps with usage access screen.

- Enable the toggle to Permit usage access.
- Enable the toggles for Seqrite EMM and Seqrite WakeUp App on the Autostart screen. Seqrite Enterprise Mobility Management app is enrolled.

ADO Enrollment using ADB
Activating Device Owner Mode
Android Debug Bridge (adb) is a command line tool that allows communication between a computer and a connected Android device. This method is recommended for Device Owner provisioning only when the device cannot be provisioned using Scan QR Code for ADO.
This method uses Android Debug Bridge (or ADB) to provision devices as Device Owner and is applicable for Android devices 5.0 or later versions.
Prerequisites
- Ensure you do not have any Google account setup on your device.
- Android Debug Bridge (ADB) binary must be downloaded and installed on your computer.
- When trying to open the ADB zip file, if the platform tool folder is not visible, then use the Windows explorer to open the zip folder.
- When installing ADB, its environment variable path should be defined on the same computer where the ADB is to be configured and device owner is to be enabled.
- The Device Owner enrollment is applicable only to the devices that have Android devices 5.0 or later versions.
Activating Device Owner Mode using ADB
Step 1
Download and install the latest Seqrite EMM application on your Android device.
URL: https://dlupdate.quickheal.com/seqrite_msuite/mdmprod/builds/cloud/mSuite_Agent.apk
Short URL: https://www.seqrite.com/app-store/
For downloading and installing steps, see Installing Seqrite Enterprise Mobility Management on device.
Step 2
Download and install the Android Debug Bridge (ADB) binary on your computer.
Windows: https://dl.google.com/android/repository/platform-tools-latest-windows.zip
Mac: https://dl.google.com/android/repository/platform-tools-latest-darwin.zip
Linux: https://dl.google.com/android/repository/platform-tools-latest-linux.zip
Step 3
You can use either of the steps to access the command window to run commands.
- After the ADB Zip file is downloaded, extract the files to your PC drive.
- Copy the directory path of the file up to adb.exe file in the platform-tools folder.
- On your computer, right-click MyPC/MyComputers > click Properties > Advance System settings.
- In System Properties dialog, click Environment Variables.
- In System Variables section, click Path > Edit > add the selected path in the path section.
- Enter adb in command prompt. If “adb” command is not recognized, try restarting your computer or try installing the drivers for the specific devices.
Step 4
Go through the setup wizard WITHOUT adding a Google account. If you accidently added an account, simply remove the account from the Settings app once you finish the setup wizard.
Connect your device to the computer with USB (it is considered that the device USB drivers are already installed on your computer).
Your device might prompt you with a trust dialog. Click Accept.
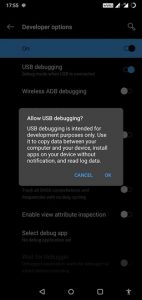
To enable the Developer option on your device:
- Go to Device > in device Setting, enable USB debugging option from Developer option. Make sure the Device setting has the Developer option.
- Go to About device (Steps may differ by models), and to turn on the Developer option, click the Build number field 7 times.
- Go back to Settings > Developer > enable USB debugging.
- Plug the device to the computer. Your device may prompt you with a trust dialog. Click Accept.
- Further the device asks for the trusted connection, select the Always allow from this computer check box.
Step 5
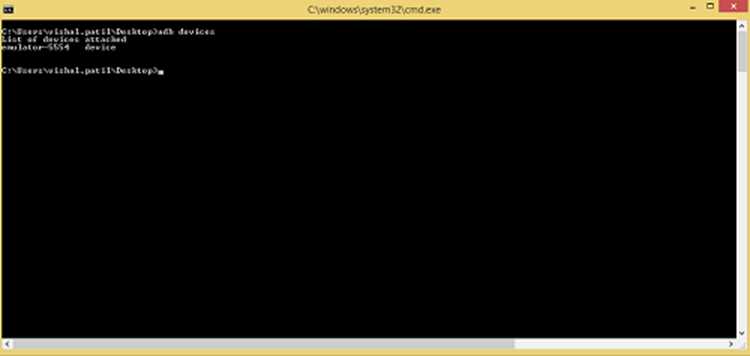
On your computer, open the command prompt and run the following command to initialize ADB:
Command
c: UsersUser>adb devices
Result
List of devices attached
3100875ea5ec6300 device
Note: Every device will have a unique device name.
After this command, the connected devices would be displayed on your command prompt window.
If it is a new device, go through the setup wizard without adding a Google account.
If it is an old device, then remove the Google account or any other account from your devices Settings.
Step 6
Run the following command to set the Seqrite Enterprise Mobility Management app as the device owner of the device:
Command
adb shell dpm set-device-owner com.seqrite.client/.components.receivers.MainDeviceAdmi nReceiver
Result
Device owner set to package com.seqrite.client
Active admin set to component
{com.seqrite.client/com.seqrite.client.components.receivers.MainDeviceAdminReceiver}
- This result shows that the ADO enablement is successfully completed.
- Repeat the above-mentioned steps for all the devices.
- After Seqrite Enterprise Mobility Management is setup as the device owner, the device enrollment screen is displayed and with successful enrollment, the user will be able to access the Seqrite Enterprise Mobility Management app dashboard.
Troubleshooting
Google or any account is present on the device.
The following screen is displayed when the device has the User account or Google account, or any other account configured on it. Even after removing the accounts, if you are still getting the same error, then try performing a Factory Reset of the device.

Seqrite Enterprise Mobility Management client is already a device owner.
The following screen is displayed when the Seqrite Enterprise Mobility Management client application is already provisioned as a Device Owner.

Device name not listed at the time of installation.
If your device is not getting listed when you enter the adb devices command in command prompt, then try to install the specific drivers for that device.
Device ownership is assigned to a third-party application.
If the issue persists, then the device may have been already provisioned as device owner by the OEM provider (manufacturer) and hence the device cannot be provisioned again with Seqrite Enterprise Mobility Management client. In this case, you can enroll the Seqrite Enterprise Mobility Management client with regular enrollment process by enabling Device Administrator.
Enrollment for iOS
In this process, the admin generates a QR Code on the Seqrite EMM console and scans the generated QR code on console through the Seqrite EMM app on the device. Alternatively, the generated QR code can be shared with the users for scanning through their devices.
Action on Seqrite EMM Console
- On the Seqrite EMM console, you can perform the enrollment using QR code in 2 ways as follows:
- Navigate to the Users tab in the left pane and select the user from the list.
From the Take Action list, select Enrollment Request > For Device Management > Using QR Code and click Submit.
- Navigate to the Devices tab in the left pane and select the device that is to be enrolled from the list. From the Take action list, select Enrollment Request > For Device Management > Using QR Code and click Submit.
- Navigate to the Users tab in the left pane and select the user from the list.
A QR Code is generated and displayed on the Seqrite EMM console. You will need to scan this code while installing the Seqrite EMM app on the device.

Installing Seqrite Enterprise Mobility Management on iOS device
You must download and install the Seqrite EMM app on your device first before you can proceed with the enrollment process.
- On your device, open the link in your browser, https://www.seqrite.com/app-store/
- Download the Seqrite EMM app for iOS on your device.
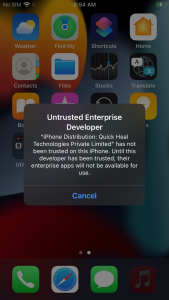
- On the device go to Settings > General > VPN & Device Management.

- In the Enterprise App section tap Quick Heal Technologies.

- Tap Trust to add Quick Heal apps to trusted app list.
- Go to Home screen on device and tap the Seqrite EMM app to start the installation process.
- Tap Agree on the license agreement screen.
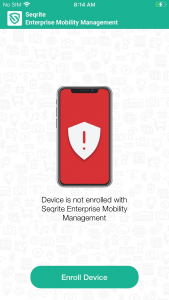
- Tap Enroll Device to enroll device with Seqrite EMM console.
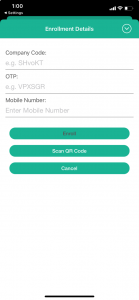
- Tap Scan QR Code on the enrollment details screen and scan the QR code displayed on the Seqrite EMM console or shared with user (as described earlier).
- Tap OK to grant permission to Seqrite EMM to access the camera.
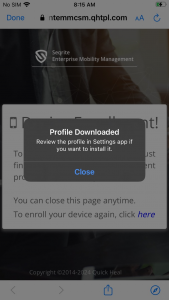
- Tap Allow to download configuration profile on the device.
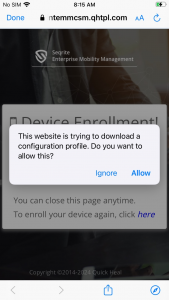
The profile will be downloaded on your device.
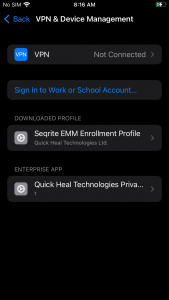
- Go to Settings > General > VPN & Device management. Tap Seqrite EMM Profile.
- Tap Install to install the downloaded profile.
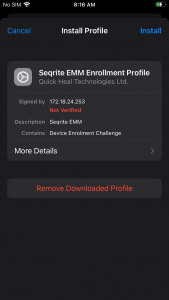
- Tap Install again on the screen warning about the unverified profile.

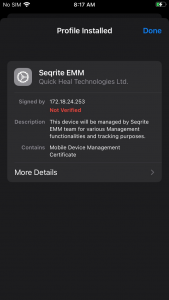
- Tap Install to install the root certificate.
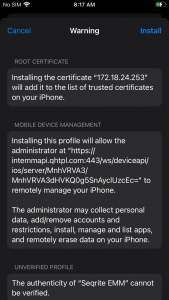
- Tap Trust to enroll your device into remote management.
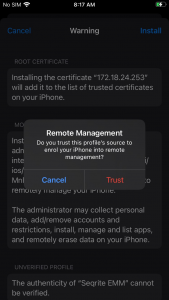
- The device is enrolled with the Seqrite EMM console.