
Zero-touch enrollment is a feature on Android devices that automatically sets up your device with your organization’s apps and IT policies. You may have received your Zero touch enabled device from your vendor. The device will automatically provision itself with the necessary apps and data for your organization upon first boot. This allows for a streamlined setup process without the need for complex configurations.
Advantages of Android Zero Touch Enrollment
- One-time setup and helps large scale enterprise device roll-out.
- Mandatory MDM management.
- Allows authorized Android device Resellers to add devices to Zero Touch portal, easing enrollment process.
- Admins can set up the device with necessary apps and profiles and it gets applied automatically on device activation.
Prerequisites for Zero Touch Enrollment
- Android Zero Touch Enrollment is supported for devices running Android 9.0 and later.
- Purchase the device either from a Zero-touch reseller partner , Google partner or Zero-Touch device reseller.
- A Zero-touch portal account needed that can be obtained by contacting your reseller.
- A zero-touch account created by an authorized zero-touch vendor that requires your Gmail address.
Follow the steps in given order to proceed with zero-touch enrollment.
-
Associating your Enterprise Google Account with zero-touch portal
-
Creating a configuration and enrolling devices to a group
Associating your Enterprise Google Account with zero-touch portal
Zero touch enrollment is applicable only for devices that are zero-touch provisioned and purchased from sellers listed in Android Enterprise Solutions Directory.
Note: Click here to view and purchase new devices from vendors provided by Android Enterprise.
-
Log on to Seqrite EMM with your credentials.
The dashboard appears. -
Navigate to the Setup Services option on the upper right corner.

-
On the Enterprise Account Enrollment tab, click Access Zero Touch Portal.
A linked company account will be displayed.

-
Click Next.
-
The page to sign-in appears, wherein you will need to provide your Zero-touch account credentials (shared by Device Reseller).
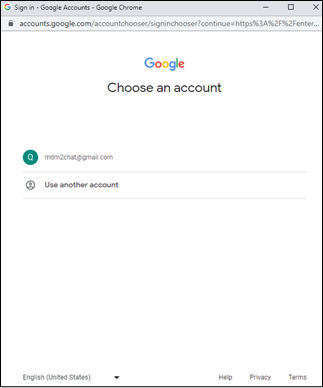
-
Select your company Enterprise Google account and click Link .
Note: All purchased devices in this account will be displayed and linked to your EMM provider. If you are not able to link your account then contact the device reseller to Configure/Setup your Zero Touch account against your Enterprise Google Account. For more details, click the link.
You can choose the accounts that contain the devices to be managed.

-
Default configuration if any will be applied to the devices. Click Next .

-
On the Add support info dialog box, provide your company’s support details for employees to reach you in case of any issues during set up.

-
Click Save .
Your company account name is linked to Zero Touch iframe.
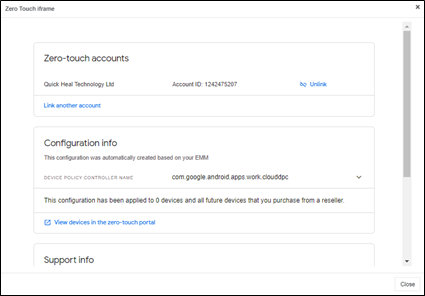
10. Click View devices in the zero-touch portal to view the devices purchased by your company.
You are redirected to your company account on Zero Touch portal Configurations page.

About Zero-touch portal
Zero-touch portal contains the details of the devices, resellers, MDM configurations and so on. You can refer the table for more details.
| Parameter | Description |
|---|---|
| Configurations | If you have an updated setup, you are provided with Enterprise Default Configurations that cannot be modified. Else you can add, modify, and delete the MDM configurations here. You can also choose to assign MDM configurations by default, to the devices being added to the account. |
| Devices | You can view the list of devices added to the account here. You can select devices and assign the created configurations to these devices. Additionally, you can also choose to delete the added devices here. |
| Manage People | You can add, modify, and delete the users, who can manage and access the portal here. |
| Resellers | You can choose to add additional reseller details here. |
Creating a configuration and enrolling devices to a group
You can create configurations to assign policies and app management for your devices. You can create configurations for different groups or a default configuration that you want to apply to devices that are enrolled via Zero Touch enrollment. A configuration contains the following:
- The EMM device policy controller (DPC) you want to install on the devices.
- EMM policies you want to apply to the devices.
Steps
-
Log on to the Seqrite EMM portal.
-
Navigate to Groups in the left pane. Select the group to which you want to add the zero-touch devices.
-
Click Edit.
The Group details page appears.
-
Click Zero Touch Enrollment tab.
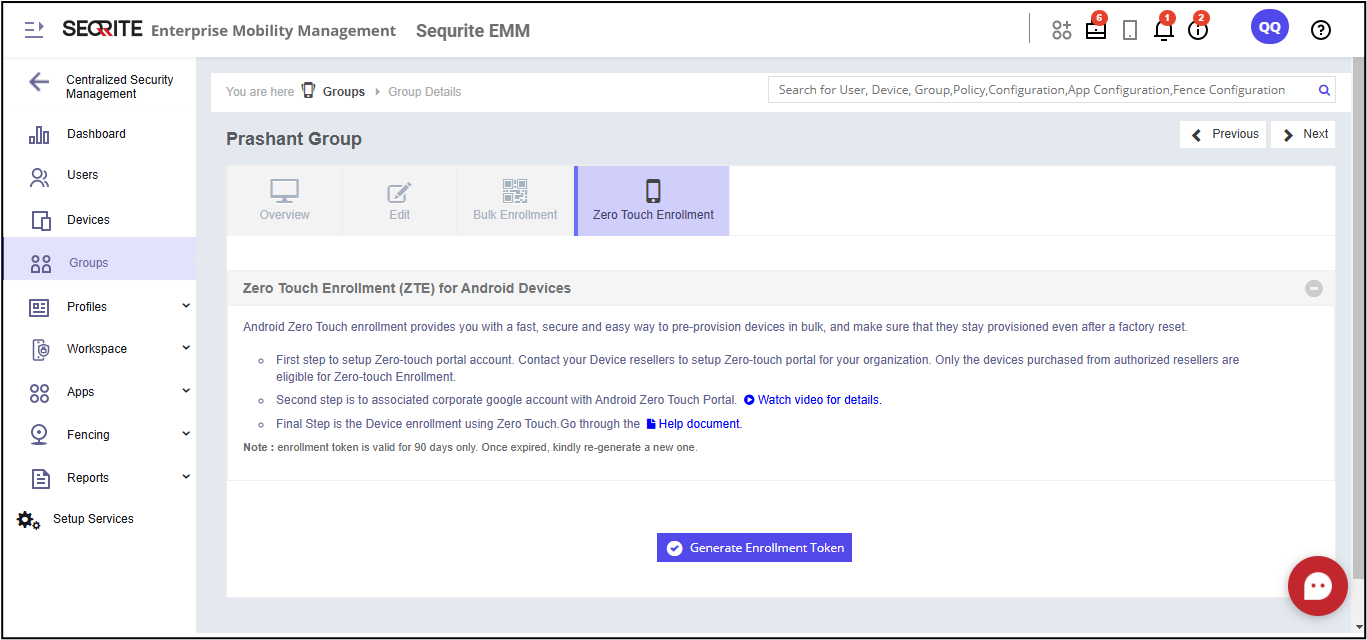
- If the group is newly created, click Generate Enrollment Token to generate token (JSON content) for enrollment.
- For existing groups, click Copy text to copy the token (JSON content) to the clipboard.
Note: The enrollment tokens expire in 90 days. If expired, re-generate a new one.
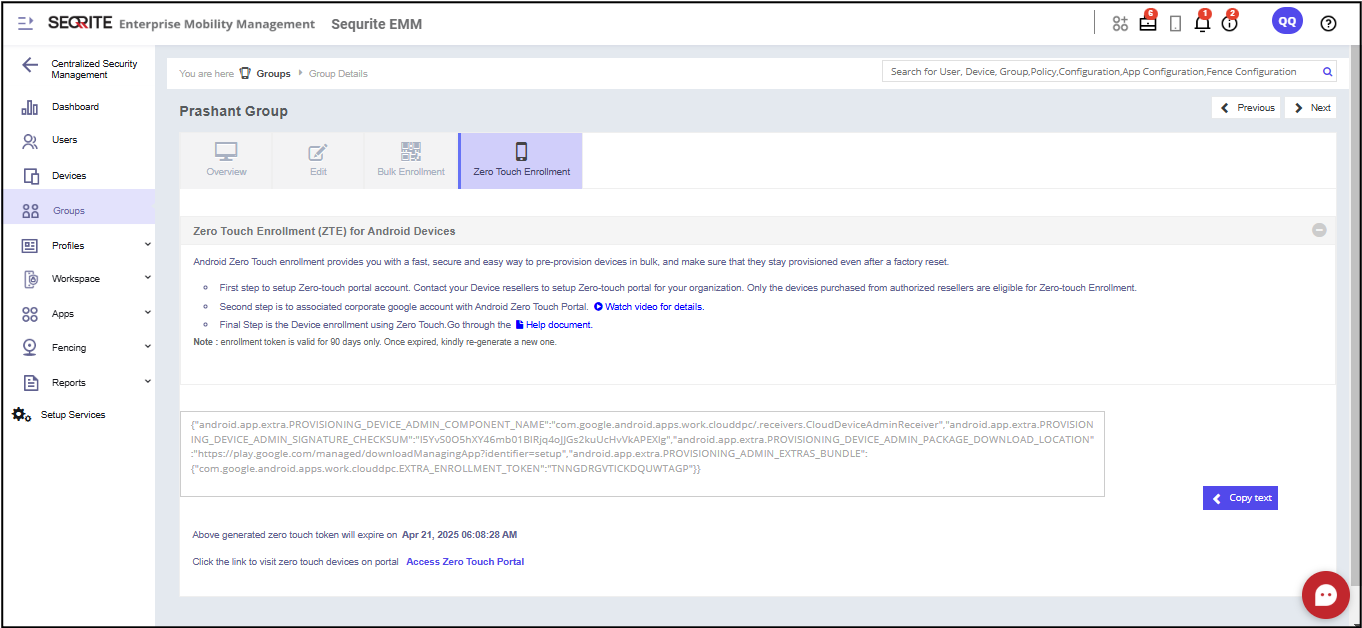
-
Click Access Zero Touch Portal link.
You are redirected to your company account on the zero-touch portal.
Setting up Zero-touch portal using JSON configurations
If you are setting up Zero Touch portal using JSON configuration, follow the steps:
-
Login with the Google account associated with your corporate e-mail if need be.
-
Click Configurations present in the navigation panel and click the + button to add a new configuration.

-
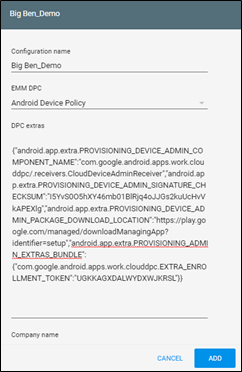
Enter the Configuration name and select the Android Device policy from the drop-down for EMM DPC.
-
In the DPC extras section paste the copied token(JSON content).
-
Enter the Company name, Support email address, Support phone number and Custom message.
-
Click ADD.
The configuration for that group is added to your company account on the zero-touch portal.
-
Click Devices in the left pane.
The Devices page appears. These devices are added to your account by your vendor after purchase.

-
For each device, in configuration drop-down, select the group configuration (saved earlier) that you want to assign the devices to.
-
Ensure that you have performed the factory reset on the device before assigning configuration.
Note: For newly purchased device do not setup device until configuration is mapped to the device.
-
Click Update.
-
After you save the devices configuration, setup your devices. Your devices will be enrolled under respective groups that were used to create configuration.
After completing the above procedure, when the user unboxes the new device and connects it to the Internet, the user will be prompted to accept the enrollment agreement and start the enrollment process with Seqrite Enterprise Mobility Management (mSuite).