
➤ To obtain the Client_ID and Client_Secret values for configuring Salesforce in the Seqrite Data Privacy application, follow these steps.
- Log in to the Salesforce organization you want to index using an administrator account.
- Select Setup from the User Menu.
- In the left navigation menu, expand Create under App Setup and click Apps.
- On the Apps page, go to the Connected Application section and click New to create a new application that will use OAuth2 to access the organization.
-
In the New Connected App page, fill in the fields as shown in the example image below.
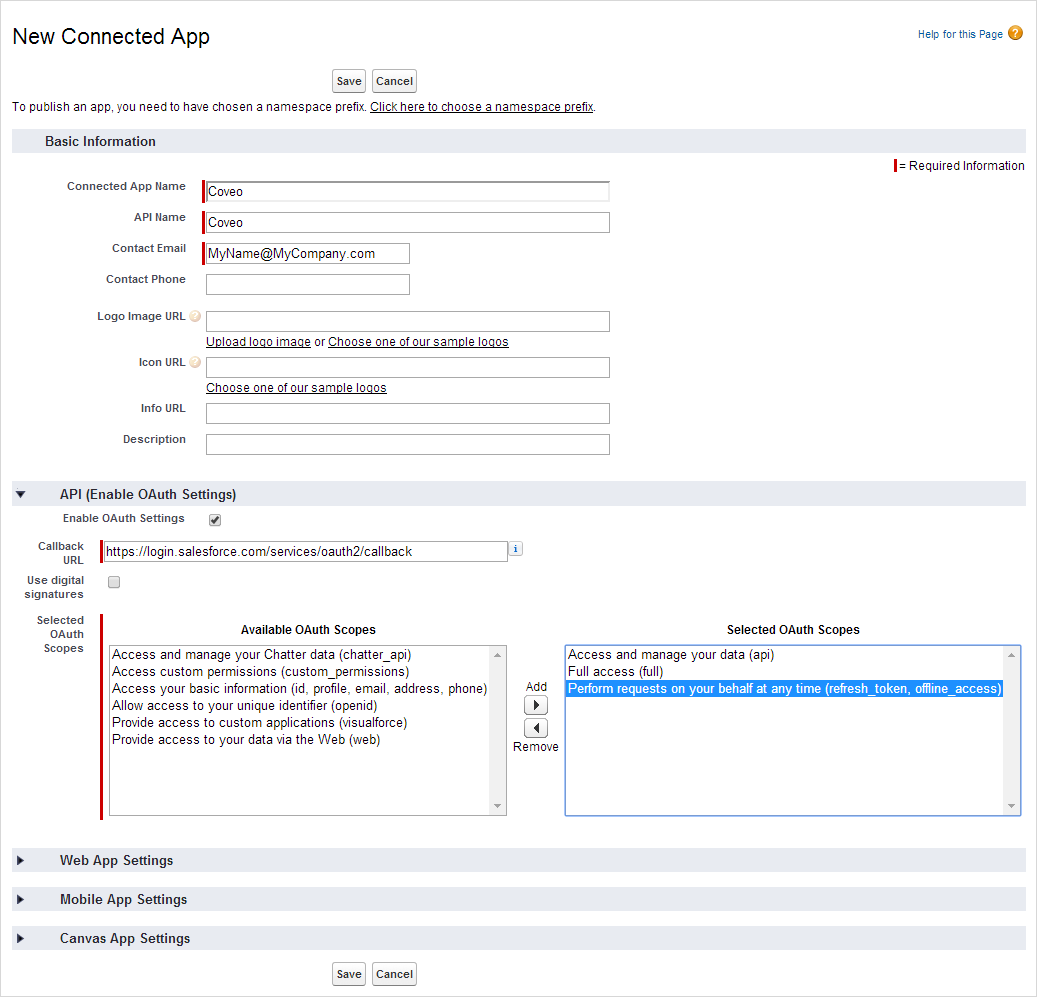
In the Basic Information section,
- Enter a meaningful name in the Connected App Name and the API Name.
- Enter your email address in the Contact Email to receive important notifications and messages from the application.
In the API (Enable OAuth Settings) section,
- Select the Enable OAuth Settings checkbox.
- In the Callback URL, enter a dummy but valid secured URL (https://) as https://login.salesforce.com/services/oauth2/callback since it will not be used for this application.
- From the Available OAuth Scopes list, select the following items and add these to the Selected OAuth list.
- Access and manage your data (api)
- Full access (full)
- Perform requests on your behalf at any time (refresh_token, offline_access)
- Click Save.
- Navigate to the page of your newly created connected application, and then locate the API (Enable OAuth Settings) section.
In the API (Enable OAuth Settings) section,

- Locate the "Consumer Key" value, which is your Client_ID, and copy it. Then, paste it into a secure reference document.
- Click the "Click to reveal" button next to the "Consumer secret" field to reveal your Client_Secret value. Copy this value, and then paste it into your secure reference document.
- Save your reference document, and store it in a safe location.
☛ Note
If you need to access these values in the future, you can always return to the Salesforce page by following the path Setup > App Setup > Create > Apps and then clicking on the name of the application in the “Connected Apps” list.
Salesforce Permission Set
To create a Salesforce permission set for the Coveo crawler and assign it to your dedicated application and user, follow the instructions given here.
- Go to the Setup page and click Manage Users followed by Permission Sets.
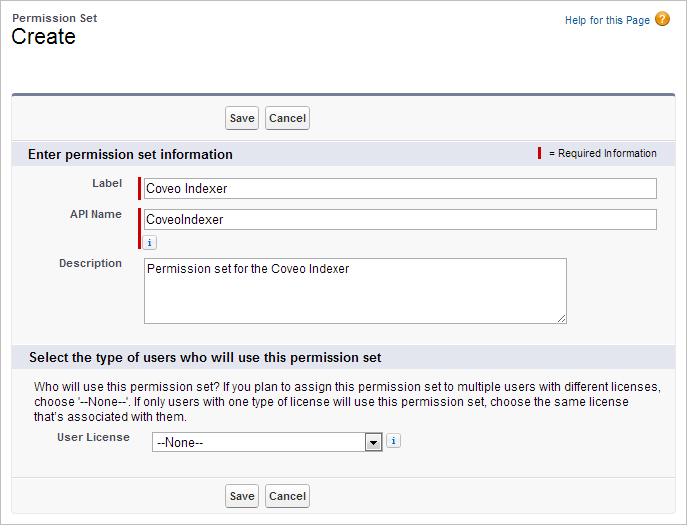
- On the Permission Sets page, click New.
- In the Create page, in the Label and API Name, enter significant names and click Save.
- To create a Salesforce user dedicated to the Coveo crawler see Creating a Dedicated Salesforce Crawling Account and User.