
Getting started with Work Profile
Prerequisites
- Set one Gmail account on EMM console
- Internet connection on device
- Seqrite EMM Workspace License and login credentials
- Supported Android devices version 7 and above
Setting up Enterprise Account Enrollment
First, you need to get a Google Account, and a Seqrite EMM Workspace License. Next you need to set up your Enterprise account in Seqrite EMM.
Refer to the following link for steps to setup your company Enterprise Account on Seqrite EMM:
Set Up Enterprise Account in Seqrite EMM
Seqrite Workspace (Work Profile)
Seqrite Workspace allows organizations to create a virtual container on an employee-owned device to manage and protect corporate data without compromising user privacy. This virtual container ensures isolation of the company data and resources even though used on the end user’s device. The Seqrite EMM administrator can limit the apps that the employee can install and use in the corporate Workspace profile. The administrator can add/move/import the users to the desired group and apply the associated policies.
Note: Workspace enrollment can be done only through the Users tab.
Enrollment of device using Email address
- Log on to Seqrite EMM with your credentials.
- Navigate to Users, select user.
Note: Users can be imported through Seqrite CSM and synced to Seqrite EMM portal.
-
In Take Action drop-down select Enrollment Request > For Android Work Profile > Using Email
-
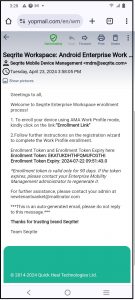
Click Submit. An Enrollment email is sent to the email address.
-
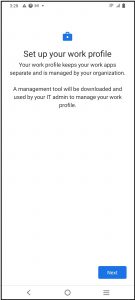
On the device, open the received email and click on the Enrollment Link given in the mail. Setup of work Profile starts.

-
Tap Next.
-
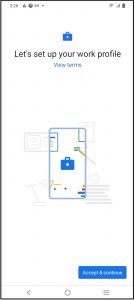
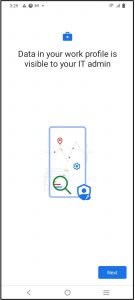
Tap Accept and Continue.

-
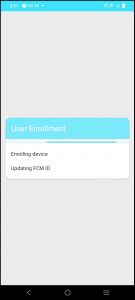
Tap Next. The Updating device and Registering Profile process follows.

-
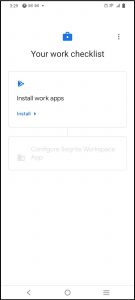
On the Work Check list screen, under Install Work Apps, tap Install.
Seqrite Workspace app starts downloading.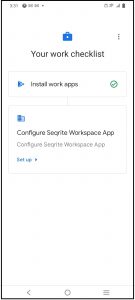
-
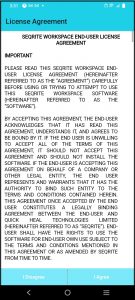
Tap Setup under Seqrite Configure Workspace App to configure the app.
The License Agreement screen is displayed.
-
Tap I agree to agree to the terms and conditions. The Enrollment process starts.

-
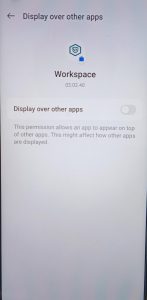
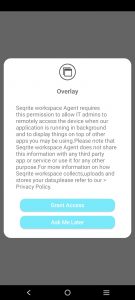
The Seqrite Workspace permissions screen is displayed.

-
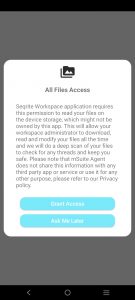
Tap Grant Permissions to grant the required permissions.


-
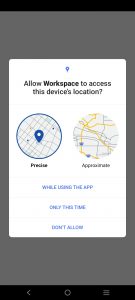
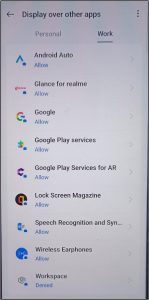
Grant the permissions as required.

-
Grant permissions as required.


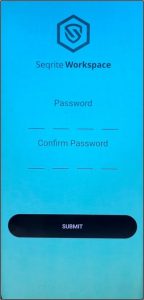
The Seqrite Workspace login prompt is displayed.
-
Enter password and confirm password.

-
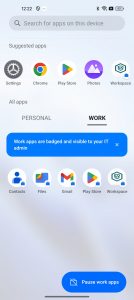
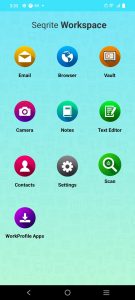
Seqrite Workspace is activated, and a Work profile is created on the device. The pre-configured applications are downloaded and displayed.
Note: The apps are installed on the User device automatically if the Install Silently option is enabled for the apps.All the policies that are assigned to the group for that user will be applied to the enrolled device.
Enrollment of devices using QR code
-
Log on to Seqrite EMM with your credentials.
Navigate to Users, select user.
Note: Users can be imported through Seqrite CSM and synced to Seqrite EMM portal.
In Take Action drop-down select Enrollment Request > For Android Work Profile > Using QR Code.
Click Submit.
The QR Code is displayed on the console.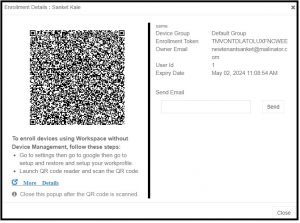
-
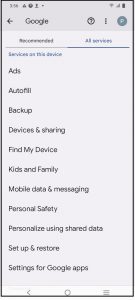
On the device, go to the Settings > Google Accounts > Setup a Device > All Services > Setup and Restore > Setup your Work Profile.
Tap Setup & Restore and then tap Setup your work Profile.

-
Tap Next. The enrollment process starts with downloading the required files.
Grant permission as required. On the Enroll this device screen, tap the camera icon.

- Scan the QR code generated on the Seqrite EMM console earlier.
- Tap Accept and Continue on the device. Your work profile is being setup.
-
Tap Next.
-
On the Work Check list screen, under Install Work Apps, tap Install.
Seqrite Workspace app starts downloading.
Tap Done. The Seqrite Configure Workspace App option is displayed.
-
Tap Setup under Seqrite Configure Workspace App to configure the app. The License Agreement screen is displayed.
-
Tap I agree to agree to the terms and conditions. The Enrollment process starts.
-
The Seqrite Workspace permissions screen is displayed.

-
Tap Grant Permissions to grant the required permissions.


Grant the permissions as required.

-
The Seqrite Workspace Login prompt is displayed.
-
Enter password and confirm password.
-
Seqrite Workspace is activated, and a Work profile is created on the device. The pre-configured applications are downloaded and displayed.
Note: The apps are installed on the User device automatically if the Install Silently option is enabled for the user.
All the policies that are assigned to the group for that user will be applied to the enrolled device.
Adding user devices through Groups page
You can add devices through the Groups page as follows:
- Logon to Seqrite EMM console using your credentials.
- Navigate to the Groups page, select group in which you want to add devices.
- Click the Edit Icon (pencil) for the selected group.
- On the Group Details page, click Move Users.
- On the Import Devices dialog, download the sample CSV file.
- In the downloaded CSV file, enter the User email addresses of the users for which you want to add the devices and later enroll.
- Click Select File and browse and select the CSV file and click Import. The devices are imported to the selected group and associated policies applied.
Adding apps to Work Profile
- Logon to Seqrite EMM console using your credentials.
- Navigate to Workspace > Profiles > Edit.
- On the Workspace Profiles Details page, click AMA Work Profile App Management.
- Click Add Apps. The Android Management Apps dialog is displayed. You can also add custom .apk through the Private Apps option.
- Select the app and click Select. for e.g. Outlook. The App permission dialog is displayed.
- On the App Permissions dialog, select Install Silently if you do not want any user intervention and app to be installed automatically on device. If the Install Silently option is not selected, the app is just downloaded on the enrolled device and user has to install it manually.
- Click Ok.
- Click Save. The app is downloaded and installed on the enrolled device.
Uninstalling/Removing apps
- Logon to Seqrite EMM console using your credentials.
- Navigate to Workspace > Profiles > Edit.
- On the Workspace Profiles Details page, click AMA Work Profile App Management.
- In the Install Apps section, select the app that you want to remove. The Remove button is displayed.
- Click Remove.
- Click Ok on the confirmation box. The App is removed from the device.
- You can also go to the Uninstall Apps, click Add App. Select and add the app to the Uninstall List.
- Save the configuration. The app will be removed from the Work Profile.
Note: If admin adds any app in uninstall list, then this app will not be visible in PlayStore even if PlayStore mode policy is on.
Managing Policies
- Logon to Seqrite EMM console using your credentials.
- Navigate to Workspace > Profiles > Edit Work Profile Restrictions.
- Configure the policies under the sections as required.
- Click Save and Publish. The policies are pushed to the enrolled devices.
Android Management API (AMA) policy options
| Note: |
|---|
| You need to configure normal policies before configuring AMA policies. |
AMA Policies
| Sections | Description |
|---|---|
| All | Lists all the AMA policies available in Seqrite EMM. |
| Password Policy | Lists the policies related to the password criteria. You can turn on the policies as per your requirement. |
| Work Profile Functionality | List the policies for Work Profile Functionality |
| Policy Compliance Enforcement | Lists the policies for company compliance |
All the policy restrictions are applied at the Work Profile level only.
Password type
This policy applies a screen lock and sets the password on the device. Different password types are specified. After applying this policy on the device, the user has to set the password as per the type of the applied password policy. If the device user does not apply the policy applied by the admin, the device will be shown as a non-compliant device.
The following are the available password policy options that you can set for the device user:
- PIN/Password: Set password with numbers for PIN or a combination of numbers, letters, and symbols.
- Alphabetic: Set password with at least one letter and a combination of numbers, letters, and symbols.
- Alphanumeric: Set password with at least one number and a combination of numbers, letters, and symbols.
- Custom: Set password as configured in the policy.
Note: If admin selects a higher password criterion and then device user cannot set a lower password as device has higher password criteria.
If the user has set a password to device, then even if Admin unchecks the password policy, password will not be removed until work profile is uninstalled.
Password Minimum Length
To set the length of the password, turn on the Password Minimum Length policy. This policy is dependent on the Password type policy. After applying this policy on the device, the user must set the password as per the recommended password length.
- If the password type is PIN/Password, then the password length must be between 4 to 16.
- If the password type is Alphabetic, then the password length must be in between 8 to 16.
- If the password type is Alphanumeric, then the password length must be in between 8 to 16.
- If the password type is Custom, then the password length must be between 8 to 16.
| Note: |
|---|
| The user must apply settings as per the applied policy. Otherwise, the device will be shown as Non-compliant device. |
Password Age
To set the expiry age for the password, turn on the Password Age policy and then select the expiry age for the password such as 15 Days, 30 Days, 45 Days, and 90 Days.
This policy is dependent on the Password type policy. After the specified time expires, the user must reset a new password. Otherwise, the device will be shown as a non-compliant device.
Maximum Time To Lock
To lock the device automatically after a preset idle time, turn on the Maximum Time To Lock policy.
This policy is dependent on the Password type policy. After applying this policy on the device, if the device screen remains idle for the selected time, the device will be automatically locked. The time can be set to 1 min, 2 mins, 5 mins, 10 mins, and 15 mins.
Password History
To maintain a history of old passwords and to restrict the user from using the old passwords, turn on the Password History policy.
After applying this policy, the device saves the selected number of old passwords given in the list. You can save up to ten old passwords. The user will not be able to set a password that is already saved in the history. A value of 0 indicates that there is no restriction.
Camera Access
To allow or restrict camera usage, turn on the Camera Access policy and select the appropriate option as required.
- If the camera access is set to User Choice, then the user can access the camera.
- If the camera access is set to Disabled, then the camera access is blocked for the user.
- If the camera access is set to Enforced, then the user can access the camera.
Unknown sources installation
To control the installation from unknown sources, turn on the Unknown sources installation policy and select the required option.
-
If the option is set to Allow untrusted app installation in personal profile, then installation from unknown sources is allowed on the personal profile.
Note: Unknown source installation in work profile is not allowed.
Block Screen Capture
To restrict the user from taking screenshot on the device, turn on the Block Screen Capture policy.
Play Protect App Verification
To control the app verification process, turn on the Play Protect App Verification policy and select from the following required option.
- If the option is set to Allows the user to choose whether to enable app verification, then user can opt for app verification.
- If the option is set to Force-enables app verification, then the app verification is mandatory.
Block Accounts Modification
To restrict Google account additions to the device, turn on Block Accounts Modification. If enabled, the user cannot add another Google account to PlayStore.
Cross Profile Data Sharing
- If Cross Profile Data Sharing disallowed is turned on, data cannot be shared from personal to work profile and from work profile to personal.
- If Data Sharing Work to Personal disallowed is turned on, data sharing from work profile to personal is not allowed and personal to work profile data sharing is allowed.
- If Cross Profile Data Sharing allowed is turned on, data can be shared from personal to work profile and from work profile to personal.
Cross Profile Copy Paste
- If Allowed option is turned on, you can copy/paste from work profile to personal and personal to work profile.
- If Disallowed option is turned on, you cannot copy/paste from work profile to personal or personal to work profile.
Show Contact in Personal Profile
- If Disallowed option is turned on, work profile contacts are not visible
- If Allowed option is turned on, work profile contacts are visible.
Play Store Mode
- If Play Store Mode option is turned On, Play Store apps are displayed.
- If Play Store Mode option is turned Off, only pushed apps are displayed.
Block Usage of Non-Compliance Devices After (days)
To block the devices automatically that do not comply with the policies after the specified days, turn on Block Usage of Non-Compliance Devices After (days) policy.
Wipe Non-Compliance Devices After (days)
To wipe the data on the non-compliant devices after the specified days, turn on the Wipe Non-Compliance Devices After (days) policy.