
- Google Workspace Connector Requirement
-
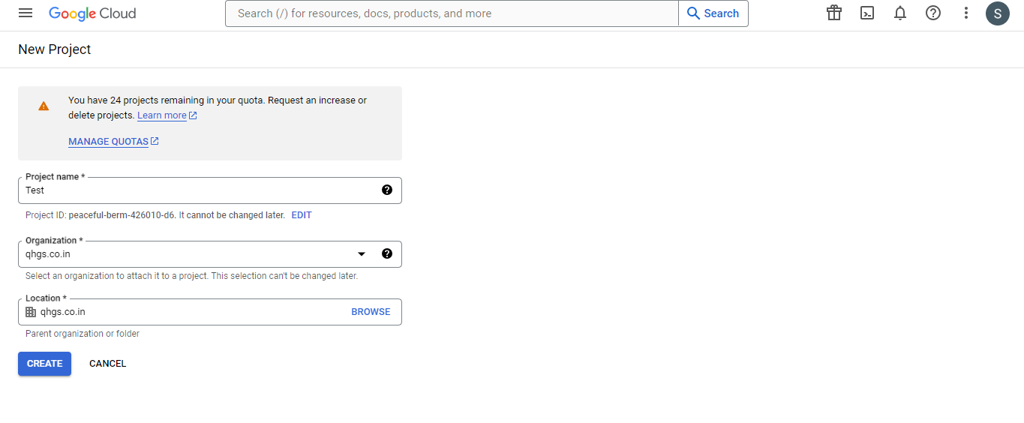
Create a New Project
-
Go to the Manage Resources page in the Google Cloud console Manage Resource.
-
Click Create Project.
-
In the New Project window that appears, enter a project name. A project name can contain only letters, numbers, single quotes, hyphens, spaces, or exclamation points, and must be between 4 and 30 characters.

-
Enter the parent organization or folder resource in the organization and Location box. That resource will be the hierarchical parent of the new project. If No organization is an option, you can select it to create your new project as the top level of its own resource hierarchy.
-
When you're finished entering new project details, click Create.
-
-
Add Credential to Project
-
Go to the Google Cloud Platform Console. From the projects list, select a project.

-
If the APIs & services page isn't already open, open the console left side menu and select APIs & services.
-
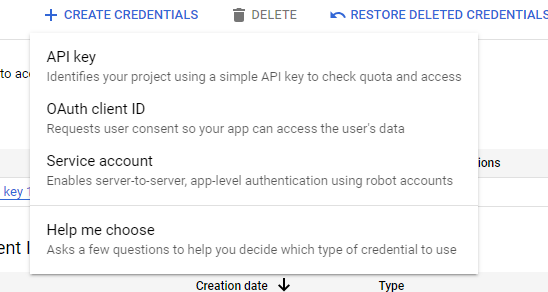
On the left, click Credentials. Click New Credentials, then select OAuth client ID.
-
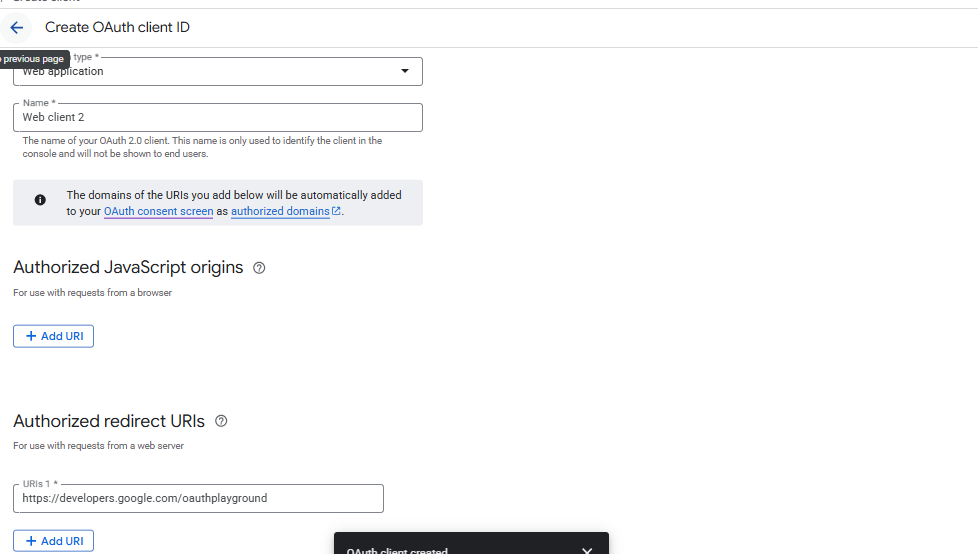
Under Authorized redirect URIs, add a line with: https://developers.google.com/oauthplayground.
-
Select the application type for your project Web Application.
-
Click Create.
-
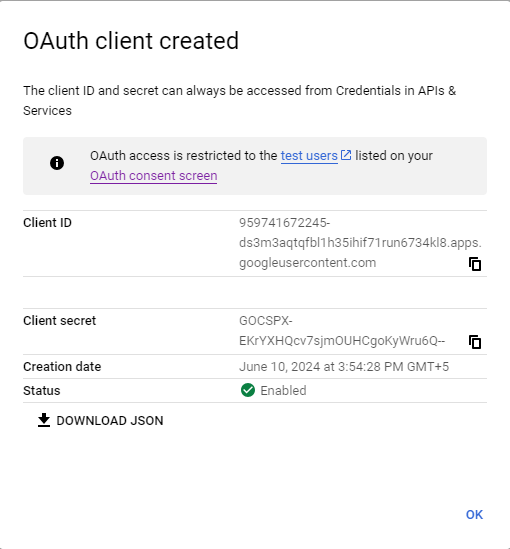
After you create the app, copy the client id and client secret of the app that you created to the integration configuration.
-
-
Enable Gmail API service.
-
Go to the API Console. For the Enabling the Gmail API. From the projects list, select a project.
-
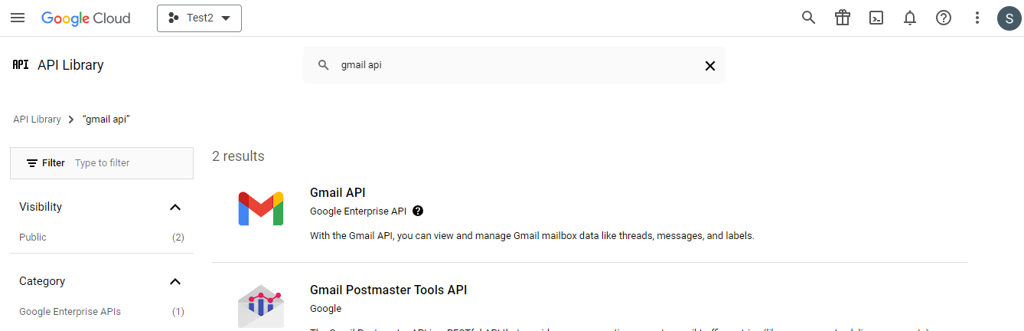
Click the API you want to enable. If you need help finding the API, use the search field.
-
Select the Gmail API and then Click on ENABLE.
-
-
Create OAuth Code.
-
Go to the OAuth2 Playground.
-
Click the gear icon in the upper right corner and check the box labeled Use your own OAuth credentials (if it isn't already checked).
-
Make sure that:
- OAuth flow is set to Server-side.
- Access type is set to Offline (this ensures you get a refresh token and an access token, instead of just an access token).
-
Enter the OAuth2 client ID and OAuth2 client secret you obtained above.

-
In the section labeled Step 1 – Select & authorize APIs, click Google Ads API from the list and select its scope,
https://www.googleapis.com/auth/adwords. Then click Authorize APIs:
-
If prompted, sign in to the account to which you want to grant access and authorization. Otherwise, confirm that the current Google user in the top right corner is the Google Ads or manager account for whom you want to obtain credentials.
-
A prompt appears indicating your app would like to Manage your Google Ads Campaigns. Click Accept to continue.
-
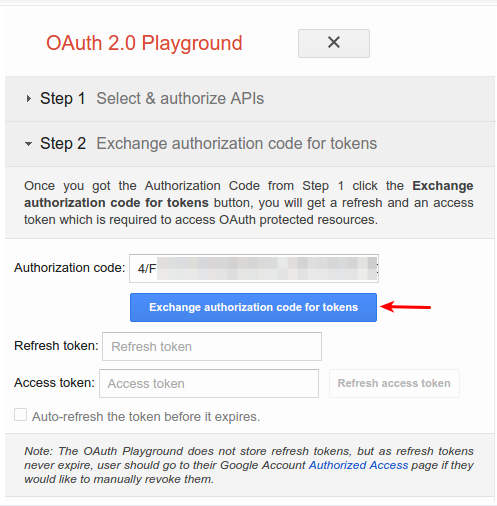
In the tab labeled Step 2 – Exchange authorization code for tokens, an Authorization code should appear. Click Exchange authorization code for tokens.
-
If all goes well, the Refresh token and Access token should be filled in for you (you may have to re-expand Step 2 – Exchange authorization code for tokens):
-
Copy the Refresh token into the configuration file for your client library of choice, along with the client ID and client secret. This will be used as OAuth Code for the connector configuration.
-
-
Create a service account
-
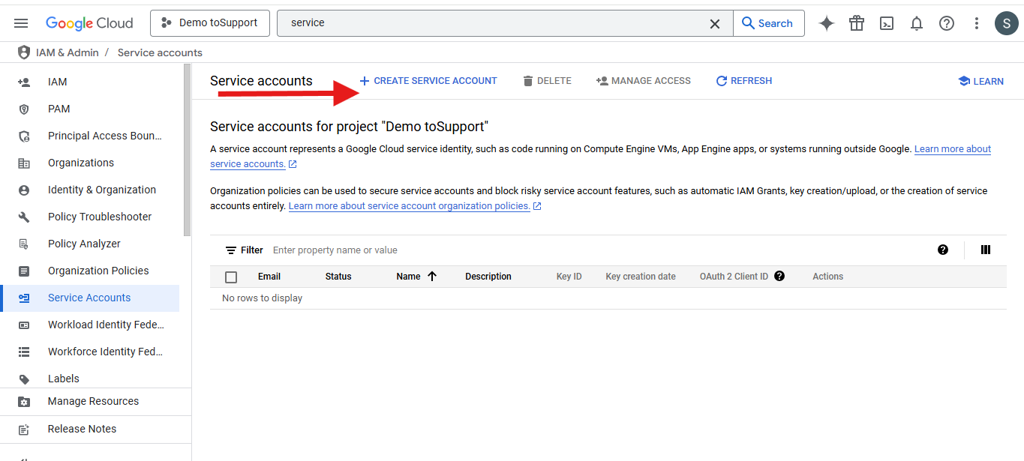
In search bar, search for an service account. Click on create service account.
-
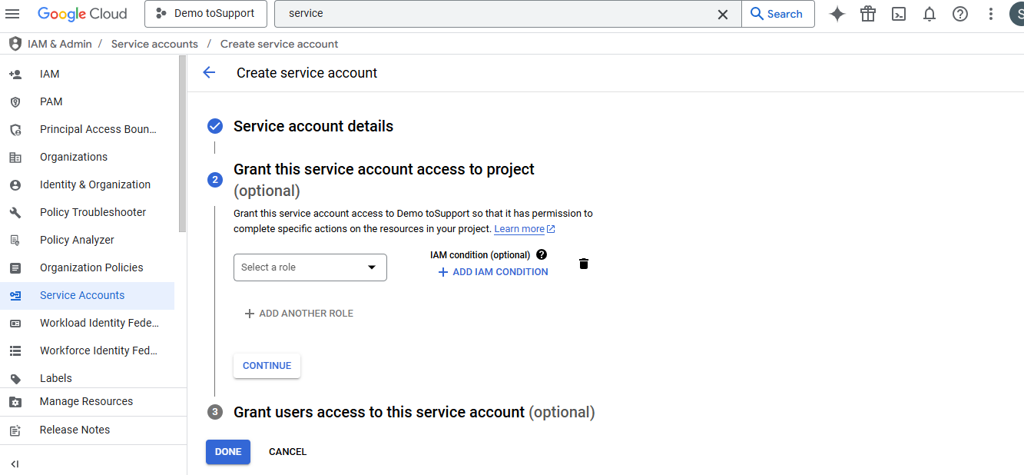
Provide Service account name.
-
Click on CREATE AND CONTINUE
-
Keep the defaults and click on DONE.
-
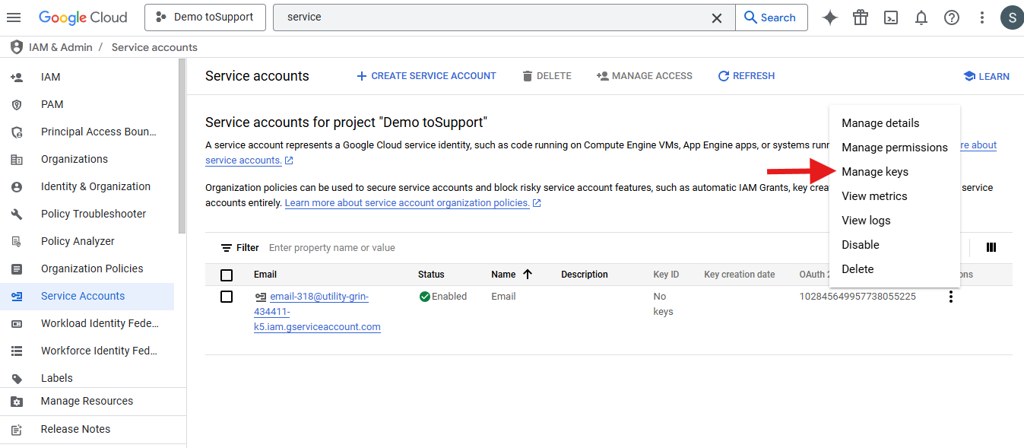
Create Key for Service Account. On service account window.
-
Click on Action button denoted by the three vertical dots
-
Select Manage Keys
-
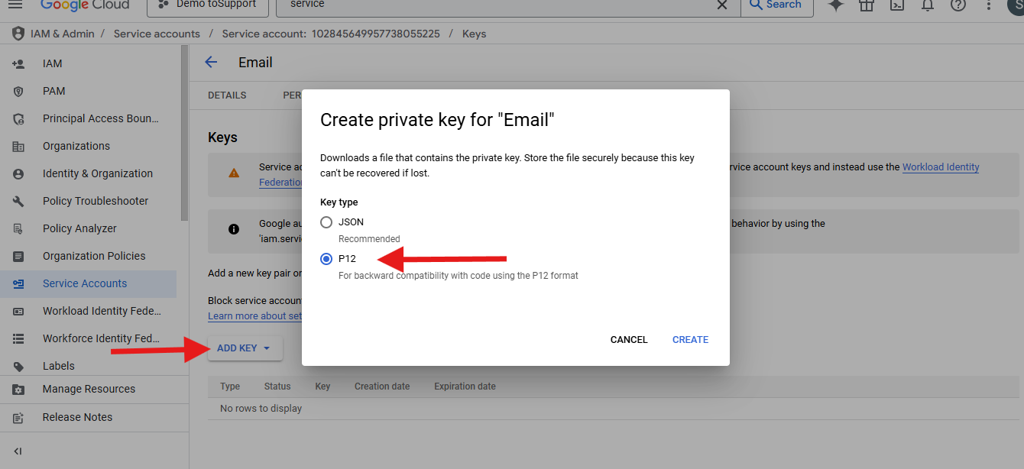
Create a key. Drop down ADD KEY. Select Create New key.
-
In Create private key, Select P12. Click on CREATE. Also it will show the private key's password. It will not be shown again. So copy the the private key's password and save it in text file.
-
On creation, the key will get download. keep this file and Password in a safe place as this will be required in later.
-
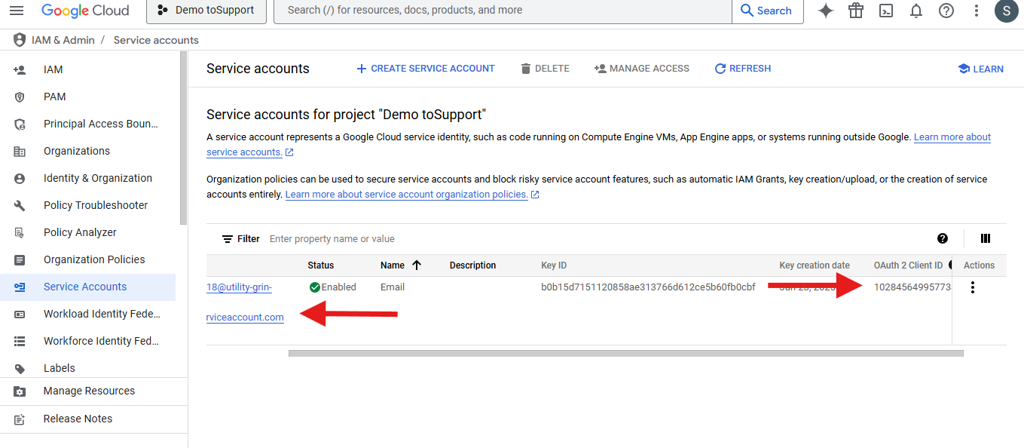
Come back to Service account tab. you will see your service account has been created and status will be active.
-
-
Copy the Service account Email and OAuth 2 Client ID. This will require for the connector configuration.
-
-
Enable the APIs & Services.
-
In search bar, search for API and Services. Then click on the Enable APIS and services.

-
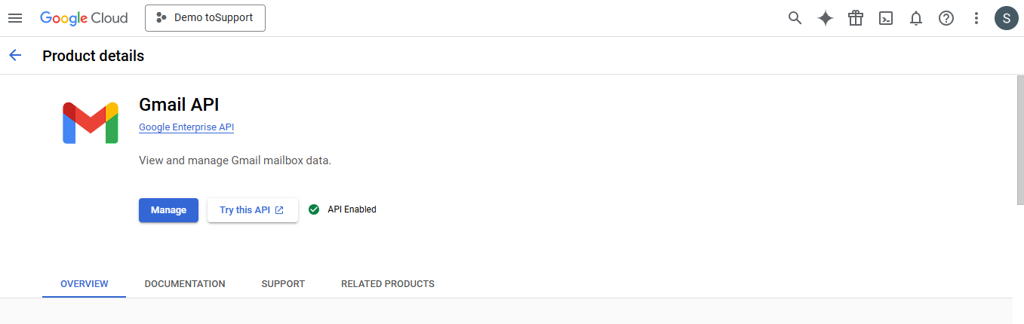
Search for the Gmail API for mailbox access. Select Gmail API. Click on ENABLE button.
-
Similarly, Search and enable the Admin SDK API.
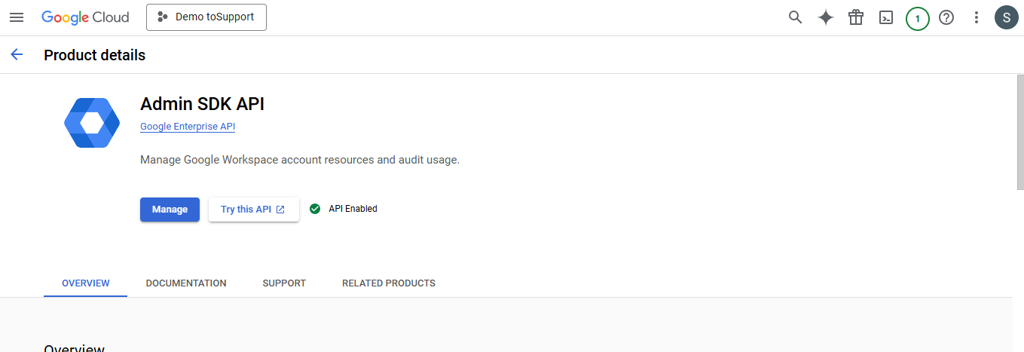
-
-
Enable domain-wide delegation
-
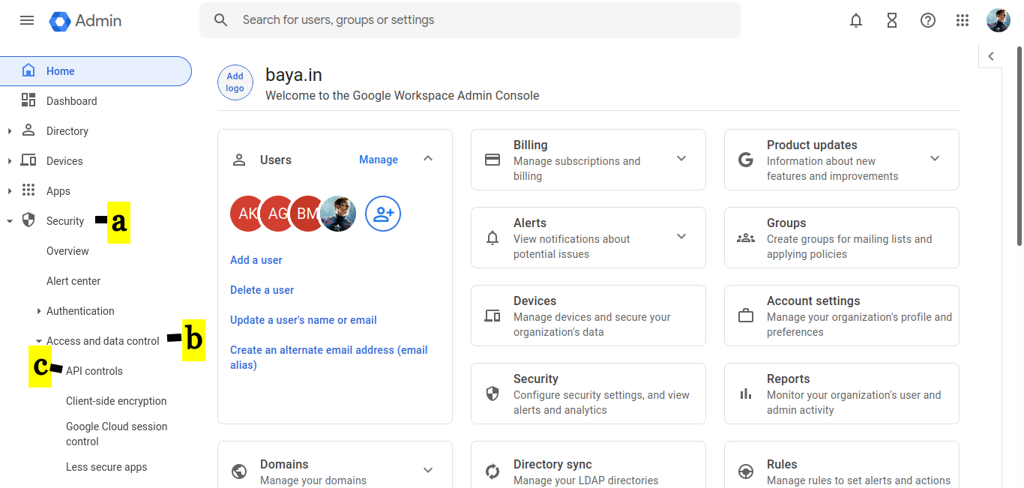
Login to G-suite Admin account and navigate to Google Admin.
-
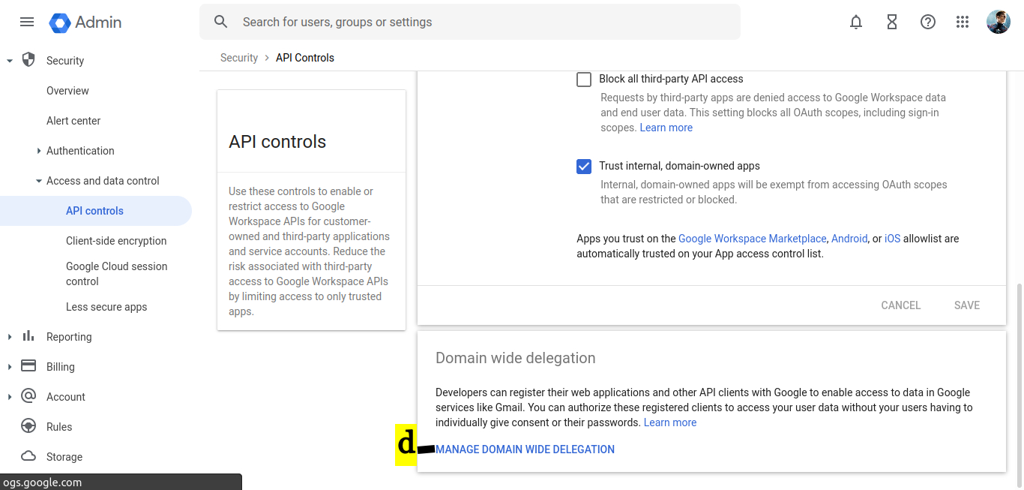
Click on Security. Select on Access and data control. Click on API controls.
-
Click On MANAGE DOMAIN WIDE DELEGATION
-
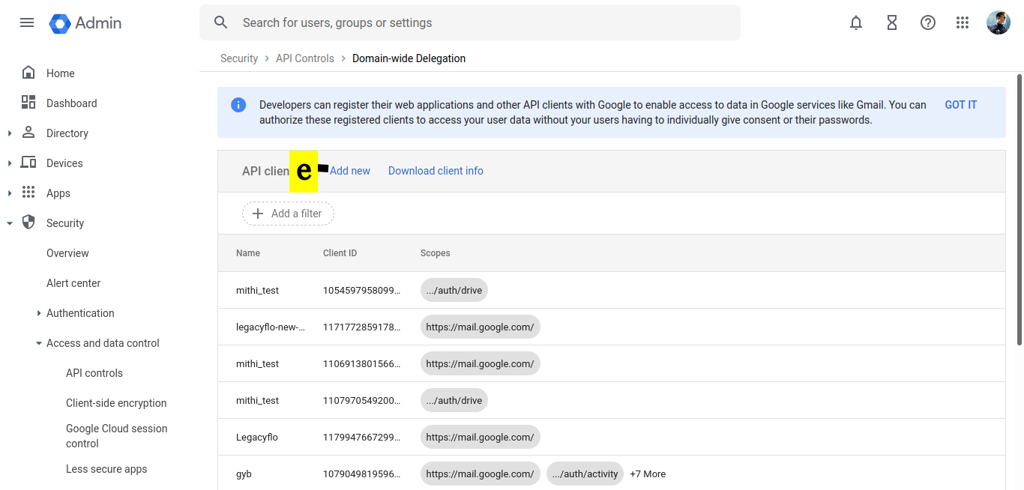
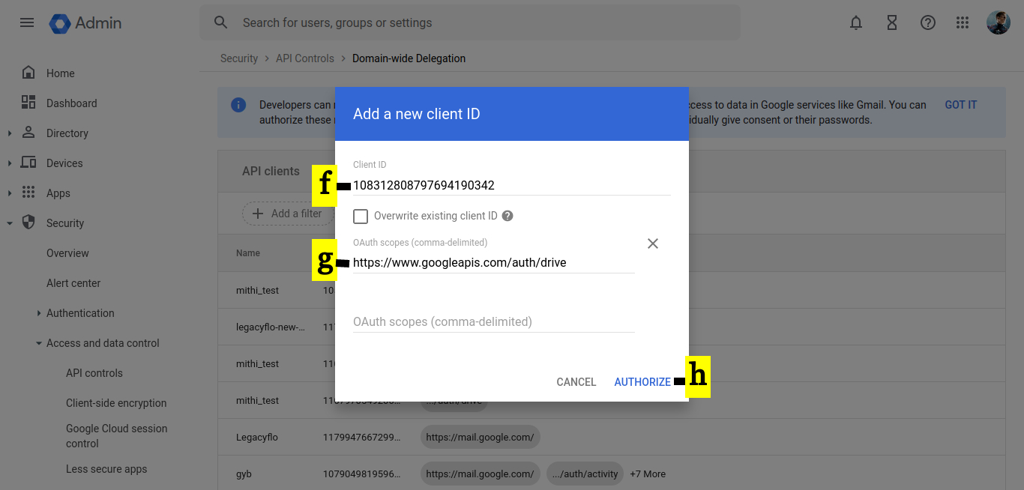
Click on Add new.
-
Copy and Paste the OAuth 2 Client ID in Client ID.
-
Copy and Paste the below APIS in OAuth scopes (comma-delimited):
https://www.googleapis.com/auth/gmail.settings.basic,https://www.googleapis.com/auth/admin.directory.user,https://www.googleapis.com/auth/admin.directory.device.mobile.action,https://www.googleapis.com/auth/admin.directory.device.mobile.readonly,https://www.googleapis.com/auth/gmail.modify,https://www.googleapis.com/auth/gmail.settings.sharing,https://www.googleapis.com/auth/gmail.send,https://www.googleapis.com/auth/gmail.modify,https://www.googleapis.com/auth/admin.directory.device.chromeos,https://www.googleapis.com/auth/admin.directory.user.readonly,https://www.googleapis.com/auth/admin.directory.user.security,https://www.googleapis.com/auth/admin.directory.rolemanagement,https://www.googleapis.com/auth/admin.directory.rolemanagement.readonly,https://www.googleapis.com/auth/gmail.readonly,https://mail.google.com,https://www.googleapis.com/auth/gmail.compose -
Click the AUTHORIZE. This completes the process of enabling the domain-wide delegation for GSuite and XDR for the required API
-
-
Download and Install OpenSSL on Windows with Cygwin – Install OpenSSL on Windows with Cygwin – SSL.com
-
Verify that you have installed OpenSSL by search for Cygwin terminal and open the Cygwin terminal application and typing
openssl version -
Copy your downloaded .pk12 file to C:\cygwin64\home<user_directory>
-
Run the command to get the private key
openssl pkcs12 -info -in <file_name.p12> -nodes -nocerts -
It will prompt for password, enter the password for your .pk12 file, default is “notasecret” (or Password you copied).
-
Copy the data from below
-----BEGIN PRIVATE KEY-----till above-----END PRIVATE KEY-----and pass in user config while registering google workspace connector (as Private key).
-
while copying please do not include these line —–BEGIN PRIVATE KEY—– and —–END PRIVATE KEY—–
- Configuration of Google Workspace Connector.
- Under the connector, go to Ingestion.
- Select Google Workspace Message Downloader Connector. Click on Configure.
- Enter the OAuth Code, Client Email Id, Client Id, and Client Secret.
- Select the Validate and Save.
- Configuration of Google Workspace Response Connector.
- Under the connector, go to Response.
- Select Google Workspace Response Connector. Click on Configure.
- Enter the Client Dedicated Email Id, Service Account EmailId, Private Key.
- Select the Validate and Save.