Assessments

The Assessments section allows you to create assessments based on predefined templates, manage participant roles, and oversee the review and approval process.

How to Create an Assessment:

  1. Navigate to the Assessment Section: Click on the "Assessment" tab from the main dashboard.

  2. Create Assessment: Select "Create Assessment" and choose an existing template from the template library.

  3. Assign Roles: Assign specific roles to individuals involved in the assessment process:

    • Owner: The individual responsible for creating and distributing the assessment.
    • Approver: The person who reviews responses, conducts risk analysis, and provides final approval.
    • Respondents: The participants who will answer the assessment questions.
    • Participants: Anyone involved in the process who may provide feedback or insights.
  4. Set Dates and Deadlines: Define when the assessment should be launched, when responses are due, and any deadlines for review and approval.

  5. Send Invitations: Automatically send out invitations to all assigned participants and respondents.

How to respond an Assessment:

The Respondents will receive the Assessment details via email. They will have to navigate to the assessment via the link in the email and provide their responses to the questions that are mentioned in the assessments.
Once all the answers are filled in, click the Submit button to submit the assessment.

How to approve/reject an Assessment:

Once the respondents submit their assessments, those will be reflecting in the Approver’s dashboard. The same will also be notified via email.
Here, the approver can open the assessment, click the downward arrow sign available at the right corner of every question and provide the verdict by clicking the Verdict dropdown. Here,the approvers can choose to Approve, Ask for more Details, or Reject the responses.
After submitting the question verdicts, the approvers can submit their response for the assessment.

Note: The respondents will receive the email notifications for the assessments approved or rejected, or if the assessment needs to be re-answered.

User Actions on Assessment

You can perform following actions once assessment is created:

  • Re-assessment
  • View Assessment
  • Export Assessment
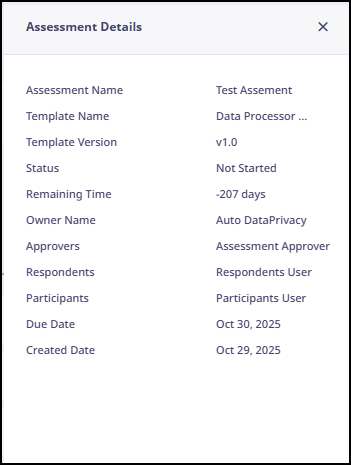
  • View More (about Assessment)

Re-assessment

Re-assessment enables you to re‑issue a completed or approved assessment to the respondent for review and updates. The new assessment is automatically pre‑filled with responses cloned from the original submission, allowing the respondent to either retain their existing answers or modify them as needed before resubmitting. This ensures continuity of data while providing flexibility for corrections, updates, or additional input.

Purpose of Re-assessment

Re-assessment is useful when an already completed or approved assessment needs to be updated. Instead of filling out everything again, the reassessment feature generates a new version pre‑filled assessment with the respondent’s previous answers, allowing them to retain existing responses or update only where necessary.
This approach ensures efficiency, accuracy, and continuity, making assessments easier to maintain and more reflective of current circumstances.

Important:

  • Only Approved assessment can be used for re-assessment.
  • Approver and Owner can create and approve the assessment.
  • Roles such as Data Privacy Administrator, Data Protection Officer, and Chief Compliance Officer can serve as both approver and owner within the re-assessment process.

Re-assessment Workflow

The re-assessment workflow follows these steps: Start Re-assessment >> Responder Submits Responses >> Approver Reviews and either approves or rejects the assessment .

Start Re-assessment

To start the re-assessment, follow these steps

  1. From the left navigation pane, go to Assessment Automation >> Assessments .
  2. Select the approved assessment for which you want start re-assessment and click .
  3. Click Confirm on confirmation pop up.
    The Assessment with pre-filled details appears.
  4. Enter Assessment Details:
    • Assessment Name
    • Owner
    • Approver
    • Respondent
    • Participants
  5. Enter Reminder details:
    • Reminders: Daily, Weekly, Monthly, Quarterly
    • Start Date
    • Email Content
    • Start Date
  6. Select Re-assessment Options:
    You can select which data to copy from the initial assessment:

    • Responses: Copies the responses provided in the initial assessment
    • Comments: Copies any comments currently associated with the initial assessment.
    • Attachments: Copies attachments that have been added to the initial assessment.
  7. Click Publish.
  8. The system creates an assessment and assigns it to a respondent.

    Note: Once the re-assessement is created, email notifications are sent to both the Respondent and the Approver .

Responding as a Responder

To respond the assessment as a responder, follow these steps:

  1. From the left navigation pane, go to Assessment Automation >> Assessments .
  2. Go to Not Started tab and select the assessment.
  3. Click Answer Assessments.

  4. An assessment with pre-filled responses appears.
    You can change or keep responses same.

  5. Choose your responses and click Submit.
  6. The assessment goes to the approver for approval.

    Note: Once the responder submits the assessment, an email notification is sent to the approver.


Approving Assessment as an Approver

As an approver you can approve, ask for more details or reject the assessment.

  1. From the left navigation pane, go to Assessment Automation >> Assessments .
  2. Go to Pending tab and select the assessment.
  3. Click View Assessment.
  4. You can give verdict to each question.

  5. Click the question, select the verdict that is either Approved, Asked for more details or Rejected .
  6. Finally, select the assessment status that is either Approved, Pending Remediation or Selected and click Send Review.
  7. Note: If an Approver Ask for more details (requests additional details) and submits the re-assessment as Pending Remediation , the Re‑answer Assessment option becomes available to the Respondent. This allows the respondent to update the requested questions and resubmit the re-assessment for approval.

View Assessment

View assessment enables you to view assessment.

To view the assessment, follow these steps:

  1. From the left navigation pane, go to Assessment Automation >> Assessments.
  2. Select the assessment which you want view and click .
Was this page helpful?