
The SEQRITE Managed Security Service Portal (SEQRITE MSSP) portal allows partners to create users based on their roles.
Note: A Report Viewer can add, edit, and delete reports related to the organization. A Report Viewer cannot add/modify/delete any profiles in the SEQRITE MSSP platform.
This chapter includes the following sections.
- Adding a user
- Activating a newly added user
- Using Two Factor Authentication (2FA)
- Enabling or disabling a user
- Enabling 2FA for Users (Bulk 2FA Authentication)
- Resending activation link
- Editing a user
- Deleting a user
Adding a user
To add a user, follow these steps.
- Log on to SEQRITE MSSP with your credentials.
- Under the Manage list, click the Users menu and then click the Add User button.
The Add User dialog appears. - On the Add User dialog box, select the role for the user from the User Type drop-down list whether Admin or Report Viewer.
- Enter Name, Email Address, Mobile Number, and Phone Number in the relevant boxes.
All asterisk fields are mandatory to enter. - Select the Enable Two-Factor Authentication (2FA) if required.
By default, the Email-based OTP option is enabled for the user, select the SMS-based OTP if required. If the SMS-based OTP option is enabled for the user then that user will get the OTP on the email address as well as on the user’s registered mobile number. Before that, the user needs to verify the mobile number from Edit Profile Section.Note:
• Only the Super Administrator can Enable/Disable 2FA for users.
• When the Super Administrator enables 2FA for users, the users receive an email notification. Subsequently, every time the user logs in, they are required to provide an OTP that is sent to their registered mobile device or email address in order to access the MSSP portal.
- Click Add User
The user is added successfully.
Activating a newly added User
After Admin has created a user account as mentioned in above procedure, an email with Set password link is sent to the registered email address. The newly added user must access the mail and set the password from the password link to login to the new account.
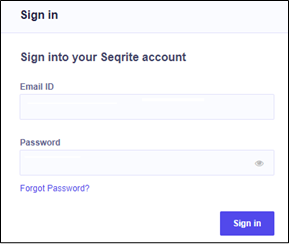
Sign In
- Log on to SEQRITE MSSP with your credentials.
- Enter the OTP received on your registered email address.
Note The OTP is valid for 60 seconds only.
The dashboard is displayed.
Using Two Factor Authentication (2FA)
With MSSP 3.1 release dated 22/04/2023, the earlier Google Authenticator App based 2FA process has been eliminated. Now we have introduced Simple MFA with Email and SMS based OTP. By default, you will receive the OTP on your registered email address.
As a security enhancement, the Super administrator has the ability to enable 2FA for users. This feature requires a two-step verification process, thereby providing a higher level of security for the user’s account. Apart from the regular username and password, the user must also provide an OTP that is generated on their email address or registered mobile number.
Note:
At present, SMS-based OTP authentication is available for mobile numbers with ISD code +91. This means that users with mobile numbers registered in India can receive a one-time password via SMS for authentication purposes.
- Login to the MSSP portal using your regular username (email) and password.
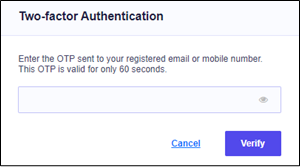
- The Two-factor Authentication screen appears.
Note:
If 2FA authentication is not enabled, then the 2FA Authentication screen does not appear and you are automatically logged in to the MSSP portal. - Enter the OTP sent to your registered email or mobile number. This OTP is valid for only 60 seconds.
- Click Verify.
You will be logged in to the MSSP portal.Note:
• 2FA is enabled for Super admin role for all new tenants by default. When Super admin creates any user, he can enable 2FA for that user. Users will be notified by an email when Super admin enables or disables 2FA for any user.
Enabling or disabling a user
To enable or disable a user, follow these steps.
- Log on to SEQRITE MSSP with your credentials.
- Under the Manage list, click the Users menu.
A user list appears. - Select a user.
An action list titled Please Select is added. - From the Please Select action list, click Enable or Disable and then click Submit.
A confirmation dialog box appears. - To confirm your action, click Confirm.
The user is disabled successfully.
Enabling 2FA for Users (Bulk 2FA Authentication)
- Log on to SEQRITE MSSP with your credentials.
- Under the Manage list, click the Users menu.
A user list appears. - Select the users for whom you want to enable 2FA.
An action list titled Please Select is displayed. - From the Please Select drop down list, click Enable 2FA.
- Email OTP is selected by default. Select SMS OTP.
- Click Submit.
- Click Confirm for the selected users.
A Success prompt is displayed.
Note:
• SMS authentication will be enabled for users with verified mobile numbers only.
• Users can verify their registered mobile number through the “Edit Profile” section. - Log on to SEQRITE MSSP with your credentials.
- Click the Users menu.
The Users list appears. - Select a user.
An action list titled Please Select is added. - From the action drop-down list, select Resend Activation Link and then click Submit.
A confirmation message appears.
Note: You can send the activation link to the partners with pending verification status only. - Click OK.
The resend activation link is sent successfully. - Log on to SEQRITE MSSP with your credentials.
- Under the Manage list, click the Users menu.
A user list appears. - Under the Actions column, click the Edit icon for the user that you want to edit.
- On the Edit User dialog box, edit the user information as required.
- Select the Enable Two Factor Authentication (2FA) check box if required. By default, the Email-based OTP option is enabled for the user, select the SMS-based OTP if required. If the SMS-based OTP option is enabled for the user then that user will get the OTP on the email address as well as on the user’s registered mobile number. Before that, the user needs to verify the mobile number from Edit Profile Section.
Note:
• Only the Super Administrator can Enable/Disable 2FA for users.
• When the Super Administrator enables 2FA for users, the users receive an email notification. Subsequently, every time the user logs in, they are required to provide an OTP that is sent to their registered mobile device or email address in order to access the MSSP portal.
- Click Update.
The details are updated successfully. - Log on to SEQRITE MSSP with your credentials.
- Under the Manage list, click the Users menu.
- Select a user.
An action list titled Please Select is added. - From the Please Select action list, select Delete.
A confirmation message appears. - To confirm your action, click Confirm.
The user is deleted successfully.
Resending activation link
If any user does not receive the activation link, the administrator can resend the activation link to that user.
To resend an activation link, follow these steps.
Editing a user
To edit a user information, follow these steps.
Deleting a user
To delete a user, follow these steps.