
Identity Providers (IdP) are used to manage users and access privileges in organizations. Currently, the supported IdP Types are as follows:
- Active Directory 2012
- Active Directory 2016
- Active Directory 2019
- Microsoft Azure
- Google Workspace
- Active Directory Federation Services
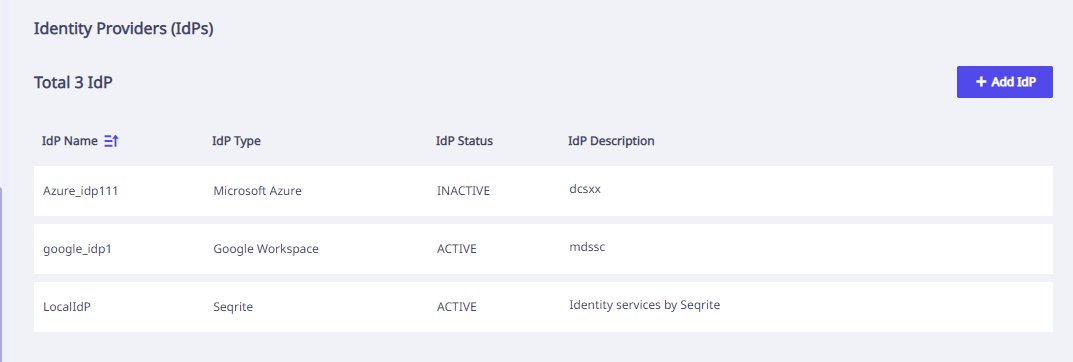
On this page, the following information about the configured IdP is displayed.
Note:
The Local Auth IdP is always active. It cannot be updated or deleted.At a time, along with Local Auth IdP, only one other IdP is Active. The users from all the active IdPs are available on the End User Page here End [Users.](https://docs.seqrite.com/docs/seqrite-csm/end-users/)
The Identity Provider (IdP) Page provides following details of added IdPs.
| Column Name | Description |
|---|---|
| IdP Name | Name of the IdP. |
| IdP Type | IdP type. |
| IdP State | State of the IdP whether Active or Inactive. |
| Idp Description | Description of the IdP. |
| Add IdP | To add a new IdP. |
Actions available with IdP
-
Click the icon present beside the IdP Name column to sort the available Identity providers in alphabetical order.
-
When you hover over each IdP row, following options are displayed on extreme right, except for the Local Auth IdP (It cannot be deleted or updated.)
-
Bulk action: Select the check boxes in front of the IdP names to perform bulk delete action on selected IdP.
Action Icon Action Label Description 
Edit Use this icon to edit the IdP details. 
Delete Use this icon to delete the IdP. -
Click an IdP name to display the following information in the right pane.
Fields Description IdP Name Name of the IdP. Description Description of the IdP. IdP type Type of IdP. Status Current status of IdP. Authentication Method Authentication method used for the IdP. Admin Username for AD Administrator username for the IdP. Host Hostname. Port Port number. Base DN Base DN for the IdP. Bind DN Bind DN for the IdP.
Adding an IdP
To add a new IdP, follow these steps.
-
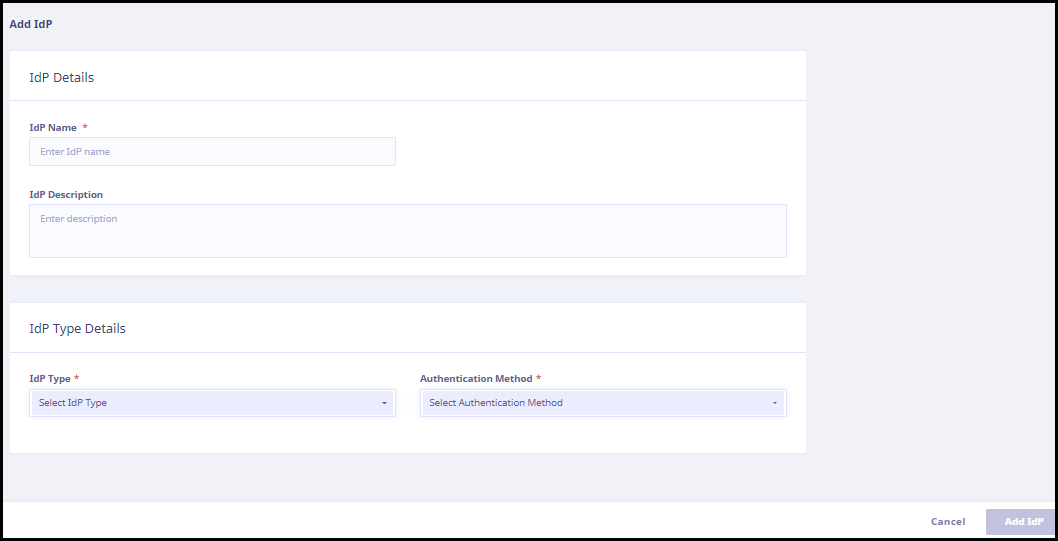
Click Add IdP. The Add IdP page appears as follows.
-
Enter following details.
IdP Details
- Enter the IdP name.
- Enter the IdP description.
IdP Type Details
- Select the appropriate IdP Type from the drop-down.
· Active Directory 2012
· Active Directory 2016
· Active Directory 2019
· Microsoft Azure
· Google Workspace
· Active Directory Federation ServicesNote:
To add Active Directory or Active Directory Federation Services IdPs the AD connector must be connected.
-
Based on the IdP Type selected,
-
Enter the following details for Active Directory and Active Directory Federation Services IdP Types:
Fields Description Enter Admin Username for AD Name of the Admin User. Enter Admin Password for AD Admin Password. Host Hostname. Port Port number. Base DN Base DN for the IdP. Bind DN Bind DN for the IdP. -
Enter the following details for Microsoft Azure IdP Type:
Fields Description Application (client) ID Application (client) ID Client Secret Client Secret OAuth 2.0 token endpoint (v2) Authorization Code -
Enter the following details for Google Workspace IdP Type and click Authorize.
Fields Description Client ID Client ID Client Secret Client Secret Project ID Project ID -
To import specific user groups rather than all users from cloud identity providers, administrators can select the checkbox “Select groups to add”. This feature facilitates the selection of multiple user groups for import from Cloud Identity Providers (IdPs) like Google Workspace and Microsoft Azure.
-
All user groups associated with the chosen cloud Identity Provider (IdP) will be visible. Choose the relevant groups accordingly. A search functionality is available for locating specific user groups. Additionally, a toggle button allows you to view only the selected groups.
-
Click Add.
-
A confirmation message ‘Adding new IdP will deactivate previously active IdP and remove the synced Users and Tags data. The removed data can not be recovered‘. appears. Click Confirm to proceed.
-
A success message appears. You can verify the status of the newly added IdP by visiting Identity Providers (IdPs) page.