
User receives an email with an Installer download link for SEQRITE HawkkAgent installation to the endpoints. For more information, see Sending the installer link on https://docs.seqrite.com/docs/seqrite-csm/end-users/> Page.
The procedure to install SEQRITE HawkkAgent on different operating systems is as follows,
Installing SEQRITE HawkkAgent on Windows
- Copy the HawkkAgent Installer Downloaded from Installer link provided in Email to Windows system.
- Extract the zip file on the system.
-
Run as Administrator and execute the installer file. The name of installer file, as per the options selected is as follows,
- 32-bit – SHA_windows-x32.exe
- 64-bit – SHA_windows-x64.exe
- On executing the installer file, the SEQRITE HawkkAgent is installed.
Installing SEQRITE HawkkAgent on Linux
- Copy the HawkkAgent Installer Downloaded from Installer link provided in Email to Linux system.
- Extract the zip file on the system.
- Open the terminal on your Linux endpoint and log in as a root user.
- Execute the Installer by typing the following command:
- 32-bit – sh SHA_unix_x86.sh.sh
- 64-bit – sh SHA_unix_amd64.sh
- On executing the installer file, the SEQRITE HawkkAgent is installed.
Note ☛
The Seqrite HawkkHunt XDR Linux Agent supports 64-bit Linux distributions.
Installing SEQRITE HawkkAgent on Mac
- Copy the HawkkAgent Installer Downloaded from Installer link provided in Email to Mac system.
- Extract the zip file on the system.
- Double-click the installer file (SHA_macos.DMG). The Seqrite HawkkAgent icon is mounted on the desktop.
- Double-click the Seqrite HawkkAgent icon. An installer window will appear.
- Provide the username and password of the system when prompted by the installer.
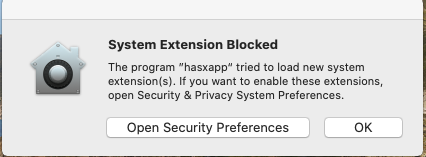
- For Users having macOS Catalina, the following system extension prompt will appear when the installation starts. Click Open Security Preferences on the prompt.
Self-protection prompt
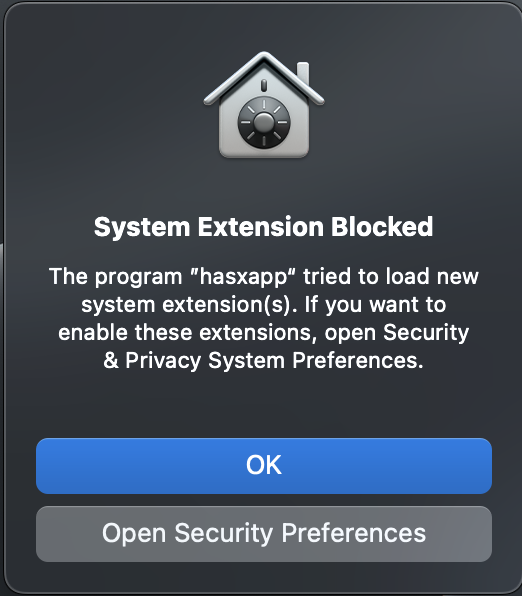
For Users having macOS Big Sur and later, the following system extension prompt will appear when the installations start. Click Open Security Preferences on the prompt.
- Go to System Preferences > Security & Privacy.
- Click the lock icon and provide the password if it is locked.
- Click the Allow button.
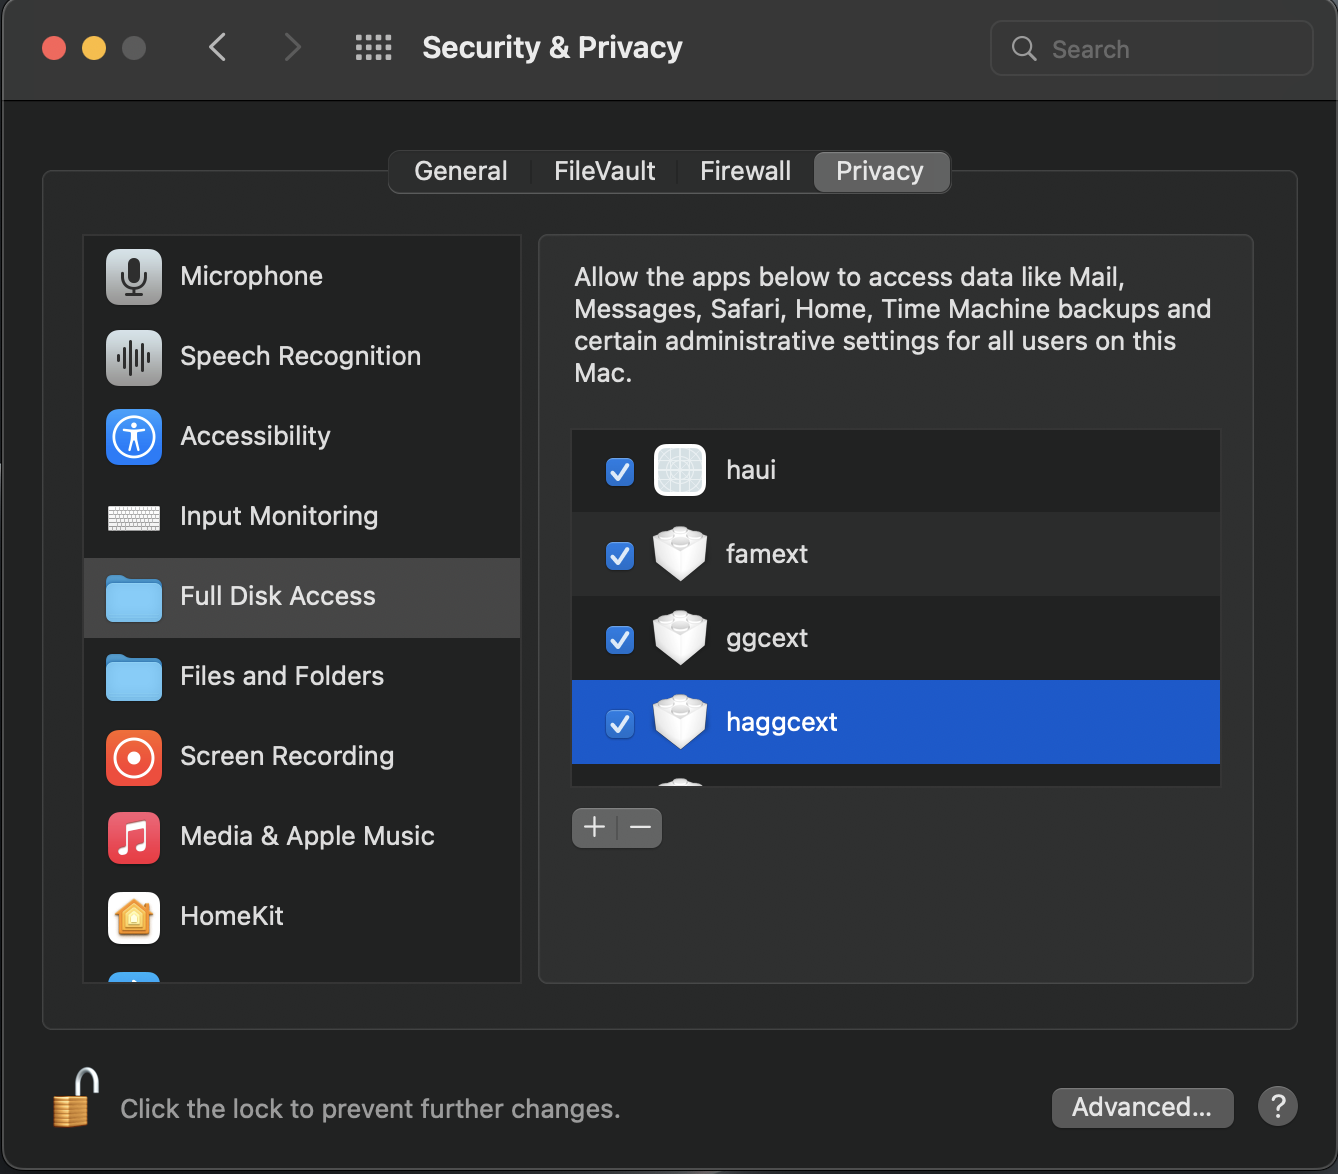
- Select Full Disk Access in the left pane.
- Select the processes in the Security & Privacy > Full Disk Access window. The following screenshot displays Full Disk Access configuration in System Preferences.
- Go to General tab and Click Allow button.

The Seqrite HawkkAgent Mac client is installed successfully.
Note
In case user does not see the prompt after login, user will still need to execute step 7 to 12 for self protection to work.
After successful installation, the HawkkAgent icon can be seen in the taskbar.
Note
- On Windows platform, HawkkAgent UI application runs on next login session when installed through remote installer and will be then visible.
- On Mac platform, HawkkAgent UI application runs on next login session and will be then visible.
- On Linux platform, HawkkAgent UI application runs on next login session and will be then visible.