
Re-assessment enables you to re‑issue a completed or approved assessment to the respondent for review and updates. The new assessment is automatically pre‑filled with responses cloned from the original submission, allowing the respondent to either retain their existing answers or modify them as needed before resubmitting. This ensures continuity of data while providing flexibility for corrections, updates, or additional input.
Purpose of Re-assessment
Re-assessment is useful when an already completed or approved assessment needs to be updated. Instead of filling out everything again, the reassessment feature generates a new version pre‑filled assessment with the respondent’s previous answers, allowing them to retain existing responses or update only where necessary.
This approach ensures efficiency, accuracy, and continuity, making assessments easier to maintain and more reflective of current circumstances.
Important:
- Only Approved assessment can be used for re-assessment.
- Approver and Owner can create and approve the assessment.
- Roles such as Data Privacy Administrator, Data Protection Officer, and Chief Compliance Officer can serve as both approver and owner within the re-assessment process.
Re-assessment Workflow
The re-assessment workflow follows these steps: Start Re-assessment >> Responder Submits Responses >> Approver Reviews and either approves or rejects the assessment .
Start Re-assessment
To start the re-assessment, follow these steps
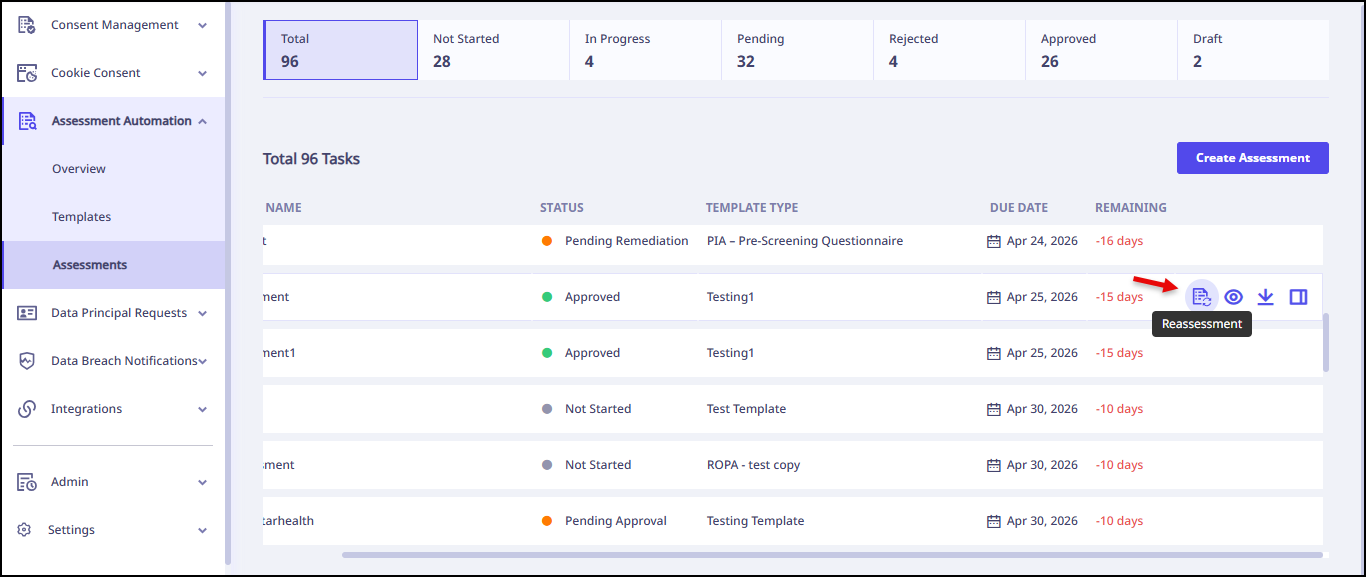
- From the left navigation pane, go to Assessment Automation >> Assessments .
- Select the approved assessment for which you want start re-assessment and click
 .
. - Click Confirm on confirmation pop up.
The Assessment with pre-filled details appears. - Enter Assessment Details:
- Assessment Name
- Owner
- Approver
- Respondent
- Participants
- Enter Reminder details:
- Reminders: Daily, Weekly, Monthly, Quarterly
- Start Date
- Email Content
- Start Date
- Select Re-assessment Options:
You can select which data to copy from the initial assessment:- Responses: Copies the responses provided in the initial assessment
- Comments: Copies any comments currently associated with the initial assessment.
- Attachments: Copies attachments that have been added to the initial assessment.
- Click Publish.
The system creates an assessment and assigns it to a respondent.
Note: Once the re-assessement is created, email notifications are sent to both the Respondent and the Approver .
Responding as a Responder
To respond the assessment as a responder, follow these steps:
- From the left navigation pane, go to Assessment Automation >> Assessments .
- Go to Not Started tab and select the assessment.
- Click Answer Assessments.
- Choose your responses and click Submit.
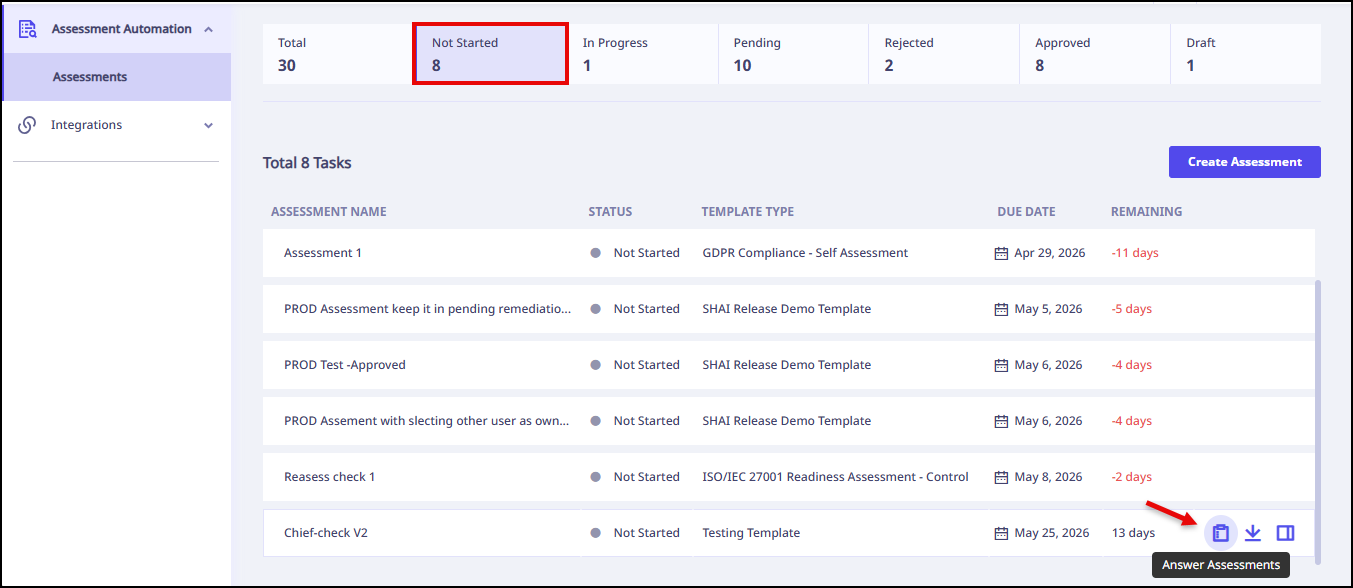
An assessment with pre-filled responses appears.
You can change or keep responses same.
The assessment goes to the approver for approval.
Note: Once the responder submits the assessment, an email notification is sent to the approver.
Approving Assessment as an Approver
As an approver you can approve, ask for more details or reject the assessment.
- From the left navigation pane, go to Assessment Automation >> Assessments .
- Go to Pending tab and select the assessment.
- Click View Assessment.
- Click the question, select the verdict that is either Approved, Asked for more details or Rejected .
- Finally, select the assessment status that is either Approved, Pending Remediation or Selected and click Send Review.
You can give verdict to each question.
Note: If an Approver Ask for more details (requests additional details) and submits the re-assessment as Pending Remediation , the Re‑answer Assessment option becomes available to the Respondent. This allows the respondent to update the requested questions and resubmit the re-assessment for approval.