

To configure OneDrive as a connector in Seqrite Data Privacy, follow two steps:
- Configure the App Registration in Microsoft Entra
- Add OneDrive Connector Configuration in Seqrite Admin Console
Configure the App Registration in Microsoft Entra
Follow these steps to configure the App Registration in Microsoft Entra:
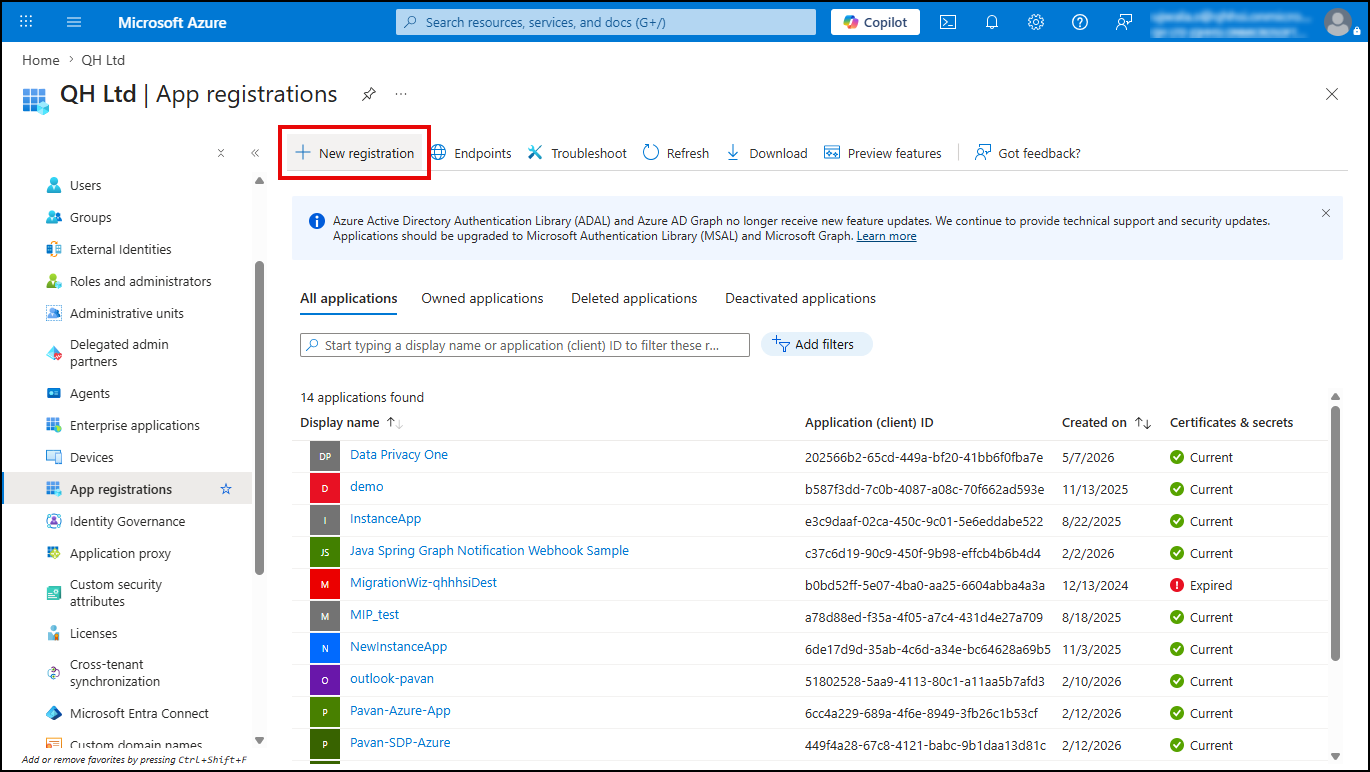
- Login to the Microsoft Entra to create a New App Registration.
- Click New registration.
- Enter Name, Support account types and click Register.
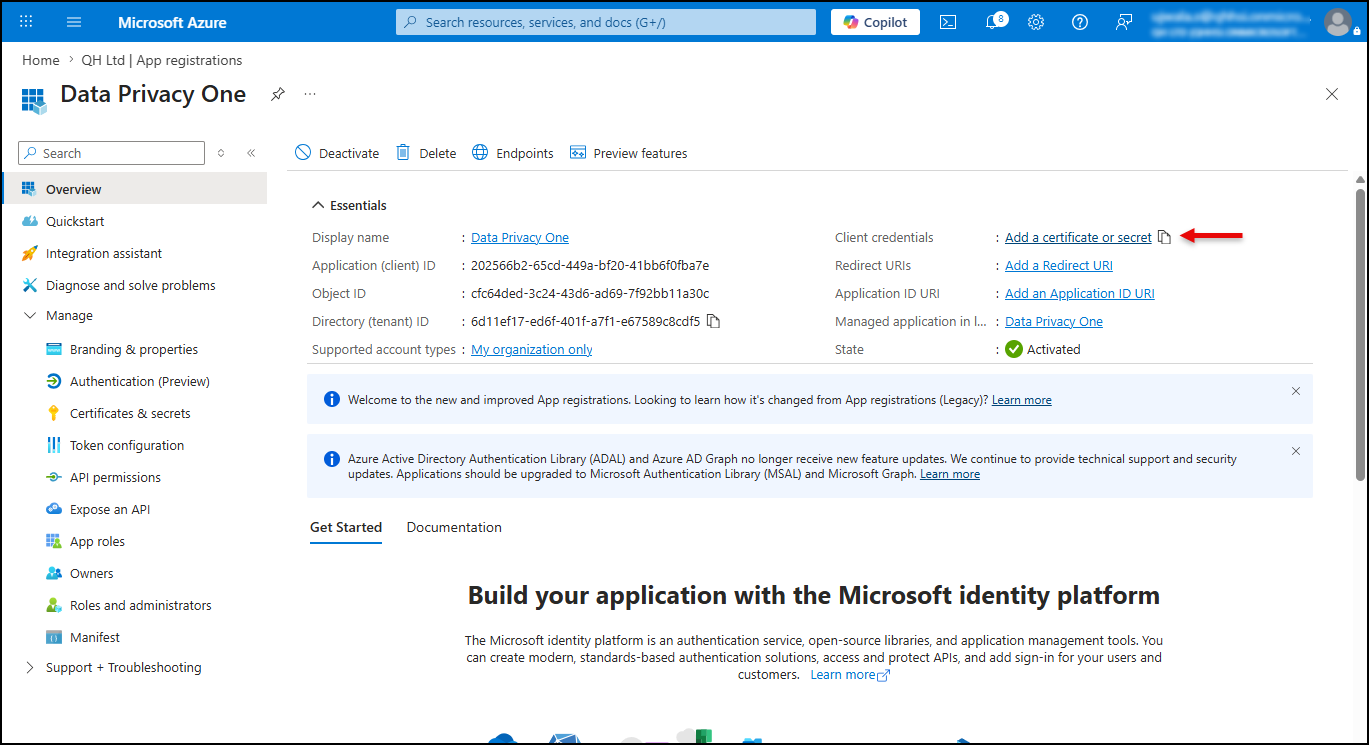
- Once the app is registered navigate to the Overview of newly created App Registration.
- Note the Application Client ID, Directory(Tenant)ID which will be used in the Creation of One Drive Instance in Seqrite Data Privacy Console.
- Create a Client Credentials from the Overview page.
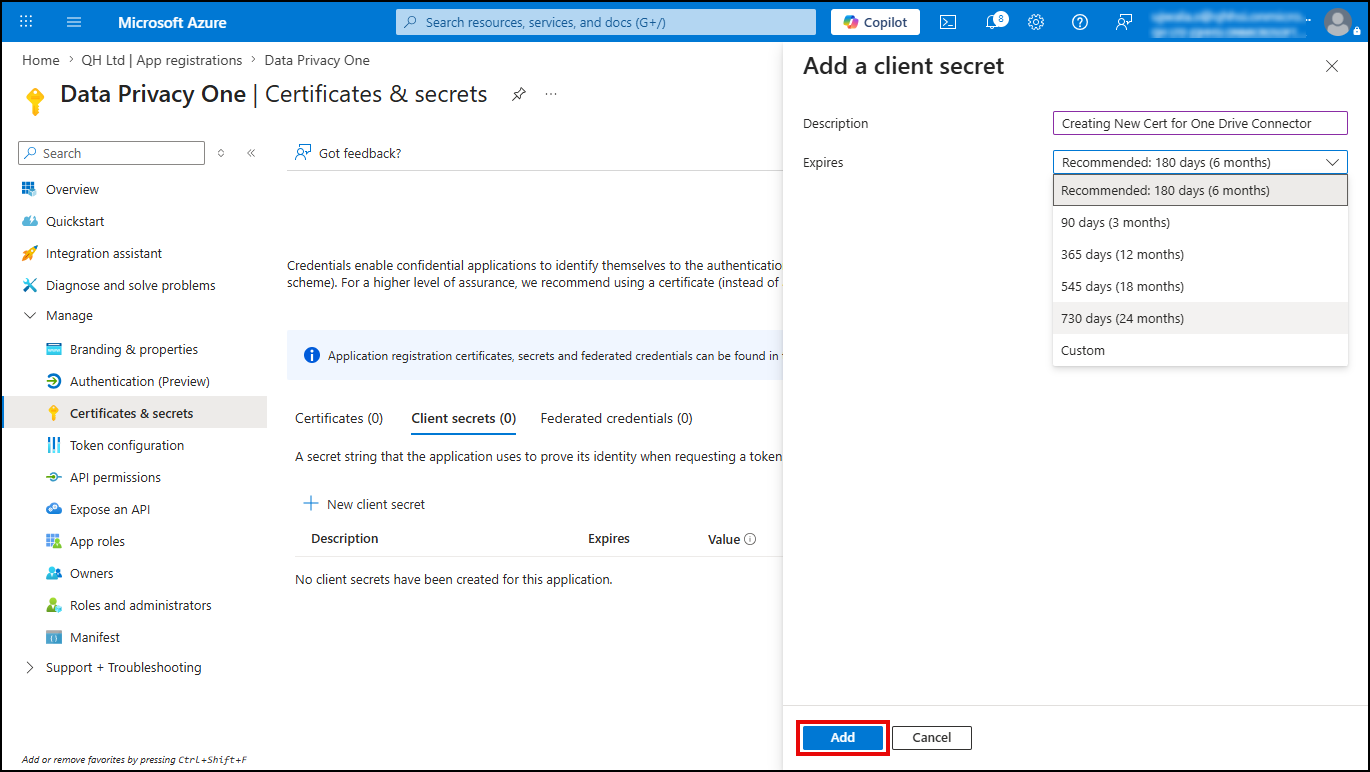
- To create a New Client Secret, go to Certificate & secret and click +New Client Secret.
- Enter Description, select the maximum time duration for the Client secret Expiry and click Add.
- Save the Value (client secret) and use this as a Client Secret in Seqrite Data Privacy Admin Console during instance creation.
- From left navigation menu of same App Registration, select the API Permissions under Manager and click + Add a permission.
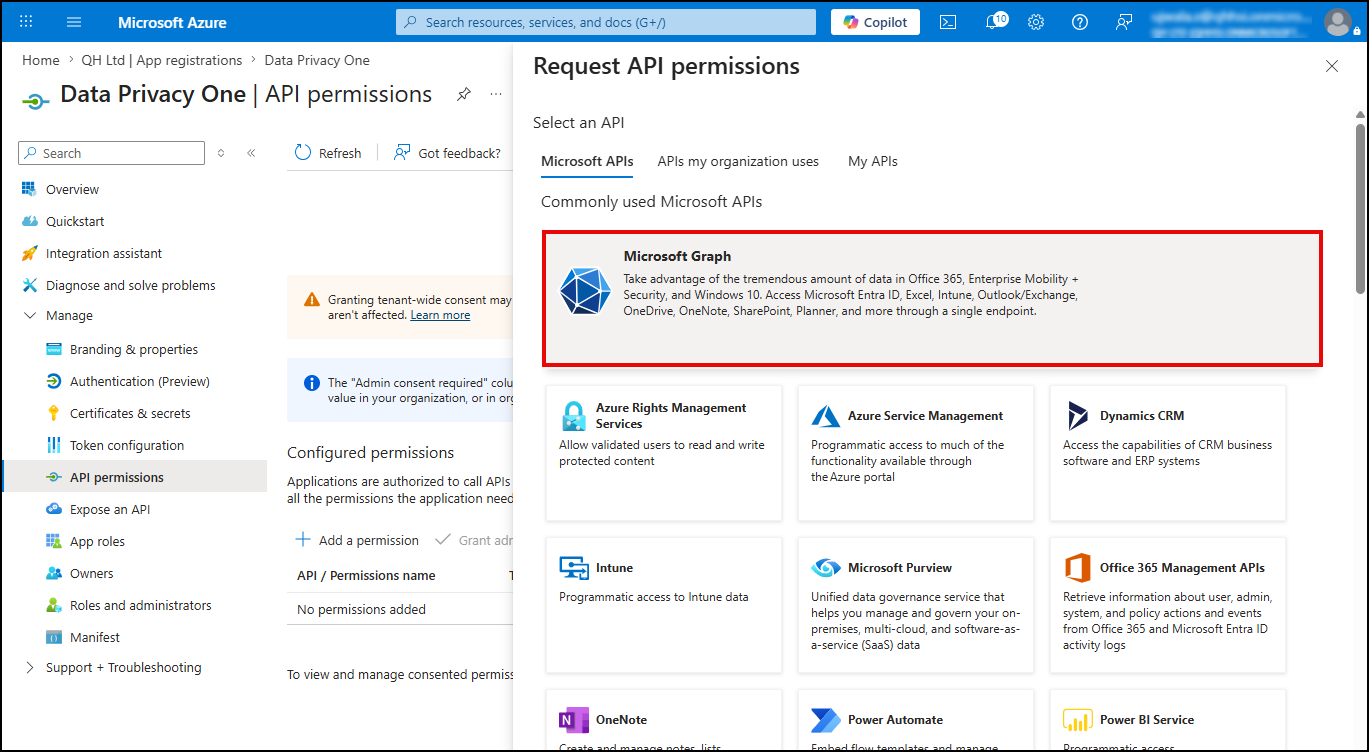
- Click Microsoft Graph.
- Click Application permissions, choose the required permissions from the dropdown list (See the table below for reference) and click Add Permissions.
- After adding the permissions, be sure to Grant Admin Consent. Without granting consent, the configuration may not function as intended
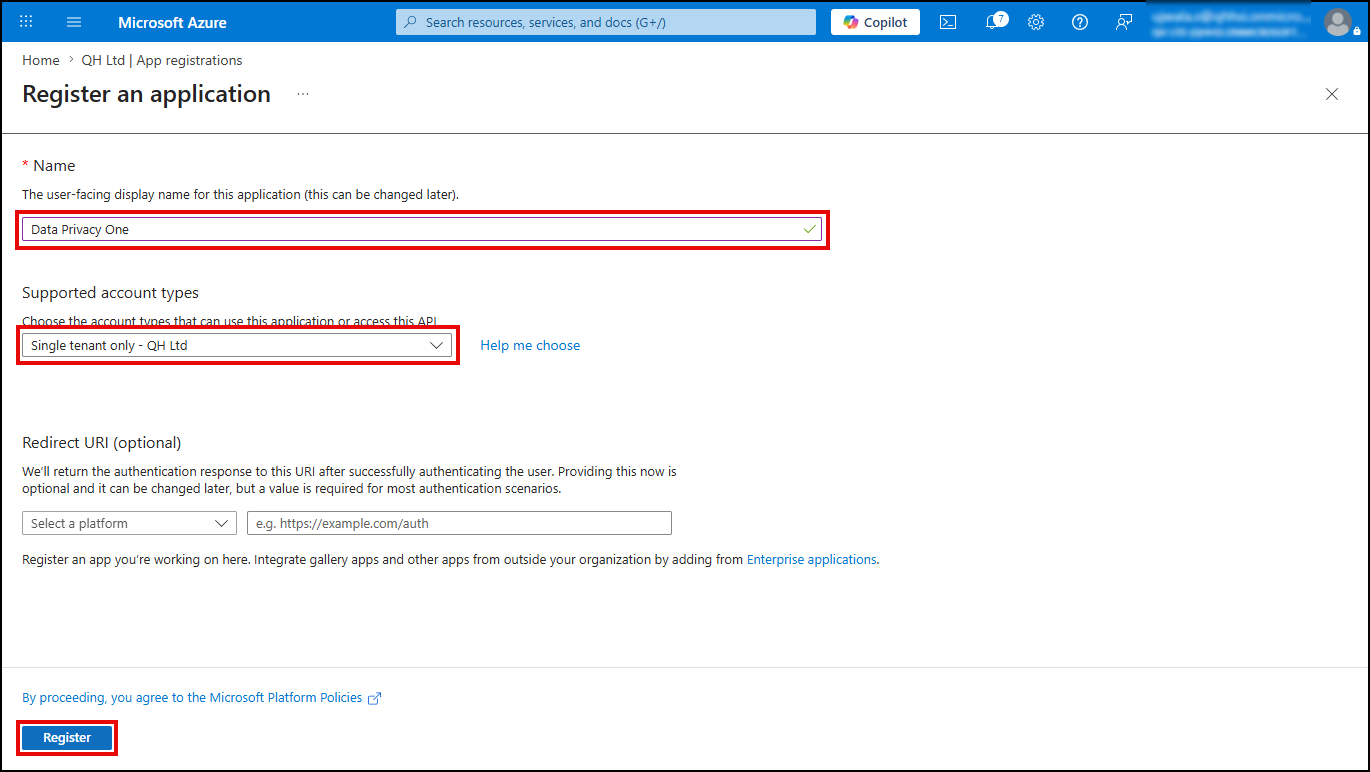
Note: Redirect URL field is optional.
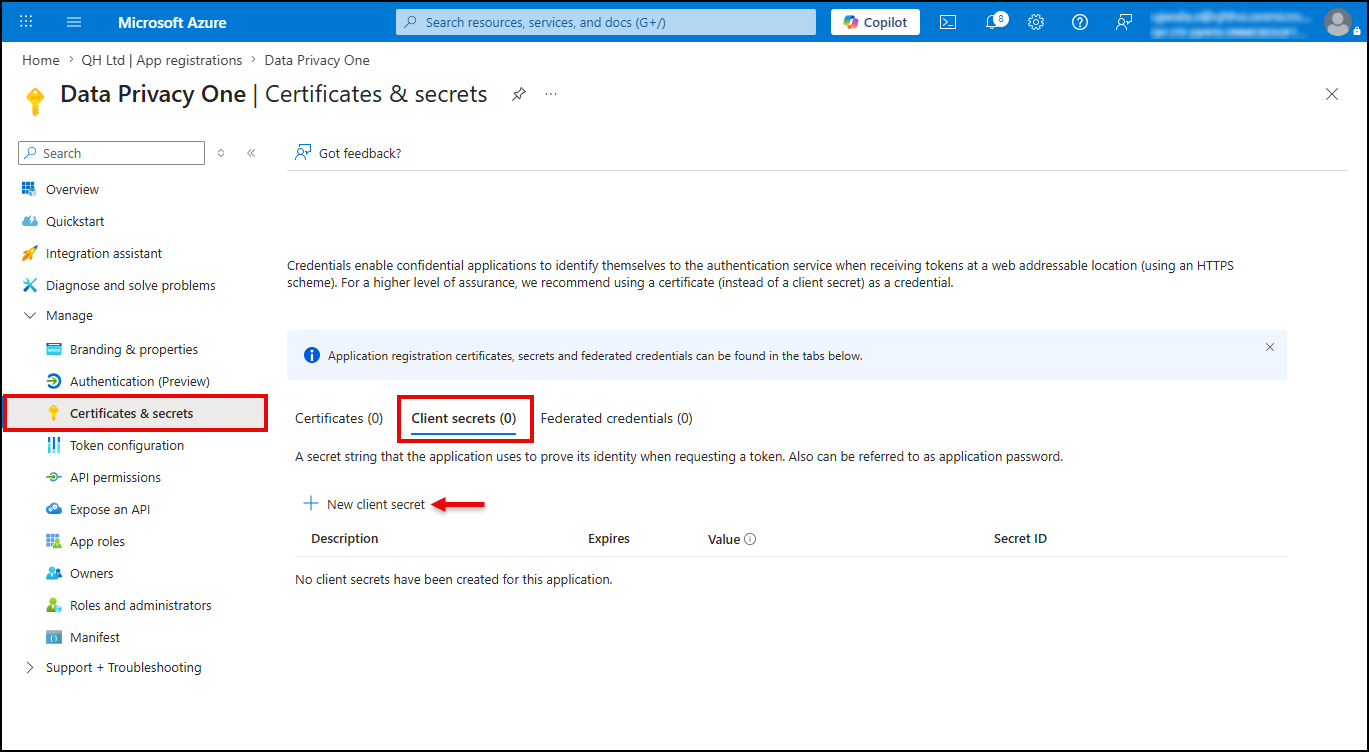
Add a client secret popup appears.
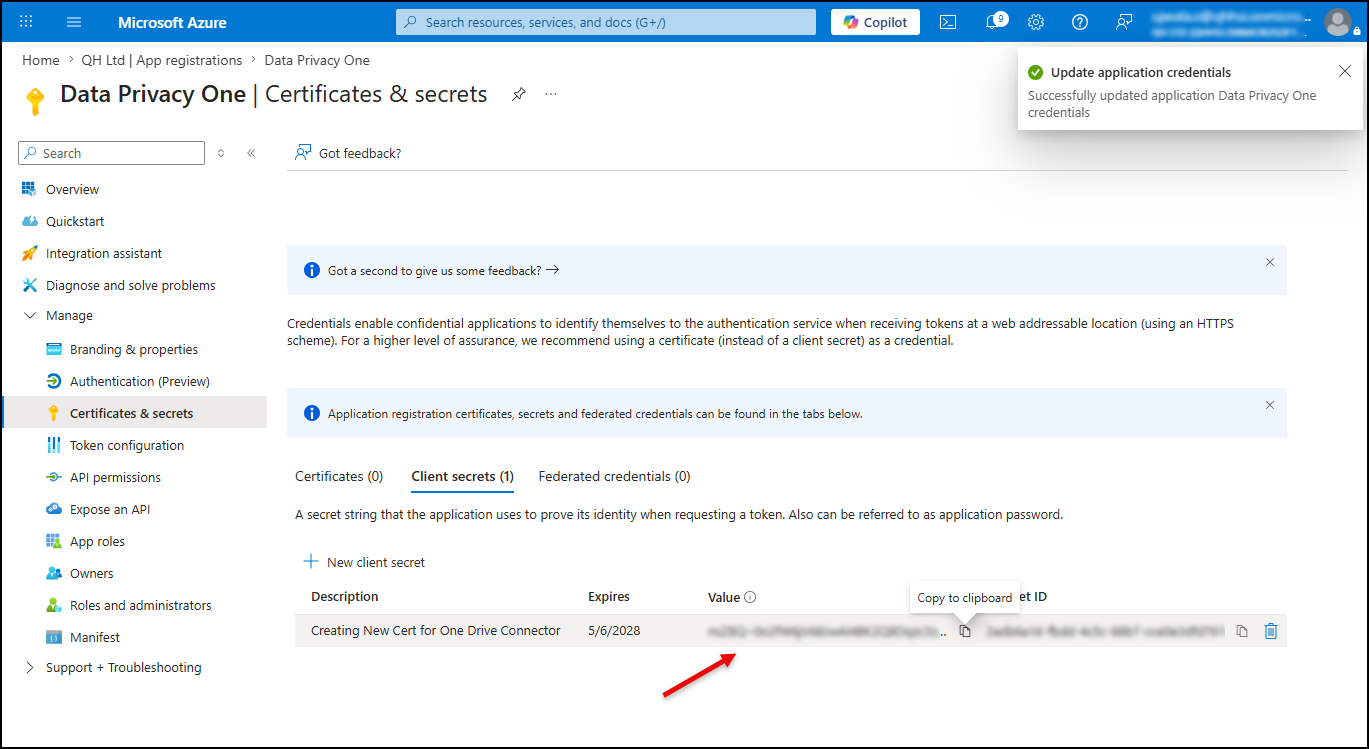
Important:
Once you generate a client secret, make sure to copy and store it immediately. If you leave the page and return later, the client secret/value will appear masked and cannot be retrieved in full. In that case, you will need to create a new client secret.
Request API permission popup appears.
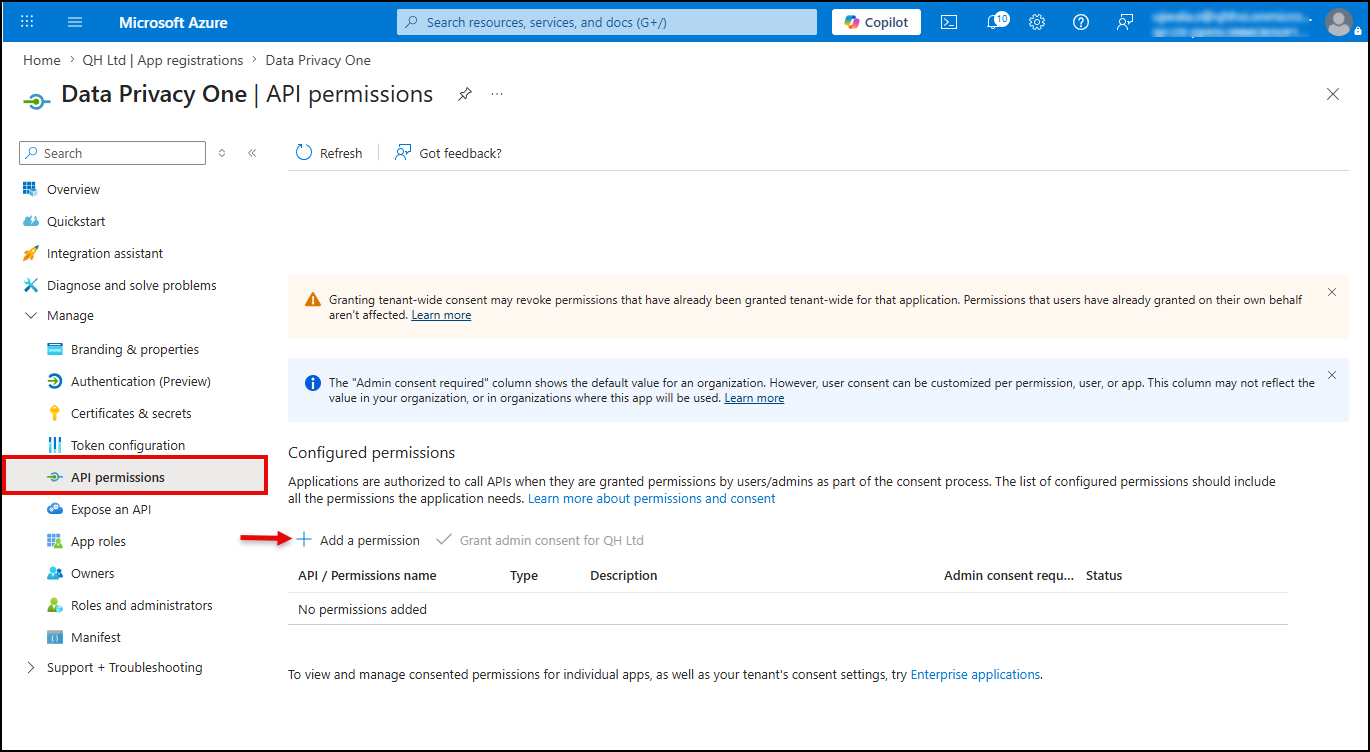
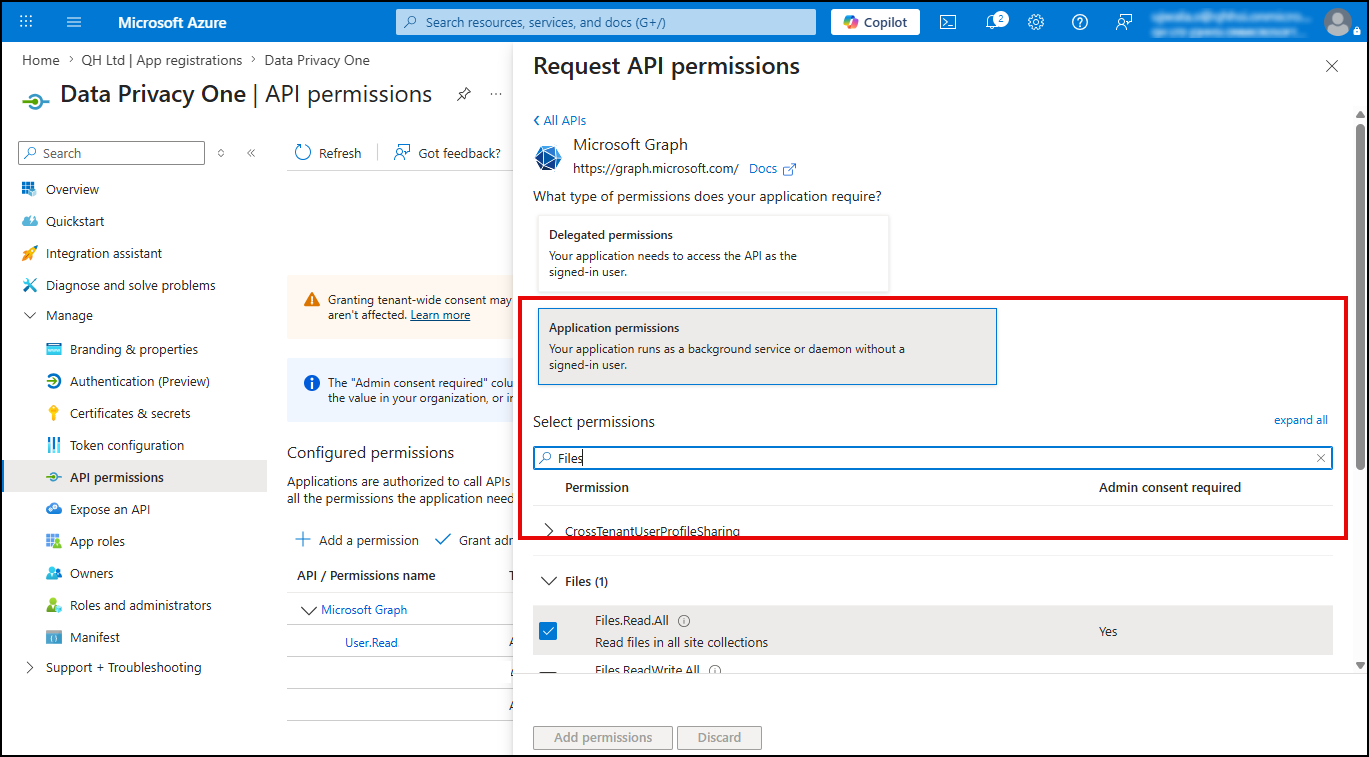
Note: By default, the User.Read API permission is included. You can select and add API permissions as required by your connector.
| API / Permissions name | Type | Permission | Admin Consent Required |
| Directory.Read.All | Application | Read directory data | Yes |
| Files.Read.All | Application | Read files in all site collections | Yes |
| User.Read.All | Application | Read all users’ full profiles | Yes |
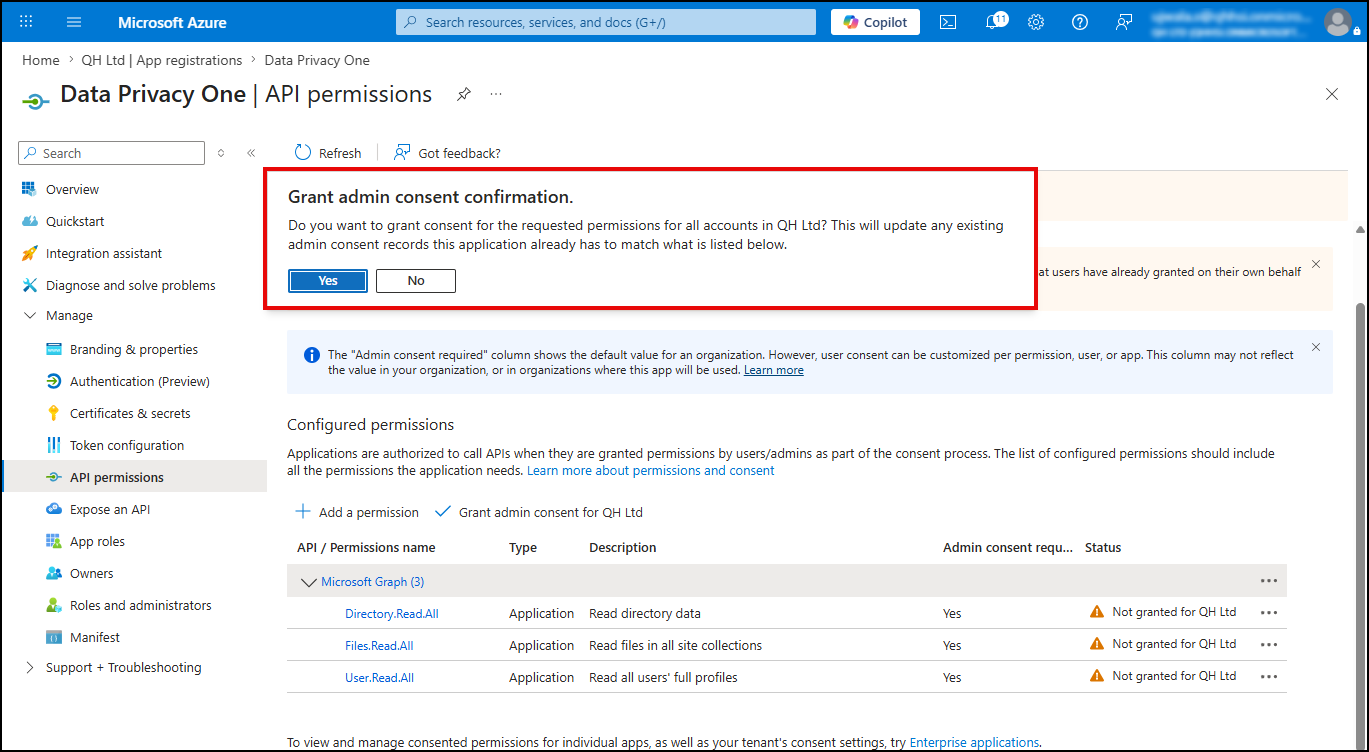
Note: These Permissions and Grant Consent is necessary for the Connector Discovery and Classification of Data.
Add OneDrive Connector Configuration in Seqrite Admin Console
Follow these steps to configure OneDrive as a Connector:
- In the left navigation pane, click Discovery and Classification and then click Connectors.
Configured Data Sources page is displayed. - Select OneDrive from the configured data source list, and then click Add Instance.
- Enter Instance Details and Owner details:
- Name
- Description
- Process
- Connection Type
- Client ID
- Tenant ID
- Client Secret
- Country
- City
- Time Zone
- Data Source Owner: The person who owns the data source and makes technical decisions about it.
- Business Owner: The person who is responsible for the business decisions about the data source
Note: The Client Secret and Tenant ID generated during Configure the App Registration in Microsoft Entra are required to complete this configuration.
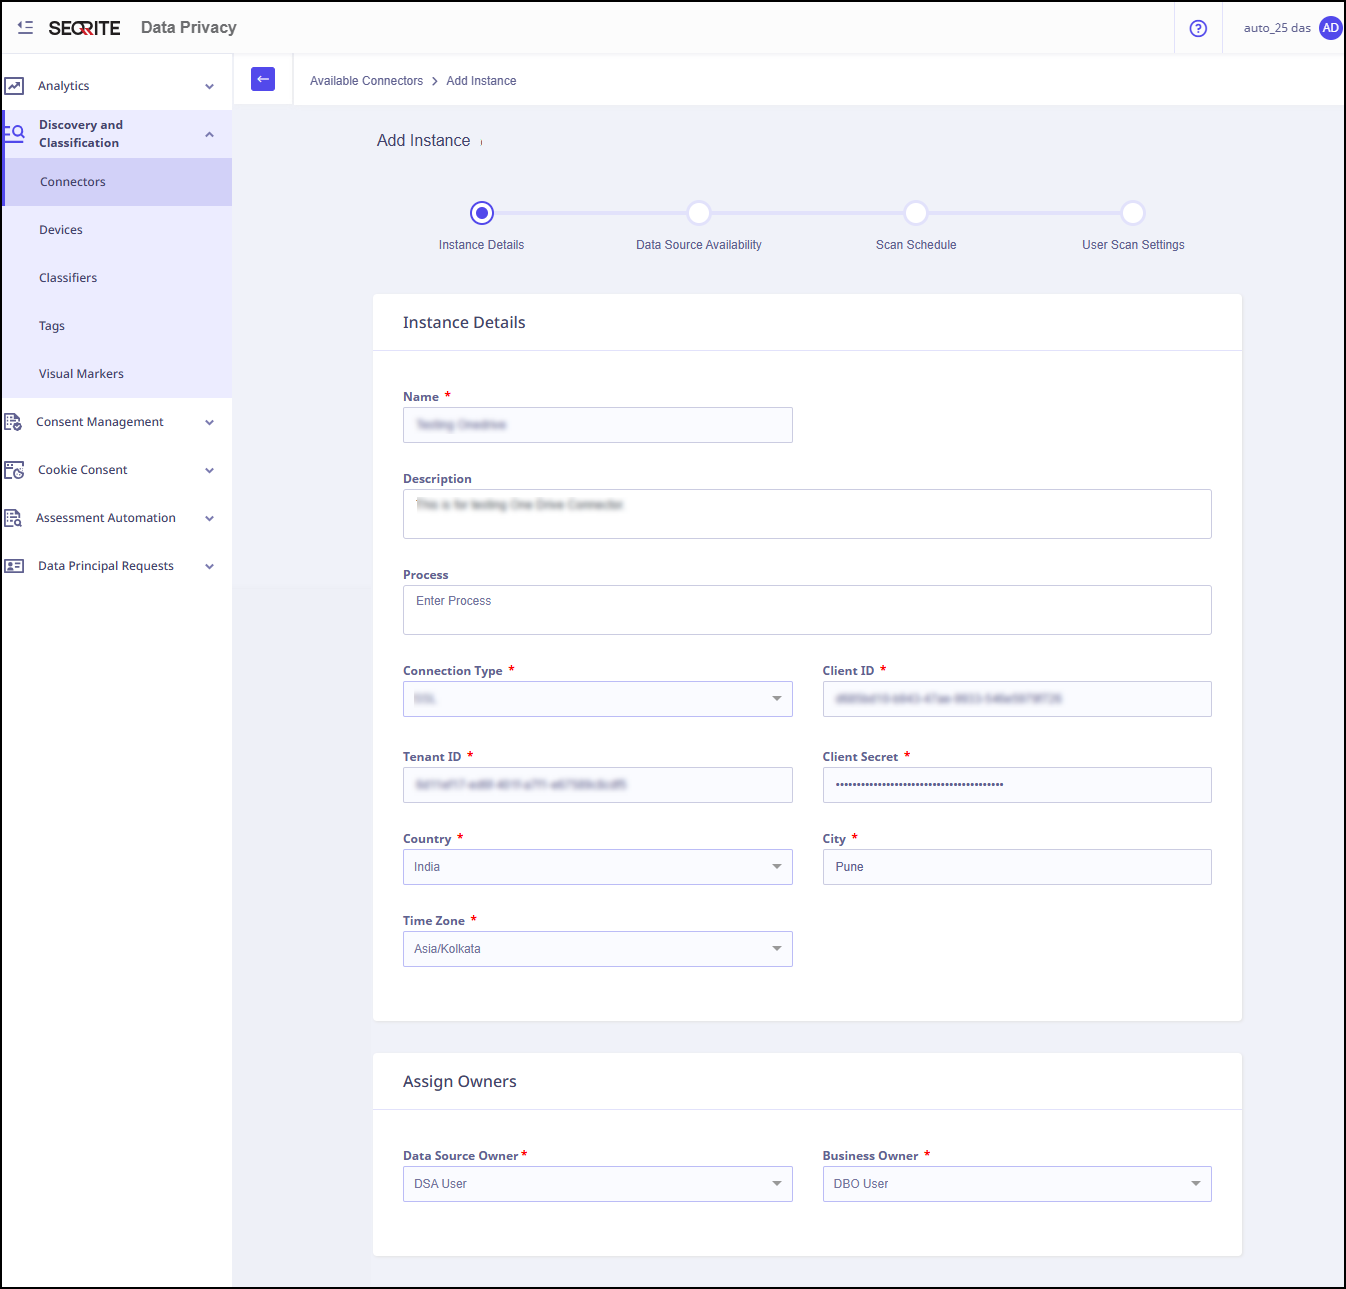
- Click Check Connection .
- Click Next.
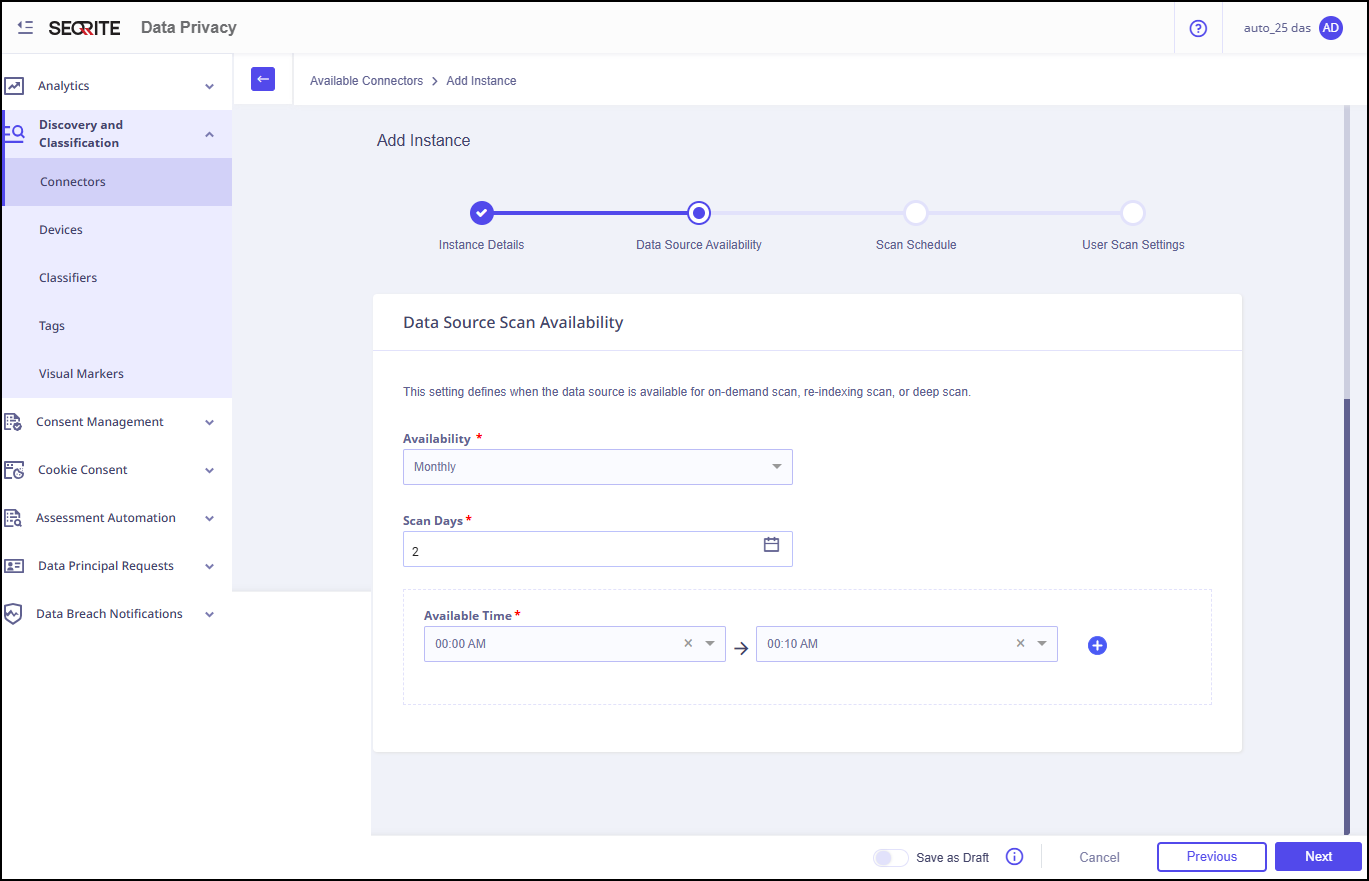
- Enter the Data Source Scan Availability details.
- Availability: Monthly, Weekly or Daily
- Scan Days
- Available Time
- Click Next.
- Enter Scan Schedule/Scan Frequency details:
- Scan Frequency
- Deep Scan Frequency
Note:
- The data source will be available for scanning monthly on selected date.
- The data source will be scanned based on the user‑defined interval. A deep scan will be performed after the number of scan cycles specified by the user.
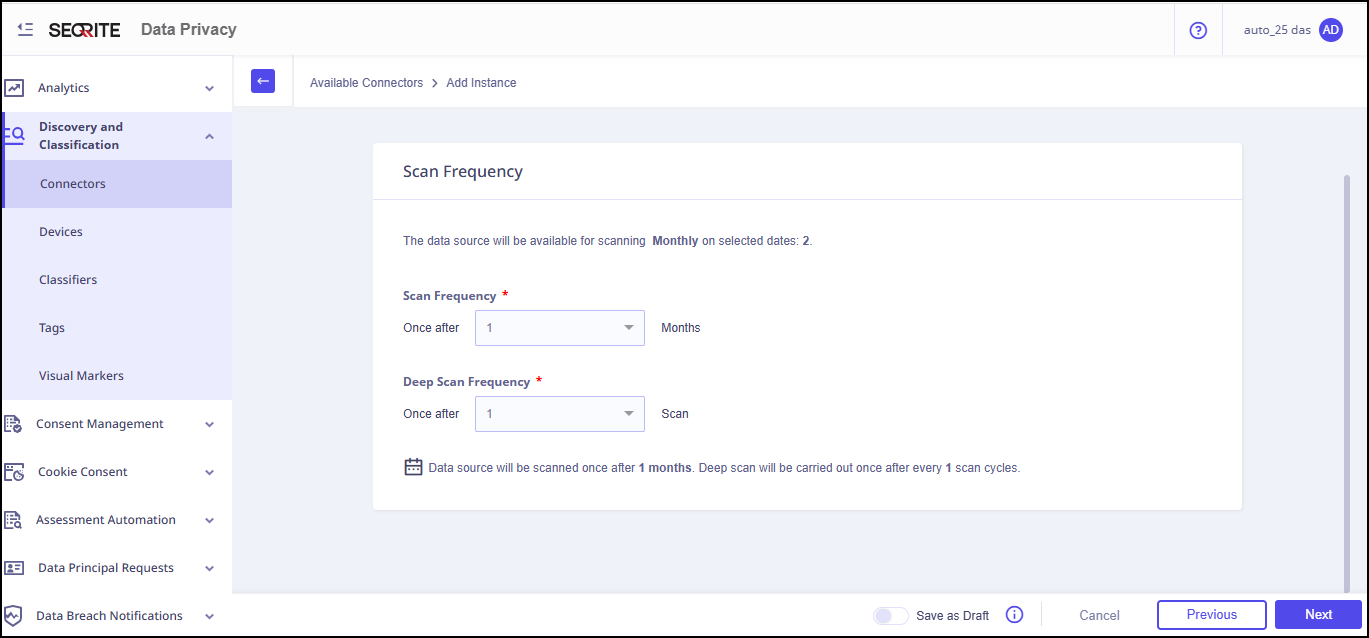
- Click Next.
- In Users Scan Settings, select Scan Type that is either Full User or Selective User Scan.
- By default, the data source scan includes all registered users. For a more customised approach, opt for the Selective User Scan option.
- Choose specific user tags based on your selected scan mode to include or exclude particular users or user groups.
- Click Add Instance.
If the provided details are accurate, the connection with OneDrive will be established successfully.

This setting defines when the data source is available for on-demand scan, re-indexing scan, or deep scan.
Note:
Instance of the data source is added successfully.