Following prerequisites are needed for creating a limited application on windows server. This helps in configuring the access to remote desktop applications.
Configuring a remote application
To configure a remote application for limited application access, follow these steps.
- Open Server Manager.
- Navigate to Remote Desktop Services > Collections > QuickSessionCollection.
- In the REMOTEAPP PROGRAMS section, click the Tasks drop-down menu and select Publish RemoteApp Programs.
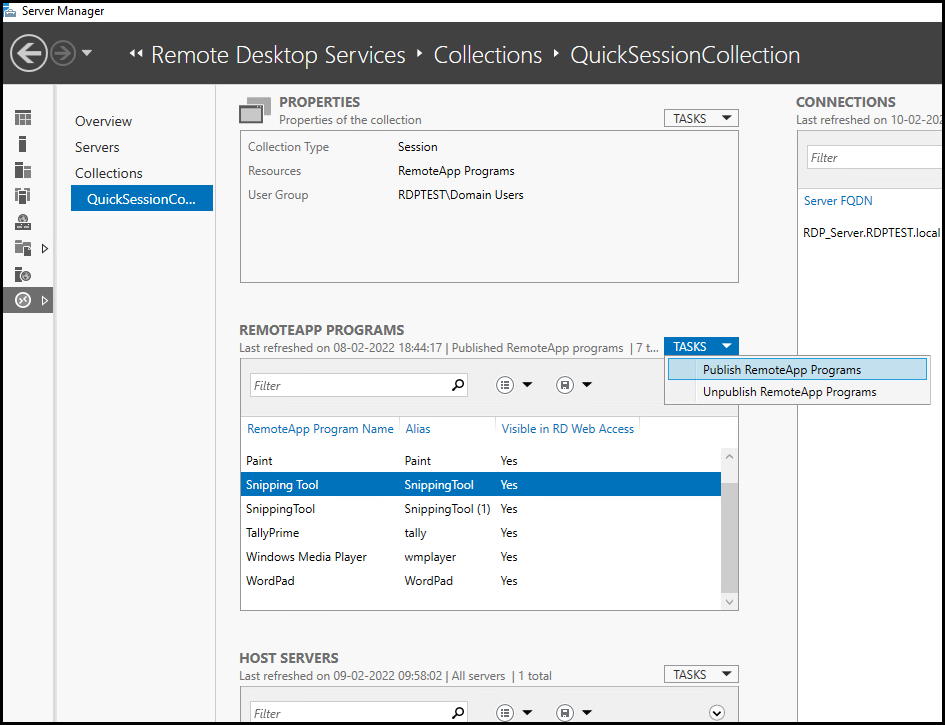
The Publish RemoteApp Programs dialog box opens.
-
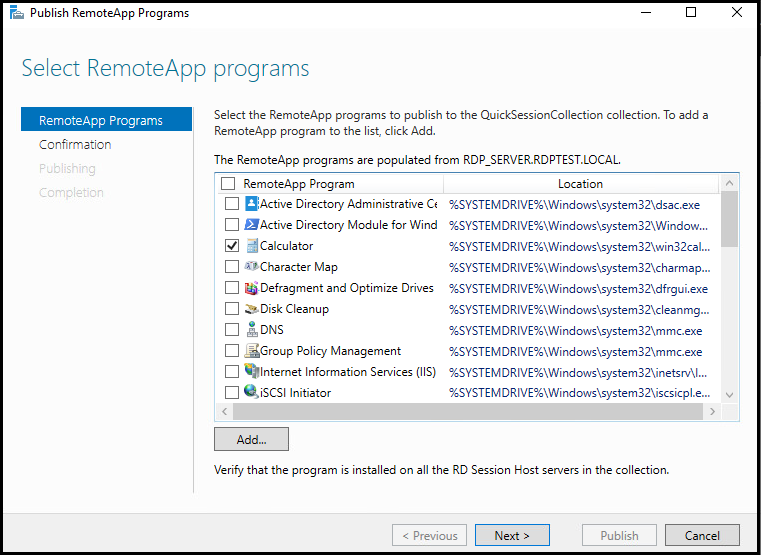
Select the app that you want to configure and click Next.
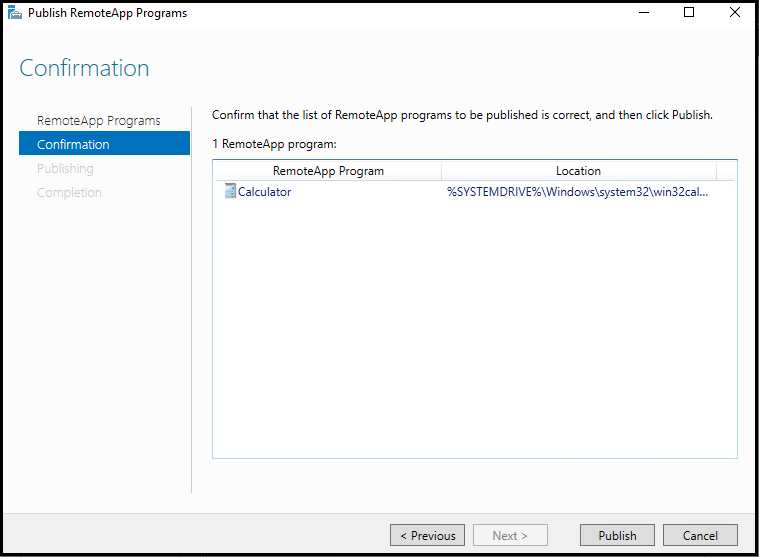
- On the Confirmation page, click Publish.
-
After the application is published, right-click it in the REMOTEAPP PROGRAMS section.
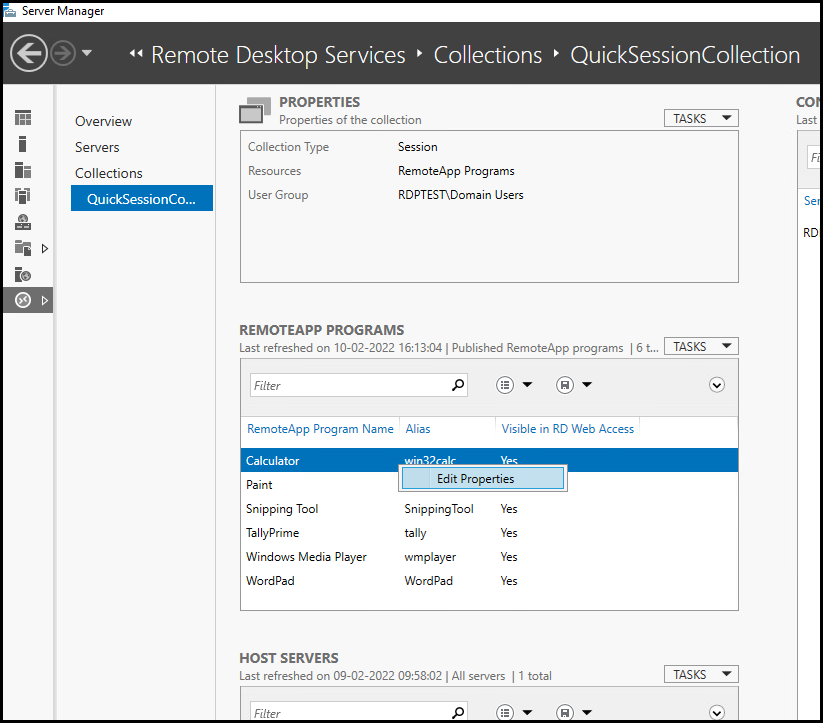
Click Edit Properties.
- On the General tab, click the Yes option button in the Show the RemoteApp program in RD Web Access dialog.

Click OK.
- On the Parameters tab, click the Allow any command-line parameters option button if you want to support command-line parameters. Else, click the other two option buttons as required.

Click OK.
- On the User Assignment tab, it is highly recommend to change the User Assignment option to a specific user or a group of users.
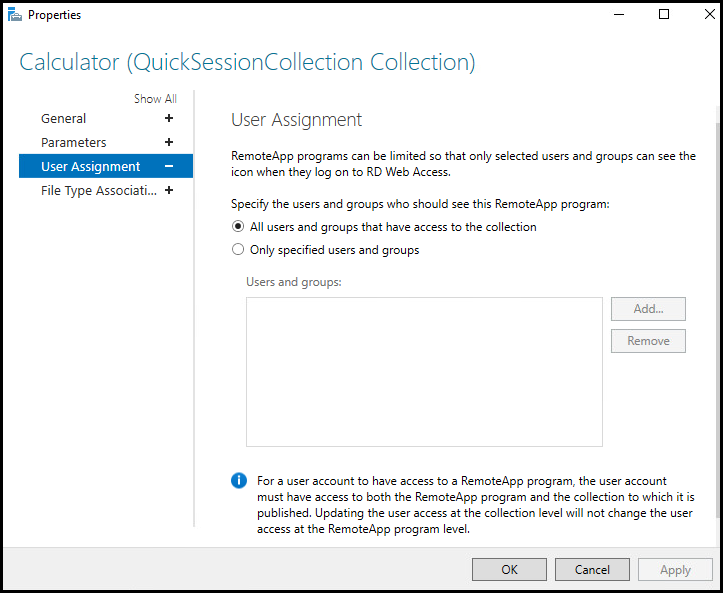
You will be connected to the server as a pre-designated account, which can be managed by Privileged Identity. This is the only account that requires access to run the program. The assigned account requires all permissions and rights to launch the desired programs.
After this is done, click OK.
Known Issues
Following known issues occur while accessing remote desktop applications.
Case – 1:
After an application is minimized, it cannot be maximized. The screen will remain blacked out.
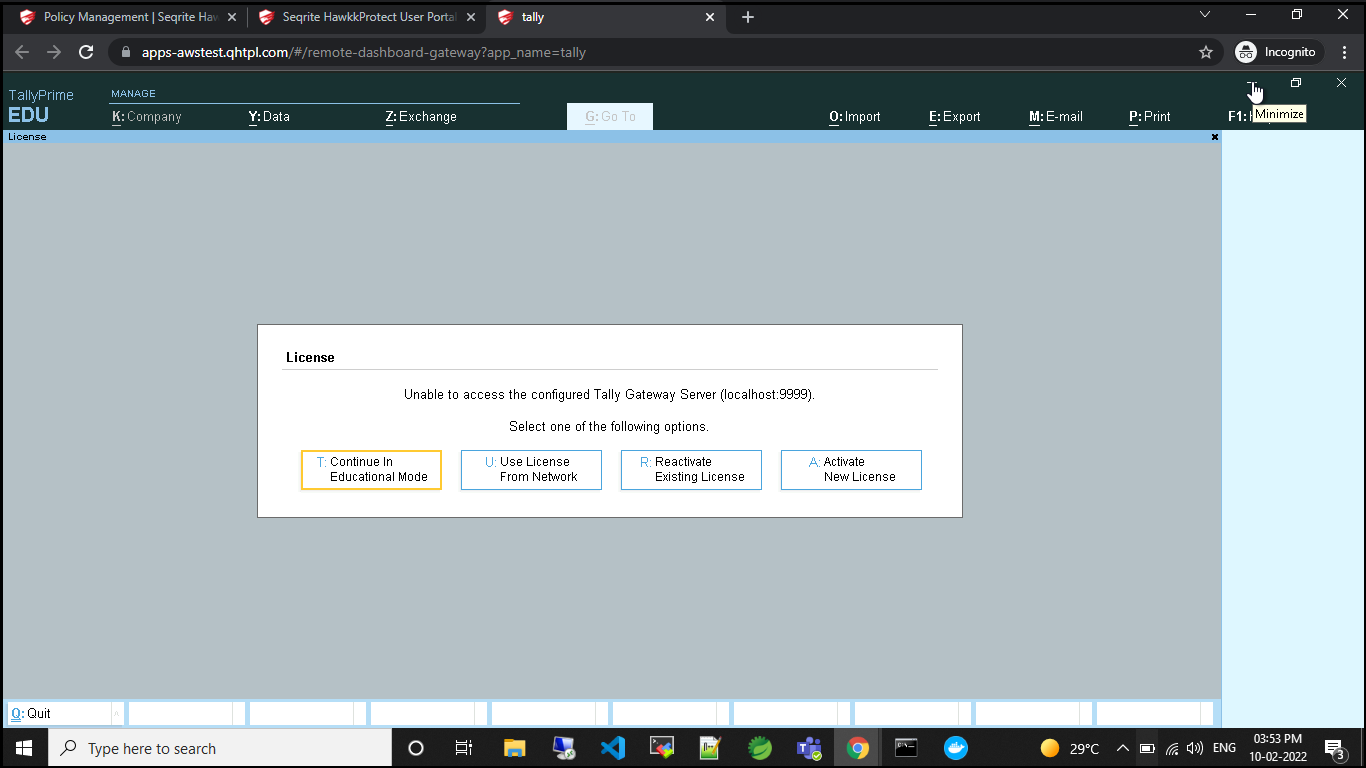
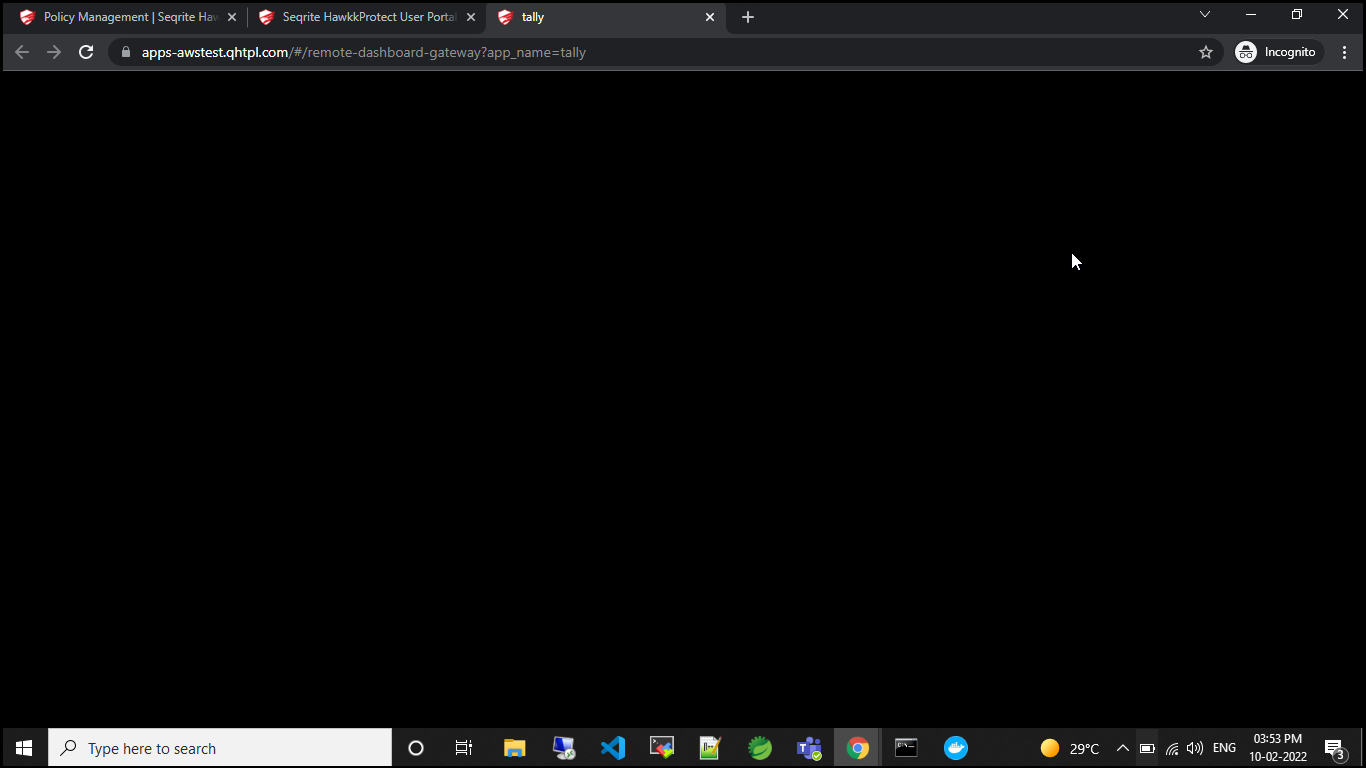
The workaround:
The user must wait for one minute. After one minute, the user can relaunch the application from the application portal.
Case – 2:
User opens one application and closes the browser tab without closing the application. The first application is visible when the user opens another application.
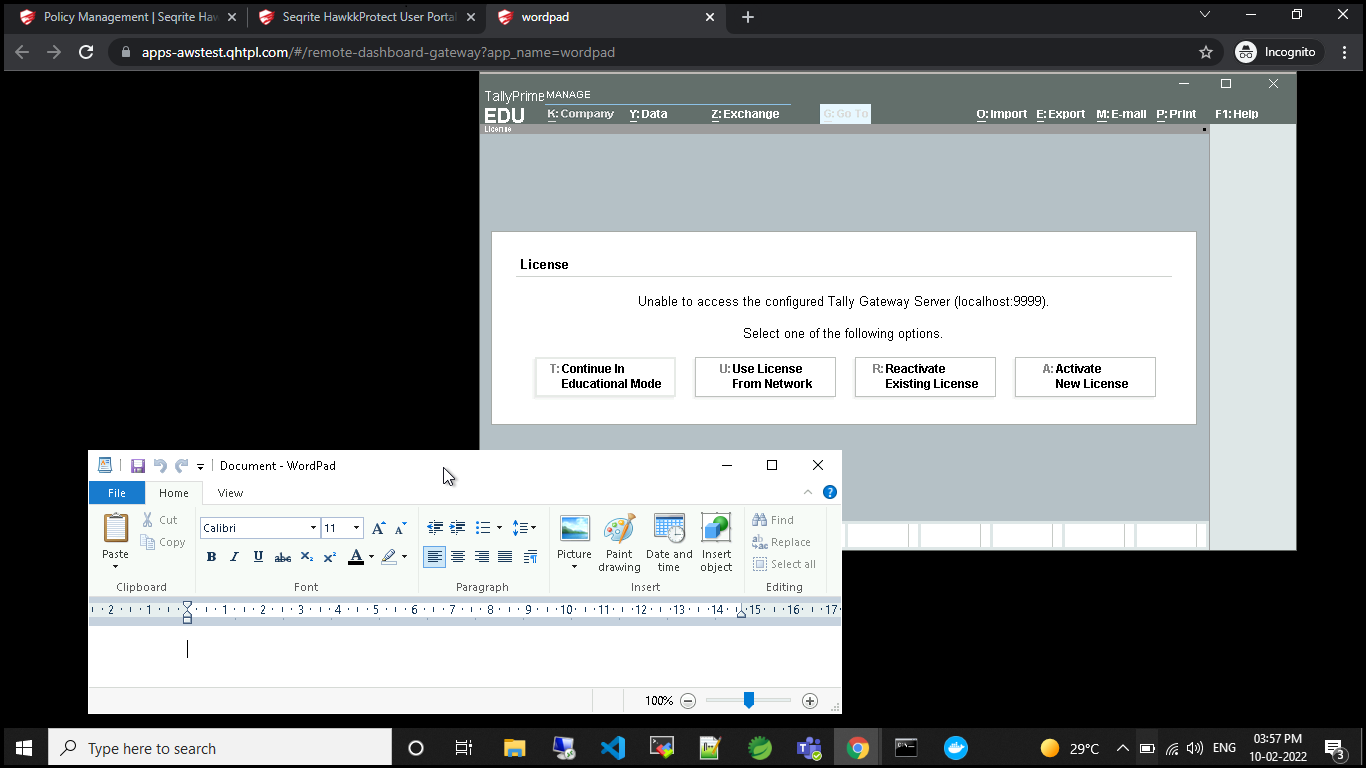
There is no workaround for this case. You can close one application and access the other application.
Creating an Organizational Unit and Adding Users
To create a separate organizational unit and add users, follow these steps.
- Open Server Manager. Navigate to Tools > Active Directory Users and Computers in the upper-right corner.

A new dialog box opens.
- Right-click the current domain. Click New > Organizational Unit for adding users to allow access for Remote Desktop Applications.
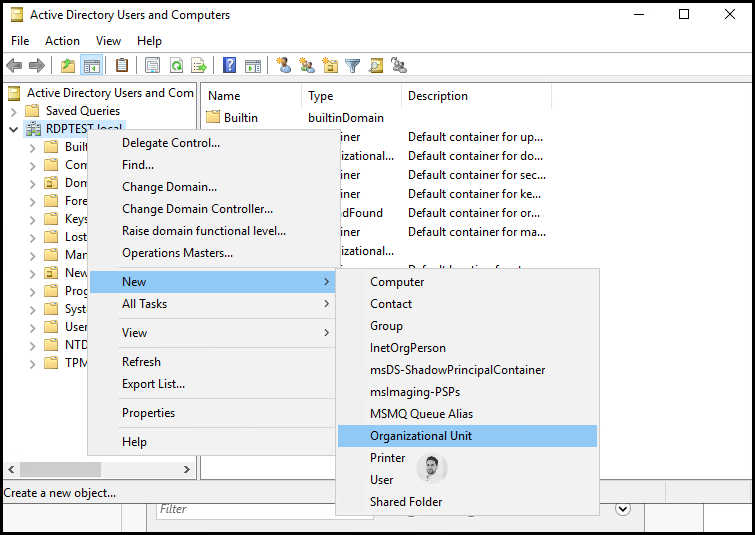
The Organizational Unit dialog box opens.
-
Enter the name of the organizational unit.
Select the checkbox below the Name field.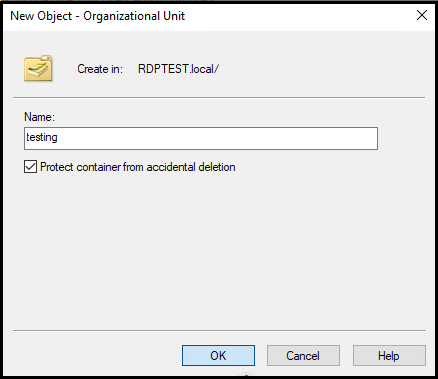
After this is done, click Next.
-
Right-click on the Organizational unit. Select New > User.
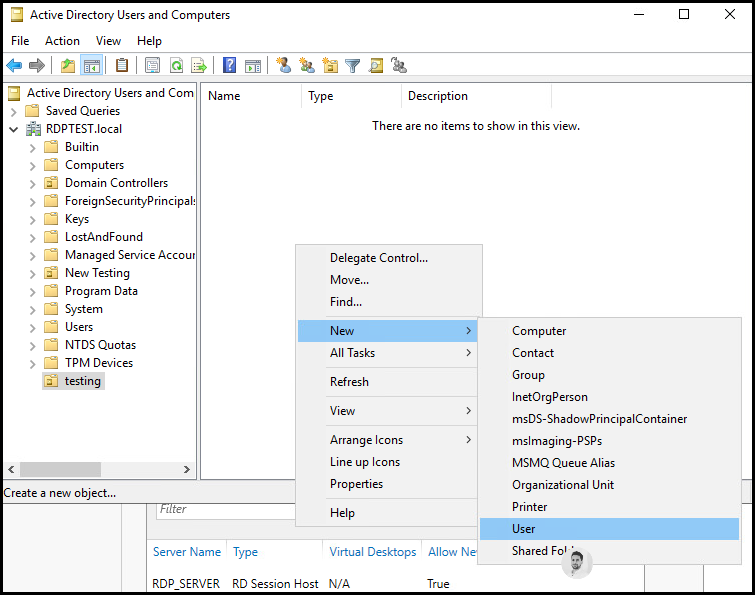
A new dialog box opens.
-
5.Enter the following details in the New Object – User dialog box.
- Enter the name of the user.
- Enter the user logon name.
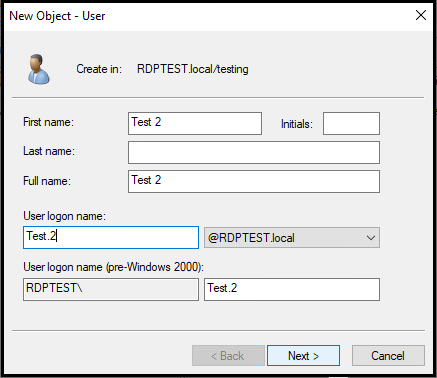
Click Next.
-
On this page, enter the password and confirm the password.
Select the checkboxes, as required.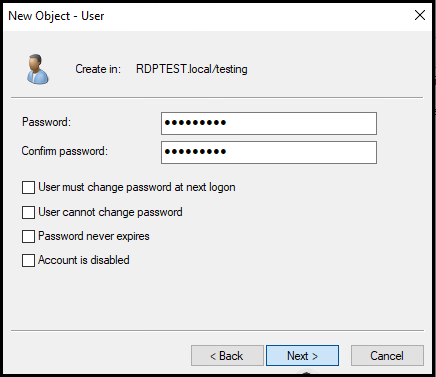
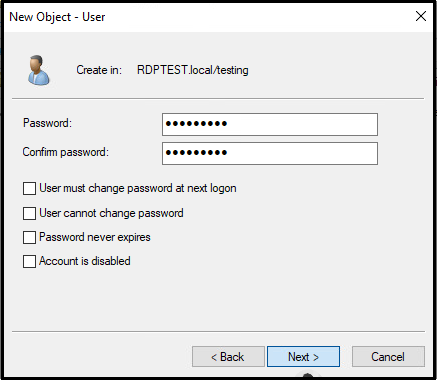
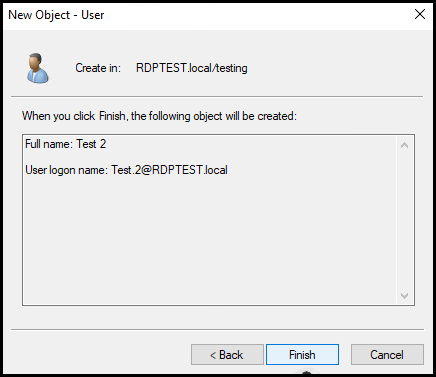
Click Next. Then click Finish.
Creating a Group Policy
Creating a group policy is recommended for limited access to applications.
To create a group policy, follow these steps.
- Open Server Manager.
- Navigate to Tools > Group Policy Management.
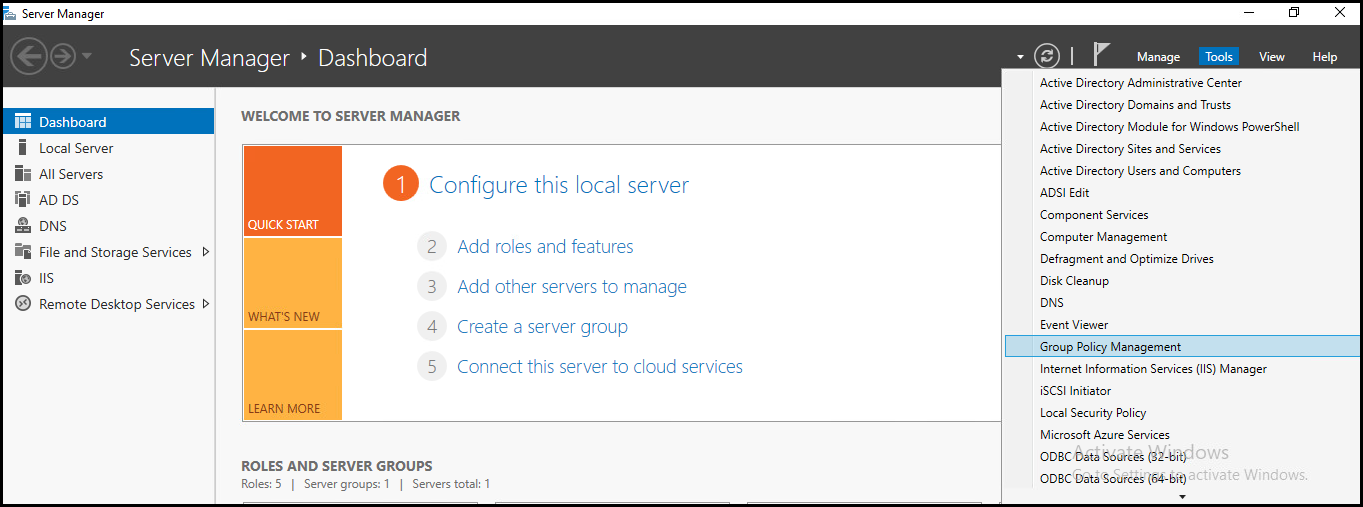
- On Group Policy Management (GPO) page, the organizational units created earlier are displayed under Domains.
- Right-click the Organizational Unit for which you want to create a new group policy. Click Create a new GPO in this domain, and Link it here.
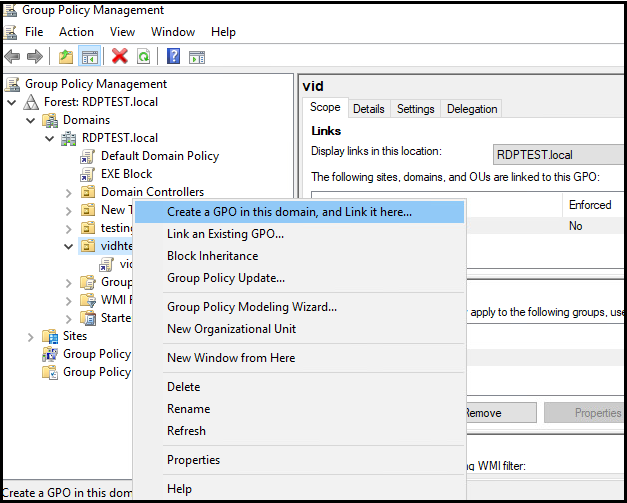
A new dialog box opens.
- In the New GPO dialog box, enter the group policy name and click OK.
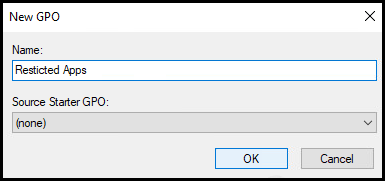
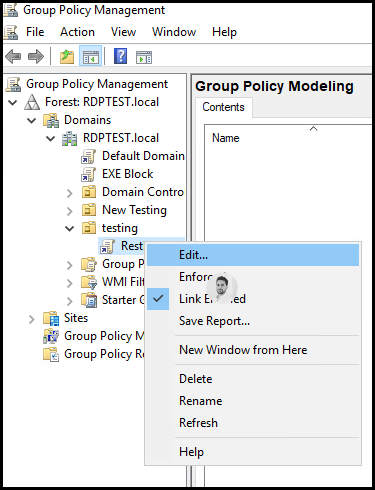
This new group policy is created. It is visible in the left side pane.
- Now, right-click the policy. Click Edit.
- In left hand pane, navigate to User Configuration >Administrative Templates >System.
Under System, double-click Run Only Specified Windows Applications.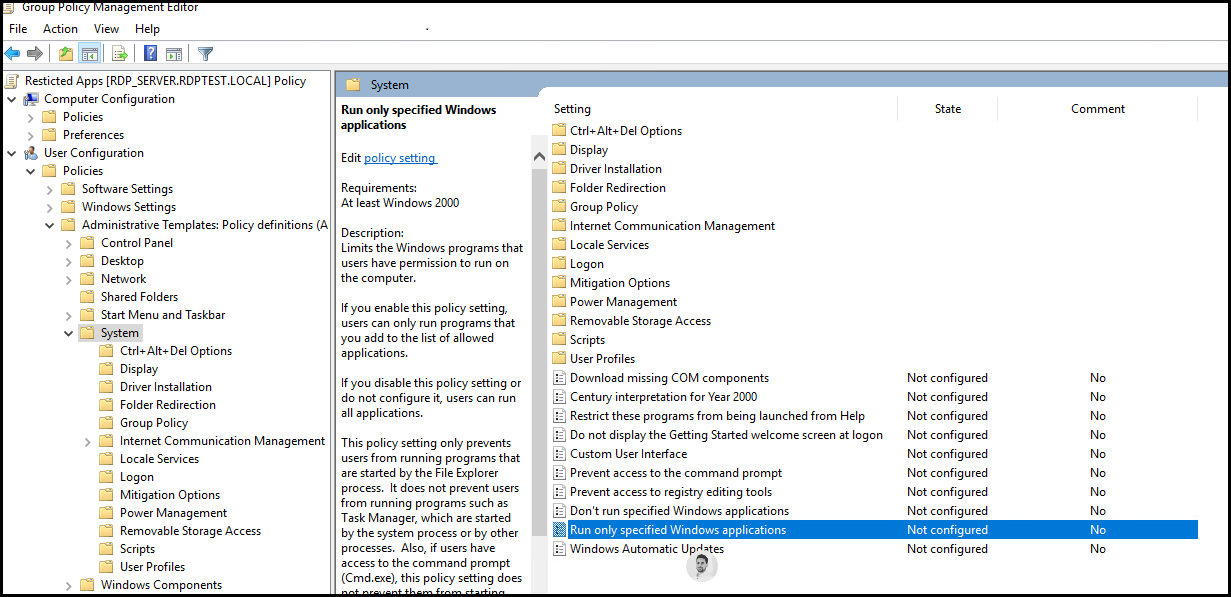
A dialog box opens.
- Click Enabled option button.
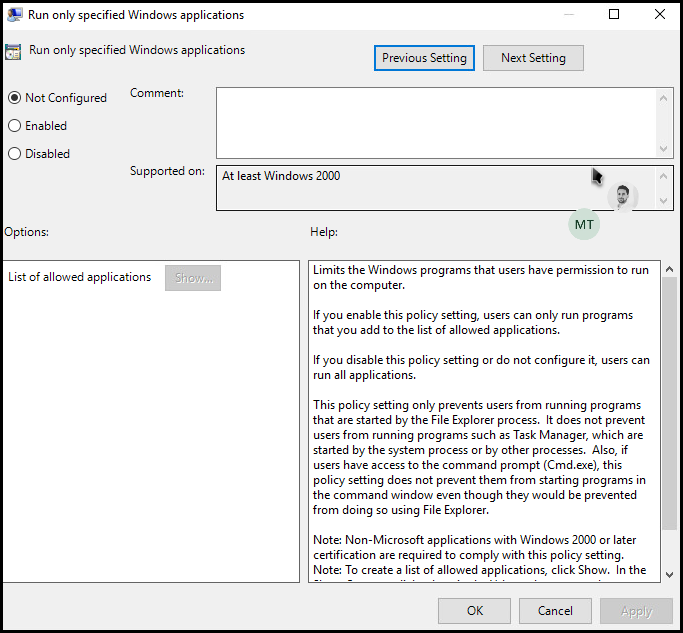
- Click the list of allowed applications to see and add applications.
- To add applications, click Show.
The Show Content dialogue box opens.
- In the Value column, type the exact .exe file names of applications you want to allow access to users.
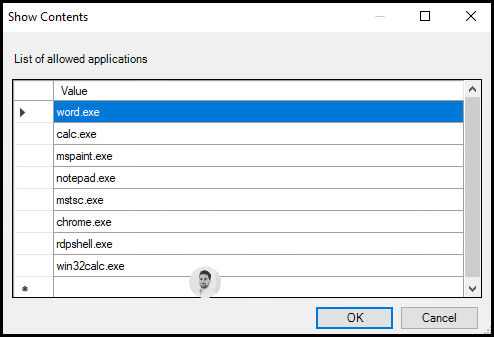
Click OK to save it.
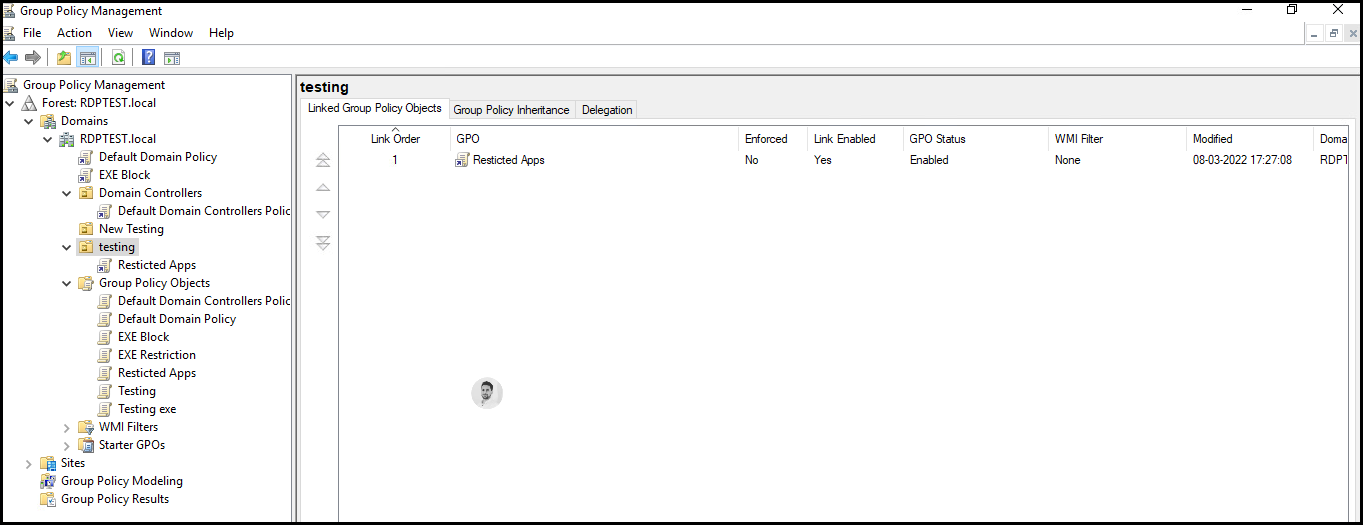
Now the Group policy creation is complete.
Note:
mstsc.exe and rdpshell.exe are must to take RDP.

