
The purpose of this document is to provide instructions on how to configure and manage GitLab to enable SAML integration.
1. Adding the SaaS application to Seqrite ZTNA
To add the SaaS application, follow these steps:
- Log into Seqrite ZTNA admin console.
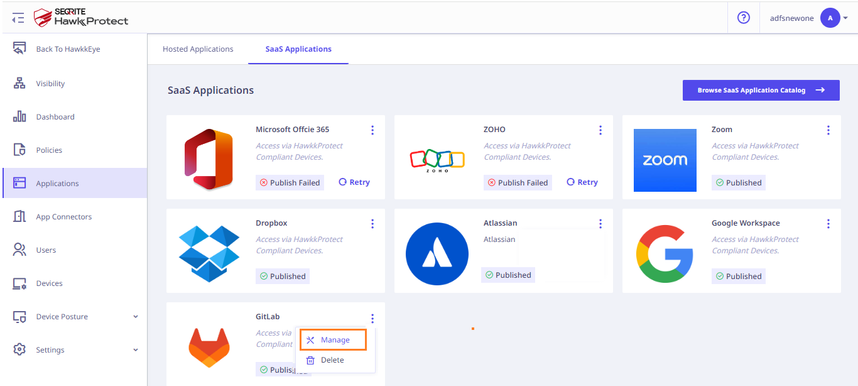
- Navigate to the Applications section.
- Navigate to the SaaS Applications tab and click.
- To add Slack application click Browse SaaS Application Catalog.
- Click Add + of GitLab application card.
- Enter the Application Name. Provide the Application Description and Logo, if any.
- Select the following checkboxes as appropriate to control access from managed laptops, desktops, or mobile devices.
- Allow access from registered Seqrite ZTNA-compliant devices:
Only users with registered Seqrite ZTNA-compliant devices (on which the Seqrite ZTNA agent is installed and active), including desktops and laptops, can access the applications. - Allow access from mSuite:
Mobile users are able to access applications only through the Workspace. To know more about accessing SaaS application through mSuite Workspace, see mSuite Documentation.
Note: iOS is not supported; iOS users can access applications outside the Workspace also.
- Allow access from registered Seqrite ZTNA-compliant devices:
- Click Add to add the application.
2. Configure domain federation for GitLab
To configure domain federation for GitLab, follow these steps:
- Log in to the GitLab Admin Console, navigate to the Groups section, and select the specific group for which you want to enable Single Sign-On.
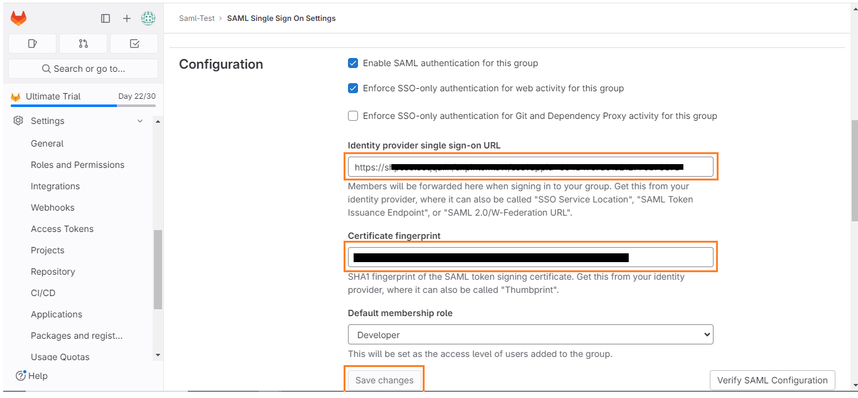
- Go to Settings in the left-hand side menu and click the SAML SSO option.
- Open Seqrite ZTNA Admin Console and navigate to Applications → SaaS Applications. Click on the Manage option of the GitLab application. Copy the Login URL from the Seqrite ZTNA GitLab application and paste it into the SAML configuration of GitLab.
- Copy the certificate from the Seqrite ZTNA GitLab application, save it in the cert.pem file and use the following command to generate the certificate fingerprint.
- Save the SAML configuration settings in GitLab to apply the changes.
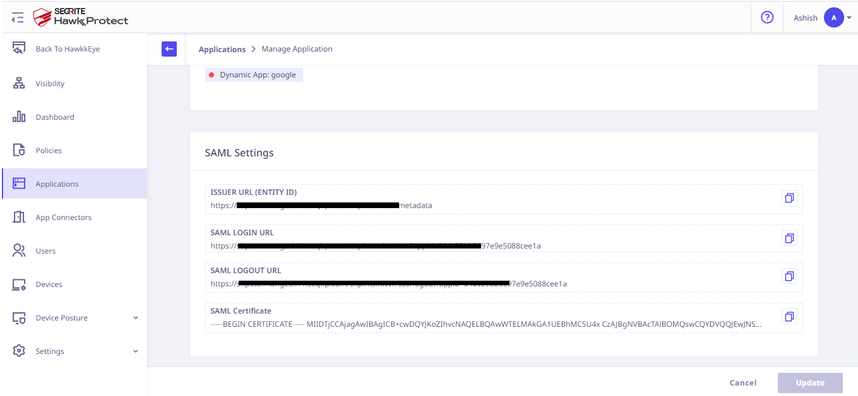


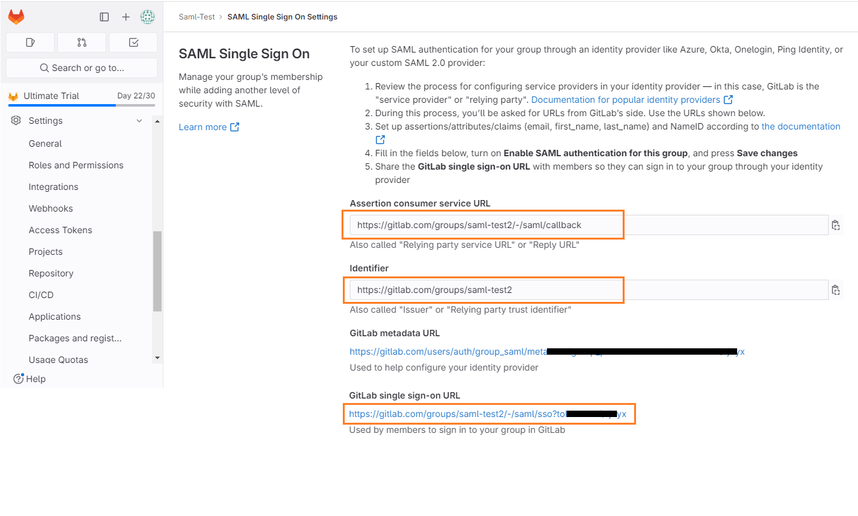
- Copy the ACS URL, Identifier (Entity ID), and Single sign-on URL from GitLab and update the corresponding fields in the Seqrite ZTNA GitLab application settings:
- ACS URL in GitLab corresponds to ACS URL in Seqrite ZTNA.
- Identifier (Entity ID) in GitLab corresponds to Entity ID in Seqrite ZTNA.
- Single Sign-On URL in GitLab corresponds to External Address in Seqrite ZTNA.

openssl x509 -noout -fingerprint -sha1 -inform pem -in cert.pem