
Clipboard Access
Enabling Clipboard Access
To enable the clipboard access follow these steps.
- Go to Applications > Add Applications.
- Click Private Web Apps.
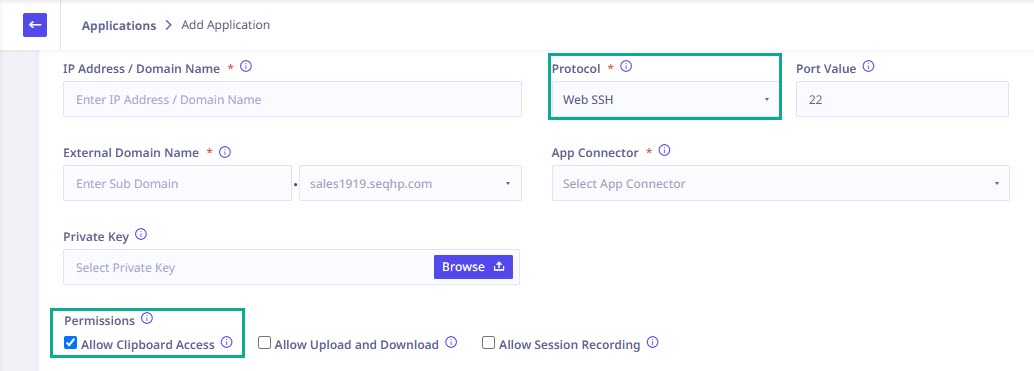
- Choose the appropriate protocol (WebSSH, WebRDP, WebTelnet, or WebVNC) from the dropdown.
-
The Permissions fields will become active. Select the ‘Allow Clipboard Access‘ option and click Add.
Note:☛
Once an administrator grants permission to a user to access the clipboard, the permission will remain active for the entire session. However, any modifications made to the permission during the same session will not take effect and the original permission will remain in effect until the session ends.
Enabling Clipboard Access for Firefox Browser
To enable clipboard access for Firefox Browser follow these steps.
- Open Firefox Browser.
-
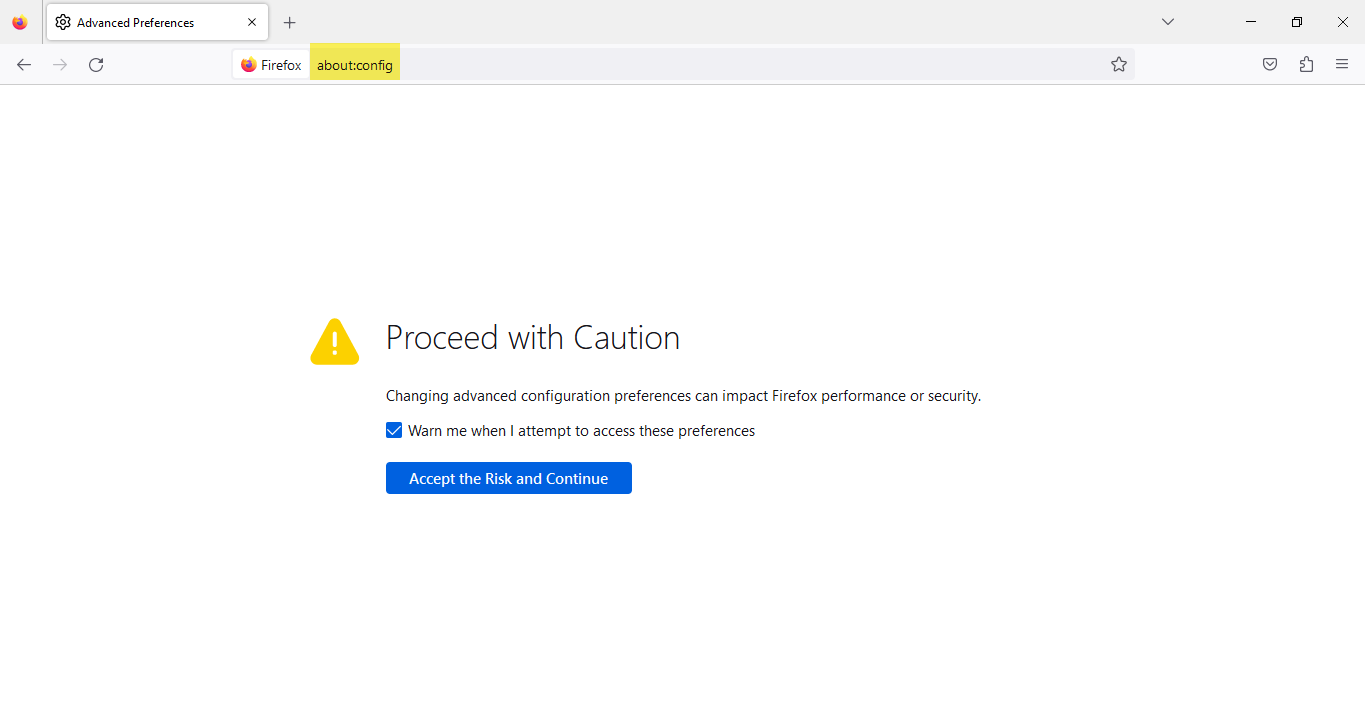
In the address bar, type ‘about:config’ and search.
-
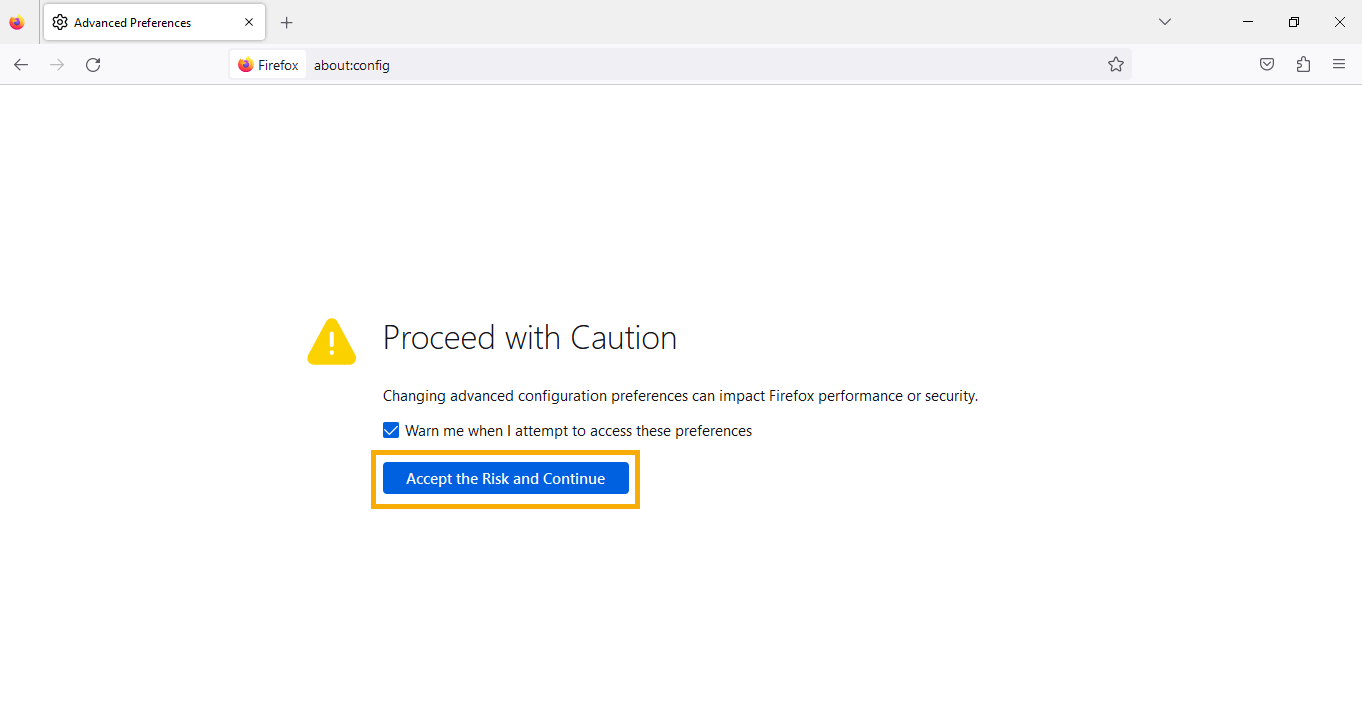
A page appears with the option ‘Accept the Risk and Continue’.
-
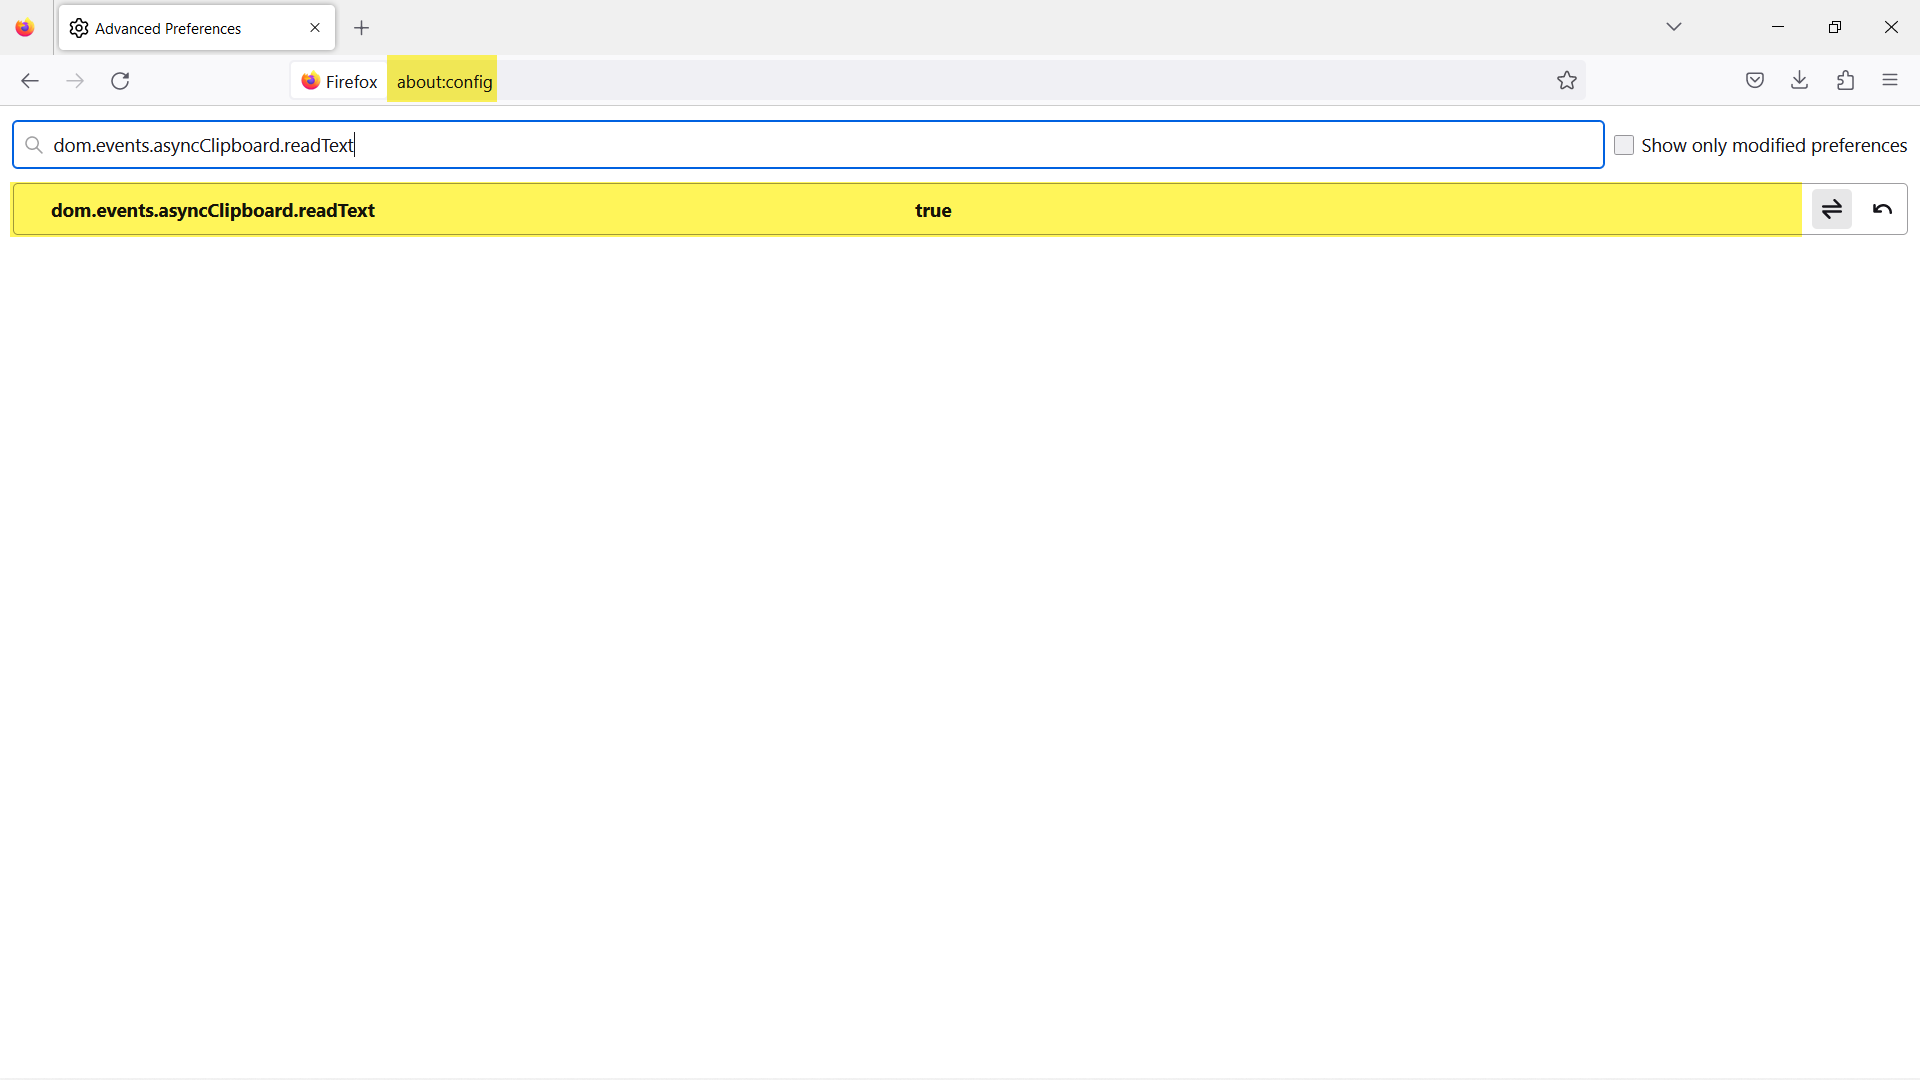
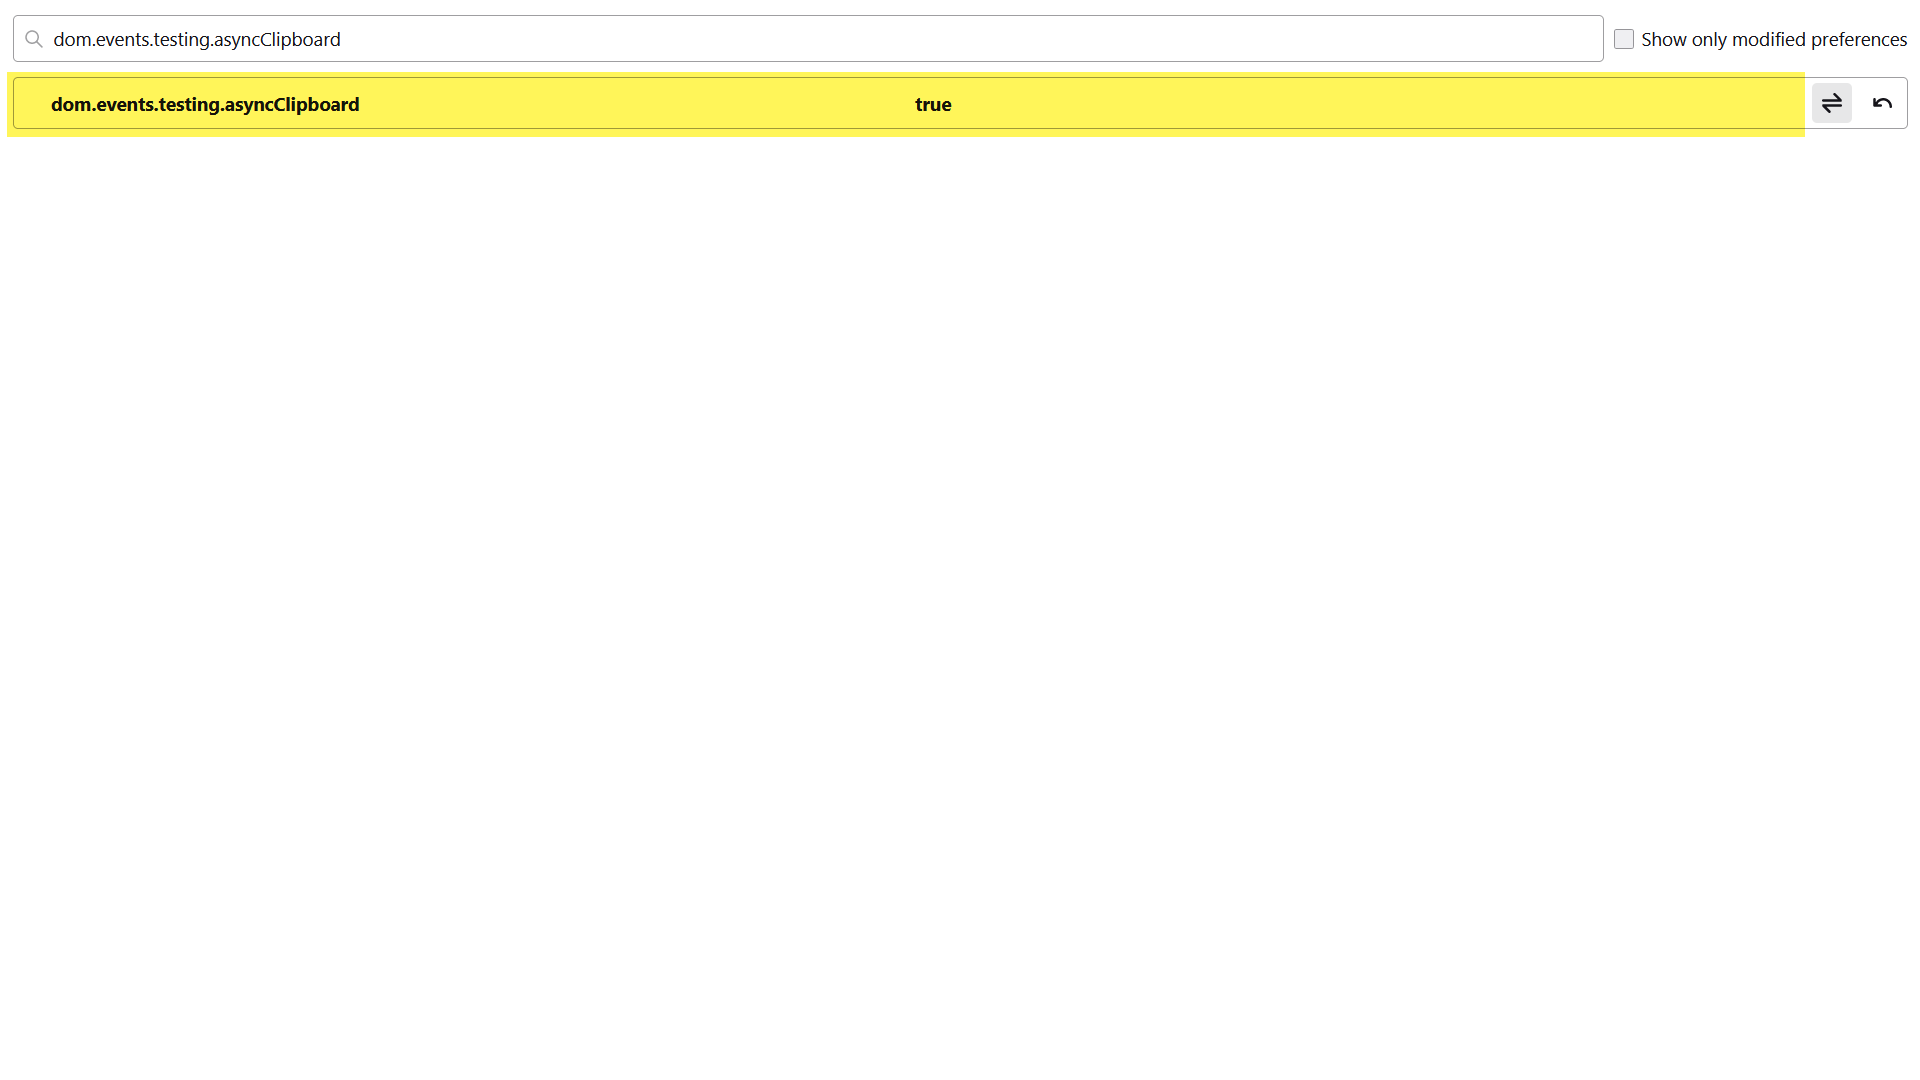
For the following two Parameters change the preferences as True.
- dom.events.asyncClipboard.readText
- dom.events.testing.asyncClipboard
Scope and Constraints
-
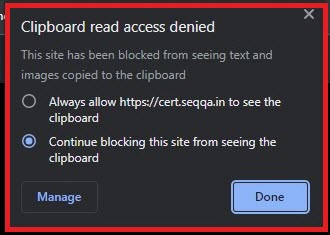
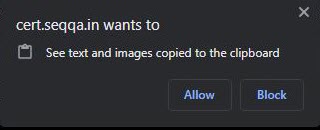
The browser may prompt you with a pop-up window asking for permission to access your clipboard when you copy or paste something using your web browser. This permission request is a one-time action, meaning that you will only need to grant permission once, and the browser will remember your choice for future instances of copying and pasting.
- Clipboard access is restricted to text and does not extend to images or files.
-
The following table shows the Protocol wise maximum number of supporting characters for copy-and-paste functionality.
Protocol Maximum number of supported characters WebSSH 262142 WebTelnet 257845 WebRDP 126754 WebVNC 252406
File Transfer
Enabling File Transfer
To enable File Transfer follow these steps.
- Go to Applications > Add Applications.
- Click Private Web Apps.
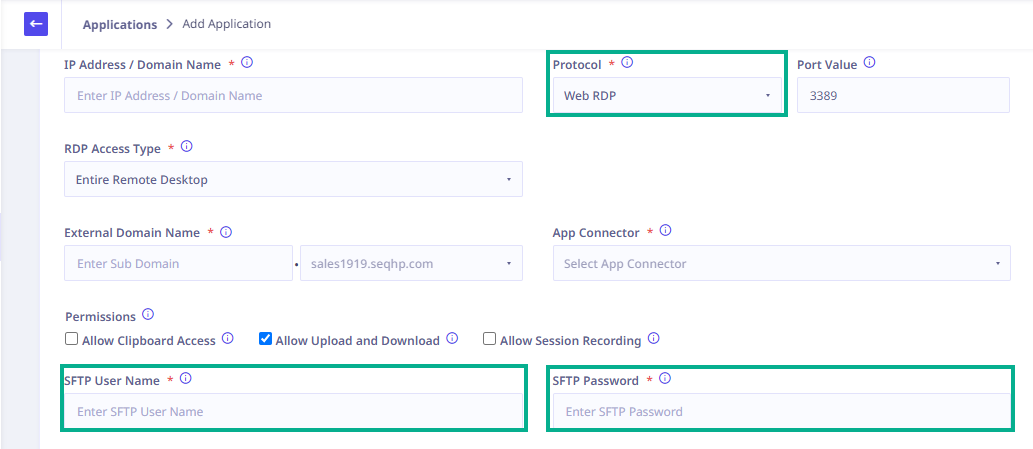
- Choose the appropriate protocol (WebSSH, WebRDP, or WebVNC) from the dropdown.
- The Permissions fields will become active. Select the ‘Allow Upload and Download‘ option.
-
Depending on the selected protocol the following fields get enabled.
1. For webSSH- Upload-Download Folder Path

2. For WebRDP
- SFTP User Name
- SFTP Password
3. For WebVNC
- SFTP User Name
- SFTP Password
- Upload-Download Folder Path
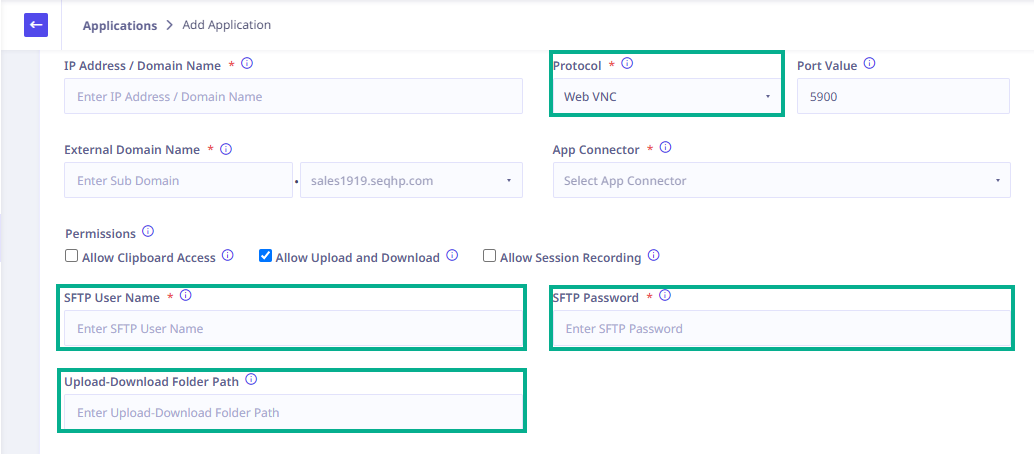
- Upload-Download Folder Path
- Fill all the required details and click Add.
Once the File Transfer permission is granted, a user can see the following options in the application.
- File Manager
- Download a File
- Upload a File

Important: ☛
For Windows
SFTP client applications are available to access the SFTP Server.For macOS
macOS includes a built-in SFTP client in the Terminal application, which can be accessed using the sftp command.For Linux
Most Linux distributions include a built-in SFTP client, which can be accessed using the sftp command in the Terminal or command-line interface.
Note:☛
Once an administrator grants permission to a user for file transfer, the permission will remain active for the entire session. However, any modifications made to the permission during the same session will not take effect and the original permission will remain in effect until the session ends.
Content Inspection
File Transfer Content Inspection in webRDP, webSSH, and webVNC Applications
To ensure secure and efficient file transfers between systems, it is vital to inspect the content being transferred.
This inspection process applies to the following protocols:
- webRDP
- webSSH
- webVNC
By implementing content inspection, you can enhance the overall security of your file transfer operations, mitigating potential risks and ensuring the safe transfer of data between systems.
Session Recording
Enabling Session Recording
To enable a session recording, follow these steps.
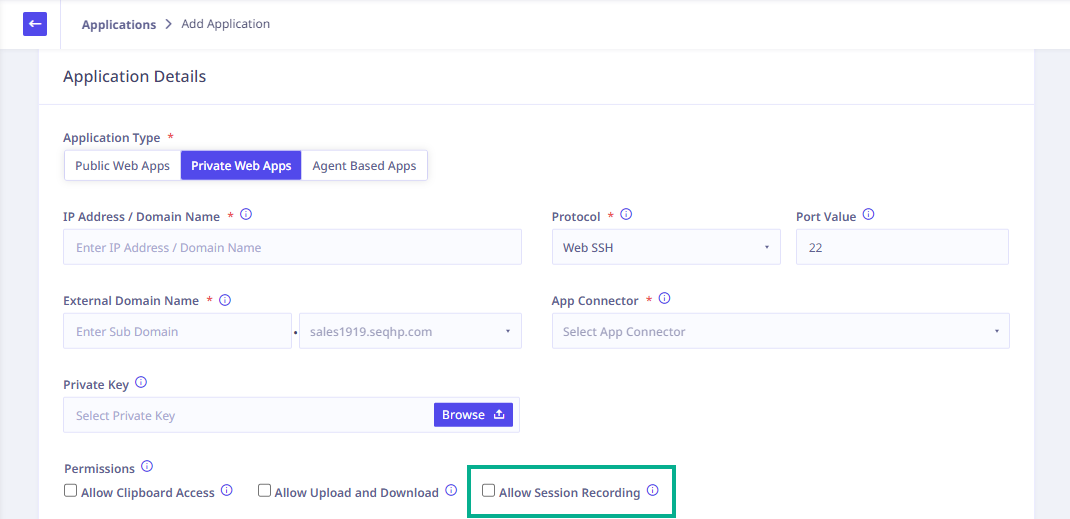
- Go to Applications > Add Applications.
- Click Private Web Apps.
- Choose the appropriate protocol (WebSSH, WebRDP, WebTelnet, or WebVNC) from the dropdown.
-
The Permissions fields will become active. Select the ‘Allow Session Recording‘ option and click Add.
Important ☛
- A session recording add-on is available to customers with an existing license.
Availability of the session recordings for
- Standard License is for 7 days.
- Enterprise License is for 30 days.
- The supported resolution for the recording is 1366×768.
- On Windows and macOS, the video of the recorded session is stored in the M4V format, while on Linux, it is stored in the MP4 format.
- The session recording feature is applicable to webRDP, WebSSH, WebTelnet, and WebVNC web-based protocols.
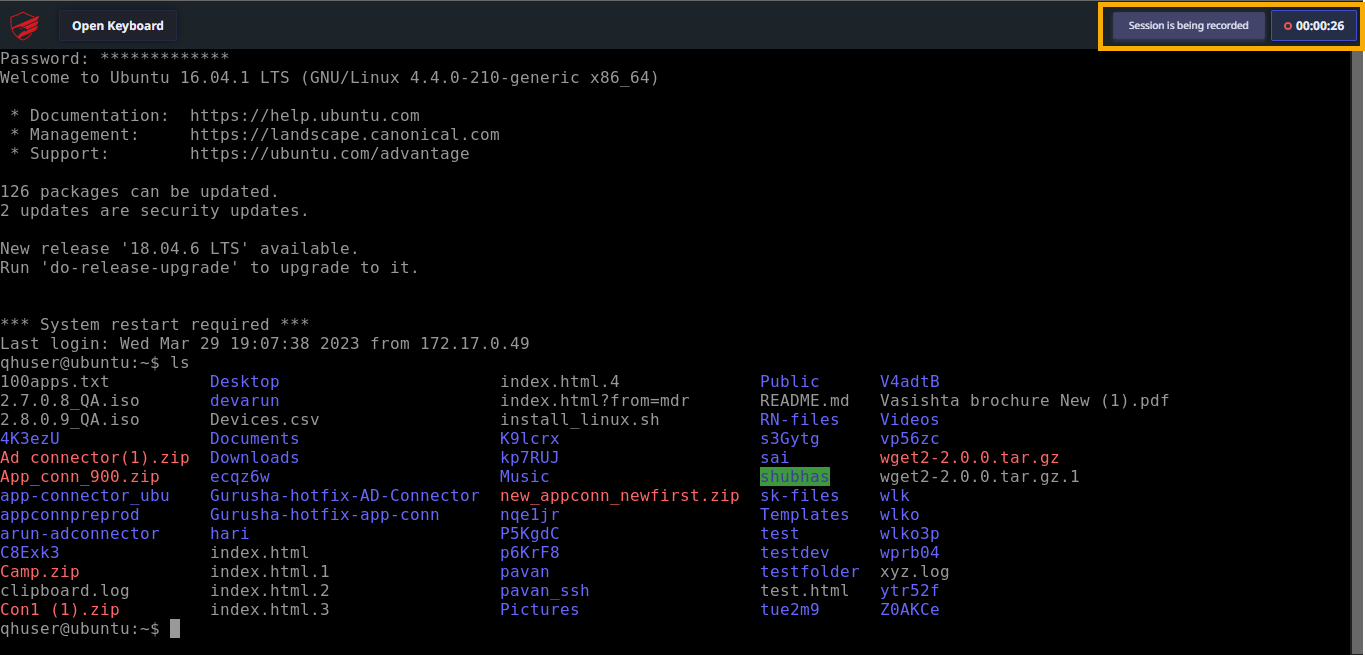
Once the administrator has enabled session recording, users will be notified that their session is being recorded along with the timer when they access the application.
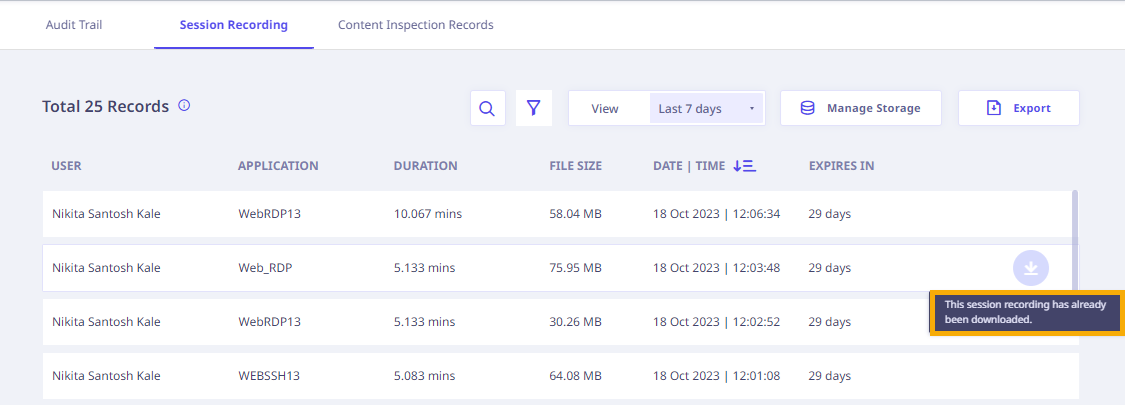
The administrator can view the session recording expiry date on the Audit Trail > Session Recording page, so that he can download it if required. The administrator can configure the local storage so that these recordings will get stored automatically stored to this location, making them unavailable for viewing or downloading from this location.
Note:☛
Once an administrator grants permission to a user to record the session, the permission will remain active for the entire session. However, any modifications made to the permission during the same session will not take effect and the original permission will remain in effect until the session ends.
Housing the Downloaded Session Recordings
Storing Session Recordings Using Customer Infrastructure
Administrators are empowered to download the session recordings with the provided utility on their local storage of the registered device. This approach provides the following benefits:
Benefits
You maintain ownership and better control over your stored session recordings. The storage can be expanded and is virtually unlimited to store the session recordings.
Accessibility
Easily access and manage recordings directly from your chosen storage location. Once downloaded, the recordings can be stored for as long as it is required for various audit and compliance purposes.
Note: ☛
The storage utility will download the session recordings in the same location where the utility has been downloaded.
Guidelines for Installing and Removing the Session Recording Storage Utility
For Windows, follow these steps to install and uninstall the Session Recording Storage Utility:
- Download the Utility: Log in to Seqrite ZTNA Admin Console. Navigate to Settings > Audit Trail. Click the Session Recording Tab. Locate and click the Manage Storage. On the Manage Storage page, opt for the Windows option and click the Download Utility.
- Unzip the File: After downloading, unzip the file. You’ll find an installer binary and a config file.
- Place the Files: Put the installer binary and config file in the folder folder where you want to download the session recordings.
- Installation: Right-click on the installer binary and select ‘Run as Administrator’ to install. A folder named ‘SHPStorageUtility’ will be created.
- Check Services: Verify that the ‘Seqrite ZTNA Storage Utility’ service is running in the Windows services list.
- Verification in Control Panel: Confirm the presence of ‘Seqrite ZTNA Storage Utility Application’ in the Control Panel under ‘Programs and Features’.
- Uninstall: To uninstall, use the Control Panel’s ‘Programs and Features’ option or run the uninstall.exe present in the SHPStorageUtility folder.
For Mac, follow these steps to install and uninstall the Session Recording Storage Utility:
- Download the Utility: Log in to Seqrite ZTNA Admin Console. Navigate to Settings > Audit Trail. Click the Session Recording Tab. Locate and click the Manage Storage. On the Manage Storage page, opt for the Mac option and click the Download Utility.
- Unzip the File: After downloading, unzip the file. You’ll find an installer binary and a config file.
- Place the Files: Put the installer binary and config file in the folder folder where you want to download the session recordings.
- Mount and Run Installation: Mount the ‘dmg’ file using the command
sudo hdiutil attach SHPSU_macos_1_0.dmg -mountpoint <mount_path>. Then, execute the installer using
sudo disk2/Seqrite ZTNA Stroage Utility Installer.app/Contents/MacOS/JavaApplicationStub. A folder named SHPStorageUtility will be created. - Check Services: Confirm that the ‘Seqrite ZTNA Storage Utility’ service is running in launchctl services.
- Uninstall: To uninstall, use the command
sudo Seqrite ZTNA Stroage Utility Uninstaller.app/Contents/MacOS/JavaApplicationStubfrom the SHPStorageUtility folder.
Note The specified path should not be the default Download folder. Installing the default folders requires full disc access approved by the Administrator.
For Linux, follow these steps to install and uninstall the Session Recording Storage Utility:
- Download the Utility: Log in to Seqrite ZTNA Admin Console. Navigate to Settings > Audit Trail. Click the Session Recording Tab. Locate and click the Manage Storage. On the Manage Storage page, opt for the Linux option and click the Download Utility.
- Unzip the File: After downloading, unzip the file. You’ll find an installer binary and a config file.
- Place the Files: Put the installer binary and config file in the folder folder where you want to download the session recordings.
- Installation: To install the utility, run these commands:
chmod +x SHPSU_unix_1.0.sh./SHPSU_unix_1_0.sh
A folder named ‘SHPStorageUtility’ will be created.
- Check Services: Confirm that the ‘Seqrite ZTNA Storage Utility’ service is running using the command
systemctl list-units --type=service | grep -i Hawk - Uninstall: To uninstall, run the uninstall present in the SHPStorageUtility folder.
Managing Storage using the Utility
To store session recordings using the utility, follow these steps:
- Navigate to Settings > Audit Trail > Session Recordings.
- The session recording list page appears. On the page locate and click Manage Storage.
- You will navigate to the Manage Storage page. On this page locate and click Download Utility to initiate the download of the cross-platform binary executable that is compatible with Windows, Linux, and macOS and register the device where the session recordings will get stored. You can find the hostname of the registered device under the section Registered Device.
Note ☛
- At a time only one device can be registered. To change the registered device, click De-Register and then download and install the utility again to register a new device.
- Ensure that the Storage Utility is run on a consistently operational server machine to avoid issues with downloading session recording videos when the system transitions from an extended sleep mode or shutdown state to an online state.
- Upon downloading the utility, proceed to click on the installer to initiate the installation process. The utility will be integrated as a system service and will be invoked based on the cron job schedule. The cron job is set to execute every 24 hours starting from the time of utility installation. For example, if the utility is installed at 10 a.m., the cron job will subsequently run at 10 a.m. every day.
Note ☛
- Click the refresh button in the upper right corner of the page to see the updated hostname of a registered device after you have installed and de-registered it.
- Once the session recording is downloaded using the Storage utility, the admin would not be able to download it from the Session recording page on the admin console.
Here are some guidelines to help you manage your storage effectively:
Low Activity Sessions
Expect 80-120MB for 10-minute recordings with minimal activity.
High Activity Sessions
For sessions with increased activity, anticipate around 150MB for the same duration.