
The following is a summarized overview of the topics covered on this page:
- Introduction
- Actions available with sites
- Adding a Sites
- Site Details
- Network Settings
- Timeout Settings
- User Authentication Timeout
- Idle Session Timeout
Introduction
This page contains a list of the locations or sites where the organizational applications and services are hosted or situated.
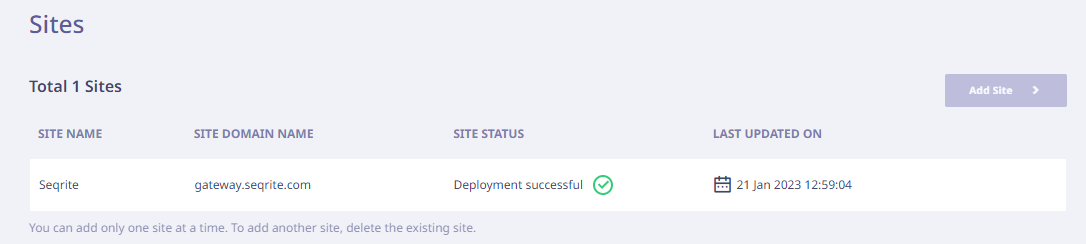
On this page, the following details are displayed.
| Column Name | Description |
|---|---|
| Site Name | Name of the site. |
| Site Status | Current status of the site. |
| Last Updated On | The date on which the site was last updated on. |
| Site Description | Description of the site, if any. |
| Add Site | To add a new site. |
Actions available with sites
When you hover over each site name, the following options are displayed on extreme right.
| Action Icon | Action Label | Description |
|---|---|---|
 |
Edit | To edit the site details. |
 |
Delete | To delete the site. |
| Side bar | To view the details of the site. |
Note:
If a site is deleted, all the related applications on Application Catalog page become inactive. To make these applications active again, edit the applications and update the domain name. This is applicable only for auto-generated certificates.
When you click any site, the following information is visible in the right pane.
| Field Name | Description |
|---|---|
| Site Name | Name of the site. |
| Description | Description of the site, if any. |
| Site Domain Name | Site domain name. |
| Site Connection Status | Current status of the site. |
| IdP | IdP connected to the site. (Local IdP and/or Prominent IdP (AD/ADFS/Azure/Google)) with details. |
| Certificate | The Certificate Name and details. |
| DNS Name | The DNS name. |
You can add the site details and verify the site domain as follows.
Adding a site
To add a new site, follow these steps.
-
Navigate to Settings > Sites in the left navigation pane.
-
Click Add Site.
-
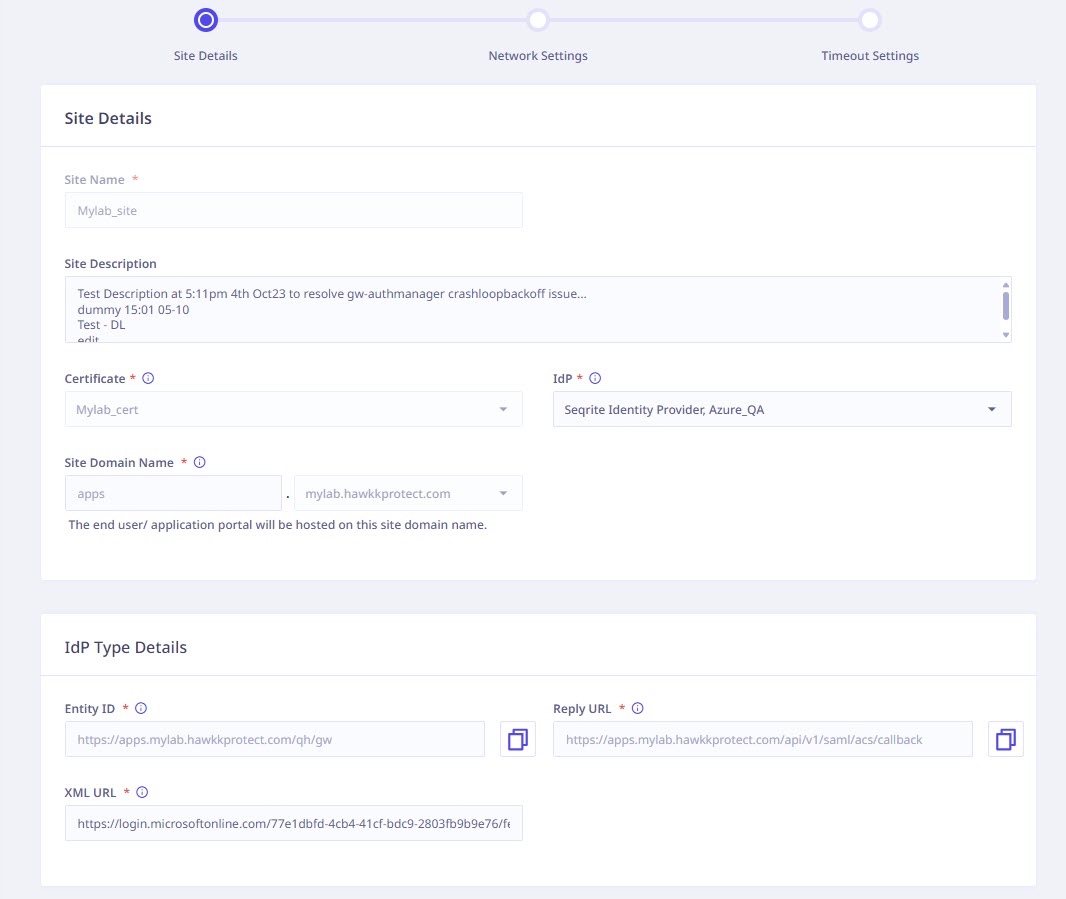
Enter the following site details.
-
Enter the site name.
-
Enter site description, if any.
-
Select the appropriate certificate from the drop-down menu.
-
Select the appropriate IdP from the drop-down menu. The administrator has the option to select the appropriate Identity Provider (IdP) from the provided drop-down menu. They can choose multiple IdPs, including local user management as well as prominent IdPs such as AD (Active Directory), ADFS (Active Directory Federation Services), Azure, and Google.
To get the IdP configuration related details, refer Identity Providers.
-
The sub domain and the base domain will be auto-populated after you select the certificate.
-
If an Identity Provider (IdP) other than Seqrite is selected, the Entity ID and Reply URL fields will be populated automatically based on the chosen IdP. The Entity ID serves to identify the entities involved in a Single Sign-On (SSO) transaction, whether they are service providers or identity providers. Conversely, the Reply URL designates the endpoint where the authentication response is directed following successful authentication.
-
Click Next. You will proceed to the second stage, which involves configuring the Network Settings.
-
Enter a subnet in the Virtual IP Pool field, such as 10.10.1.0/24. Each ZTNA Agent will receive an individual IP address from this virtual IP pool for accessing network-based applications.
-
Enter the IP address of your organization’s custom DNS server to resolve domain names to IP addresses for on-premise applications. Ensure to include it as an application and grant access through a zero-trust policy. You can add multiple Custom DNS Servers.
Note☛ Add 8.8.8.8 as a backup DNS server entry on the site page. This ensures that if the primary DNS fails, 8.8.8.8 can be utilized as an alternative.
-
Click Next. You will proceed to the third stage, which involes configuring Timeout Settings.
-
User Authentication Timeout Setting: This time frame ranges from 1 to 24 hours. This is the time duration after which the user’s session will end and they will be automatically logged out.
-
Idle Session Timeout Setting: Seqrite ZTNA administrators can configure session timeout intervals for the user portal at the tenant level, allowing flexibility for administrators to set their preferred duration. The idle session timeout functionality ensures automatic logout after the specified period of inactivity (default 30 mins) while
enabling users to re-login. The configurable duration ranges from 5 minutes to 1440 minutes (24 hours) for enhanced customization. -
After setting up these 2 timeouts click Add.
Site Details
Network Settings
Timeout Settings
-
- The Site Deployment Live Logs pop up window appears as follows.
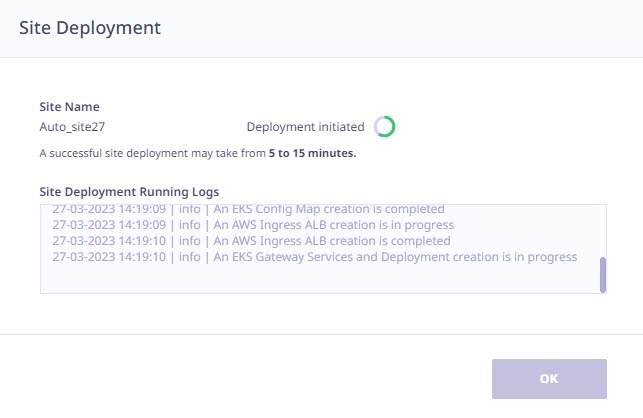
On this screen the Administrator gets to know the progress of the site deployment through the live logs.
Note: A successful site deployment may take from 5 to 15 minutes.
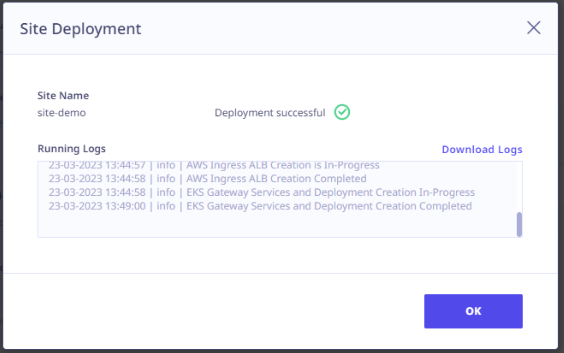
The Download Logs option becomes available after a successful site deployment, allowing the administrator to download the logs from that location. In the event of a failed site deployment, the ‘Download Logs’ option also appears, enabling the administrator to download the logs and share them with technical support for further analysis.
-
In the DNS addition section, perform the following steps.
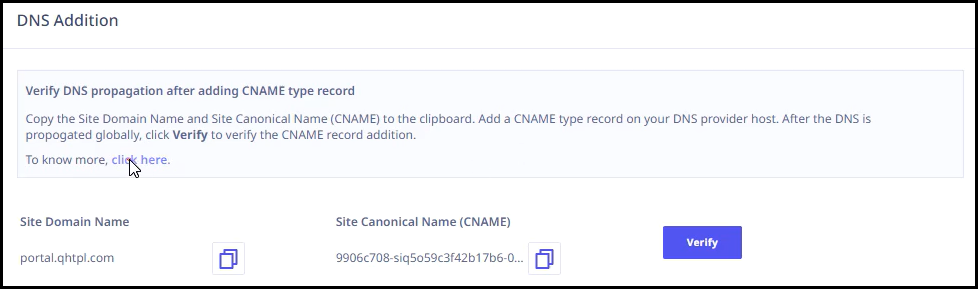
- Copy the site domain name and site canonical name (CNAME)
- Add a CNAME type record in your DNS provider host.
- After the DNS is propagated globally, click Verify.
- After this is done, click Finish. The Site Management page appears.
Upon successful site deployment, the DNS addition form dialog becomes enabled.
Note: ☛
The CNAME type record is required only in case of custom certificates and not in case of auto-generated certificates.